•
Check all electrical cables for signs of damage or ageing. Replace
the cable if it is cracked, split or otherwise damaged.
•
Check the condition of the cutting cylinder, and ensure that all
threaded connections are securely tightened.
•
If the tines are blunt, have a power tool repairer inspect the tiller.
Once per season
V
Volts
Hz
Hertz
~
Alternating current
W
Watts
/min
Revolutions or
reciprocation per minute
Double insulated
n
o
No load speed
Warning
Danger! - Rotating blades
Read operator’s manual
before use
Keep hands and feet out of
openings while machine in running
Beware of debris being ejected
from the planer thickness
Keep bystanders away.
Disconnect the power and
remove the plug from the power
supply before caring out any
maintenance. Keep the extension
cord away from the tines.
Do not expose to or
operate in the rain.
Wear eye and
ear protection
Blade continues to rotate
after the machine is
switched off. Wait until
all machine components
have completely stopped
before touching them.
Wear safety footwear when
operating this machine
Beware of servering toes
or hands. Do not put
hands or feet near a
rotating blade.
Switch off and remove
plug from mains before
adjusting, cleaning or if
the cord is entangled
or damaged.
Sound power level
Regulator compliance mark
MAINTENANCE
DESCRIPTION OF SYMBOLS
•
Lubricate the tines and shaft.
•
At the end of the season, have the tiller checked and serviced at a
power tool repairer.
WARNING!:
ENSURE THE TOOL IS SWITCHED OFF AND
DISCONNECTED FROM THE POWER SUPPLY BEFORE
PERFORMING ANY OF THE FOLLOWING TASKS.
Cleaning
CAUTION!:
ENSURE ALWAYS CLEAN THE TILLER AFTER
USE. FAILURE TO CARRY OUT PROPER CLEANING CAN
RESULT IN DAMAGE TO THE TILLER OR CAUSE IT TO
MALFUNCTION.
Whenever possible, clean the tiller straight after you have finished
using it.
•
Clean the underside of the housing around the tines, guard shield
and fender with a stiff brush. Then, using a soft cloth dampened
with a mild soap and water mixture wipe the underside. Never
splash with water!
•
To remove soil and debris from the tines and transmission, use a
stiff brush or a dampened cloth.
•
Clean the motor housing vents, and remove any remaining grass or
dirt.
•
Once cleaned, wipe the tine and shaft dry and apply a light coat of
oil.
WARNING!:
ENSURE INJURY CAN OCCUR DURING WORK
ON THE TINES. WEAR PROTECTIVE GLOVES.
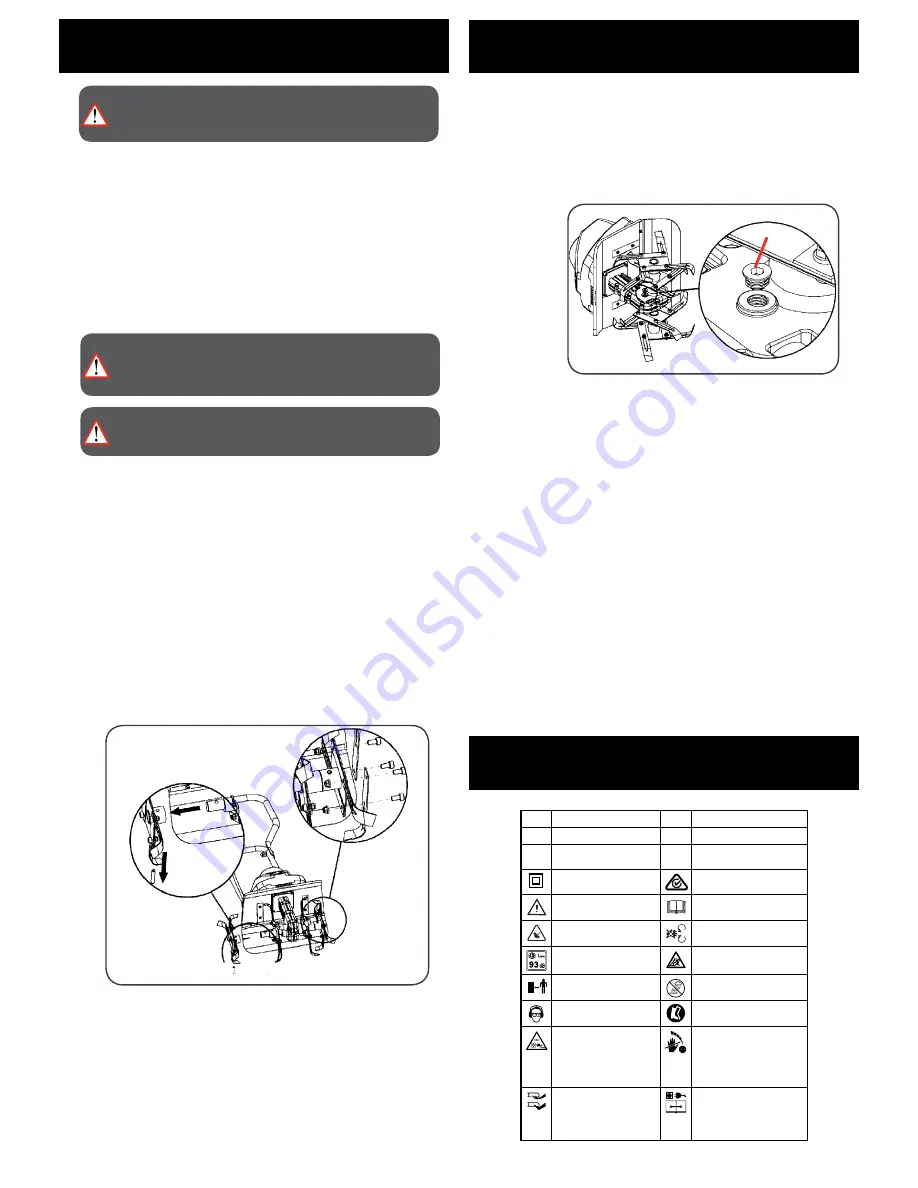
Tines Removal and Installation
Worn tines results in poor performance and overloads the motor.
Check the condition of the tines prior to use. Sharpen or replace
the tines when necessary. It is recommended that this be done by a
power tool repairer.
To remove the complete tines from the shaft:
• Remove the lock pin from the end of the shaft.
• Take off the outer tine set from shaft.
• Remove the lock pin and take off the inner tine set from tine shaft.
• Reverse above steps to install tines.
Change tines from bracket
Replacing a damaged tine:
•
Loosen the screws from one side while hold the lock nuts from other
side.
• Take off the damaged tine and replace with the new one.
Checking transmission lubrication
Drain screw plug (a) is located on the right side of transmission
housing.
•
Lay the tiller on its left side and clean the transmission to prevent
dirt and debris before remove the drain screw.
•
Using a hex key 5mm (not included) to unscrew the plug and
empty the grease from the transmission.
•
Fill up by using a grease gun with a high-quality, automotive-
grade grease until it begins to seep out around the edge of the
hole of the nozzle.
•
If necessary, disassemble tines.
•
Reinstall the drain screw plug.
a
The tiller should be stored in a dry and clean place and out of reach of
children. During extended periods of storage, ensure that the tiller is
protected against corrosion and frost.
At the end of the season, or if the tiller is not to be used for longer than
a month:
•
Clean the tiller.
•
Wipe over all metal surfaces with an oil-impregnated cloth to
protect them from corrosion, or spray a fine coat of oil onto them
from a can.
•
Fold the upper handle down, and store it in a suitable place.
NOTE:
Ozito Industries will not be responsible for any damage or
injuries caused by the repair of the tool by an unauthorised person or
by mishandling of the tool.
Storage


