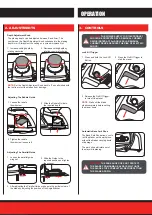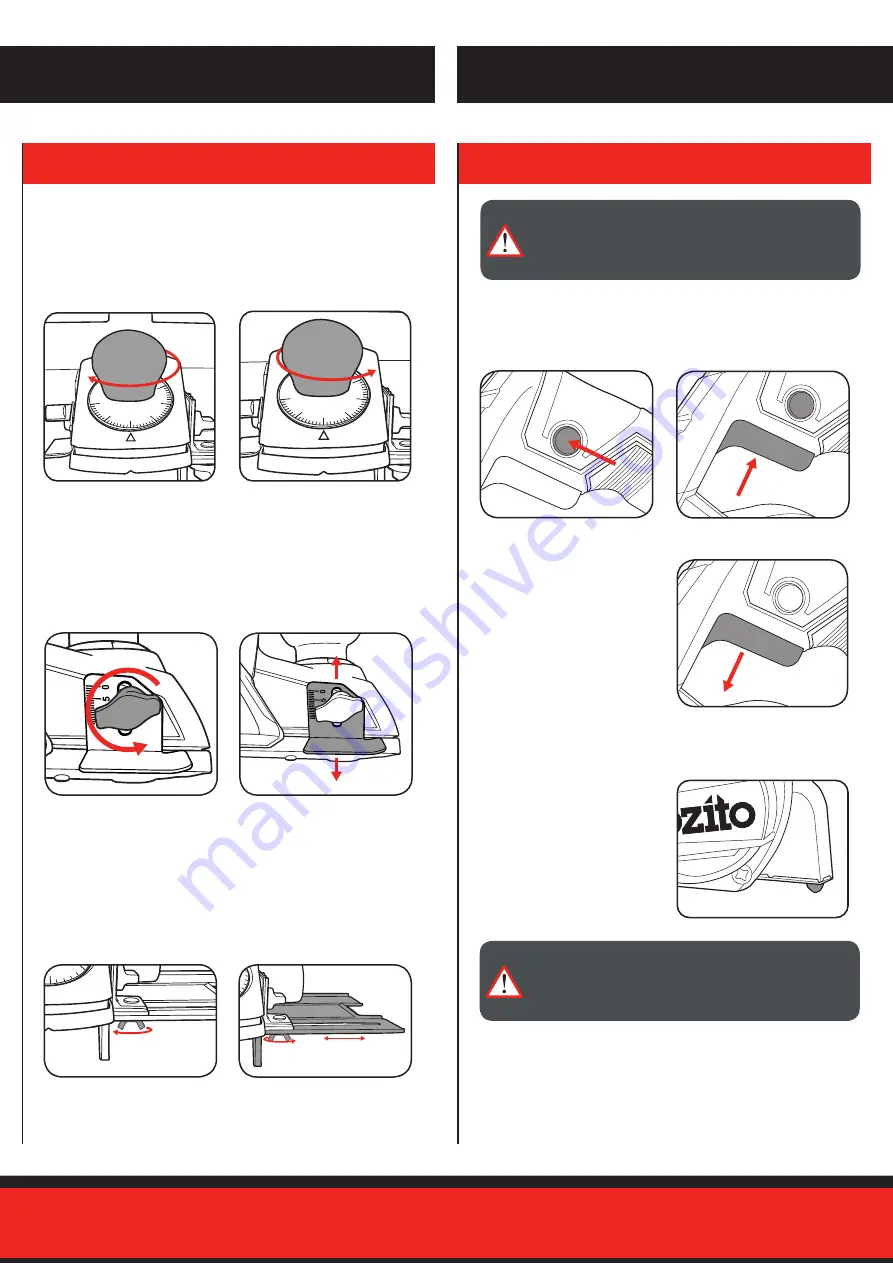
2. ADJUSTMENTS
3. CONTROLS
1 Increase cutting depth by
rotating clockwise.
1 Press and hold the Lock-Off
Button.
2 Press the On/Off Trigger to
start the planer.
3 Release the On/Off Trigger
to turn off the planer.
1 Loosen the rebate
thumbscrew.
1
2
2 Decrease cutting depth by
rotating counter-clockwise.
OPERATION
NOTE:
Wait until the blade
stops completely before setting
the planer down.
NOTE:
Set the Depth Adjustment Knob back to ‘0’ once finished with
the tool to protect the blades from damage.
The planing depth can be adjusted between 0 and 2mm. The
numbers on the Depth Adjustment Knob correspond to the planing
depth (mm). Always test the setting on a scrap workpiece first.
Adjusting The Rebate Guide
Adjusting The Parallel Guide
2 Slide the Rebate Guide to
the required depth.
3 Tighten the rebate
thumbscrew to secure it.
WARNING!
THE POWER SUPPLY FOR THIS PRODUCT
SHOULD BE PROTECTED BY A RESIDUAL CURRENT
DEVICE (RATED AT 30mA OR LESS). A RESIDUAL
CURRENT DEVICE REDUCES THE RISK OF ELECTRIC
SHOCK.
WARNING!
THE PARK SHOE DOES NOT PROTECT
THE BLADE FROM DAMAGE. ALWAYS WAIT UNTIL
THE BLADE STOPS COMPLETELY BEFORE SETTING
THE PLANER DOWN.
The Base Park Shoe allows you to
rest the planer on the workpiece
without the blades causing dents
or damage.
The park shoe will rotate out of
the way while planing.
Automatic Base Park Shoe
1
Depth Adjustment Knob
Lock-Off Trigger
1 Loosen the parallel guide
wingnut.
2 Slide the Guide to the
required position and tighten
the wingnut.
3 After adjusting the Parallel Guide, make sure the guide is clear of
the blade by adjusting the position of the Angle Bracket.
a
b


