


CARING FOR THE ENVIRONMENT
TROUBLESHOOTING
Spare parts can be ordered from the Special Orders Desk at
your local Bunnings Warehouse.
For further information, or any parts not listed here, visit
www.ozito.com.au or contact Ozito Customer Service:
Australia 1800 069 486
New Zealand 0508 069 486
E-mail: enquiries@ozito.com.au
SPARE PARTS
WARNING!
ALWAYS ENSURE THE TOOL IS SWITCHED
OFF AND THE BATTERY IS REMOVED PRIOR TO ANY
MAINTENANCE.
Problem Cause
Remedy
Sprayer is not
starting
Battery is low in charge.
Charge battery
Battery not inserted
properly.
Insert battery pack correctly.
Sprayer is not
operating at
full capacity
Nozzle blocked.
Clean nozzle. Refer to "Cleaning the Nozzle"
in the Maintenance section of this manual
Motor
stops while
spraying
Battery has no power.
Charge battery.
Note: Ozito Industries will not be responsible for any damage or injuries caused by the repair of
the garden sprayer by an unauthorised person or by mishandling of the garden sprayer. This tool is
designed for DIY use - use in commercial or industrial environments will void the warranty.
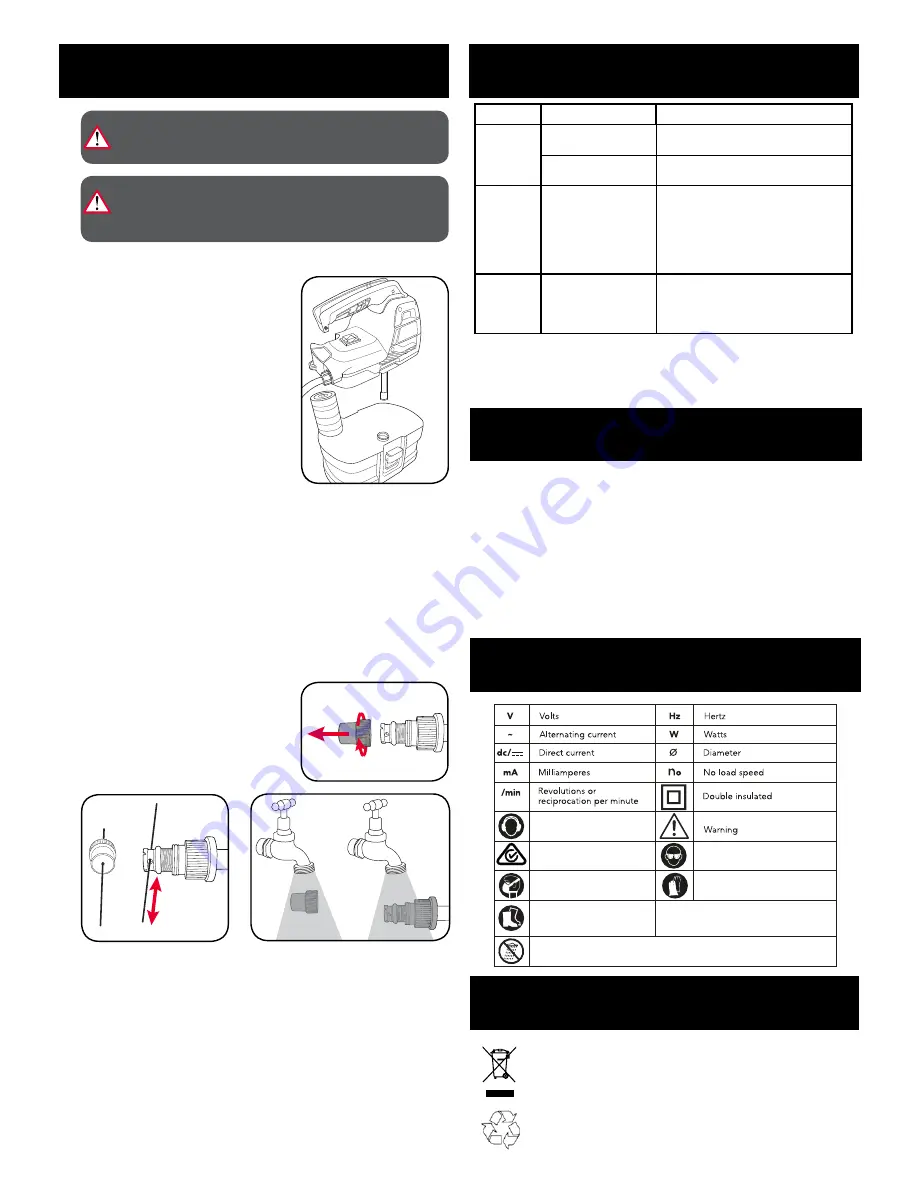
Read instruction manual
Do not use in the rain or leave the weed sprayer outdoors while raining.
Wear eye protection.
Regulator compliance mark
Wear a breathing mask
Wear protective gloves.
Wear safety footwear
DESCRIPTION OF SYMBOLS
MAINTENANCE
Power tools that are no longer usable should not be disposed of with household
waste but in an environmentally friendly way. Please recycle where facilities exist.
Check with your local council authority for recycling advice.
Recycling packaging reduces the need for landfill and raw materials. Reuse of
recycled material decreases pollution in the environment. Please recycle packaging
where facilities exist. Check with your local council authority for recycling advice.
WARNING!
ALWAYS STORE AND DISPOSE OF
CHEMICALS PROPERLY. DISPOSAL OF CONTAMINATED
RINSE WATER SHOULD BE PERFORMED ACCORDING
TO LOCAL ORDINANCES AND BYLAWS.
Cleaning the Tank
If there is any liquid left in the tank after spraying, the
tank should be drained before cleaning.
1.
Remove the motor housing from the tank by lifting
up and releasing the latches on each end of the
unit.
2. Drain the contents through the fill area.
Note:
Drain the contents back into the original
container. Do not store chemicals in the tank.
3. Fill tank approximately one-third full with clean
water and a small amount of mild household
detergent.
Note:
Never use abrasive cleaning agents or
flammable chemicals to clean the tank.
4.
Wipe the outside of the tank with a clean, dry cloth.
5.
Reattach the motor housing to the tank and ensure the latches are closed.
6.
Fit a battery pack. Spray until the tank has been emptied. Make sure to direct the spray
toward an area that will not be damaged by the spray solution.
7.
Repeat the procedure with clean water. It may be necessary to rinse the tank more
than once, then drain again as directed above.
8.
Allow the unit to completely dry before reinstalling parts and storing the unit.
Cleaning the Nozzle
If the adjustable nozzle becomes clogged, use the
following steps to clear the blockage.
1.
Unscrew the nozzle fully from the spray wand.
2. Push a small wire (not included) through the cross
holes to clear any debris. Rinse the cross holes
and nozzle with clean water.
3. Wipe the nozzle and cross holes with a clean dry cloth and reinstall the nozzle.


