OPERATION
ZLSGS-012
4. CONTROLS
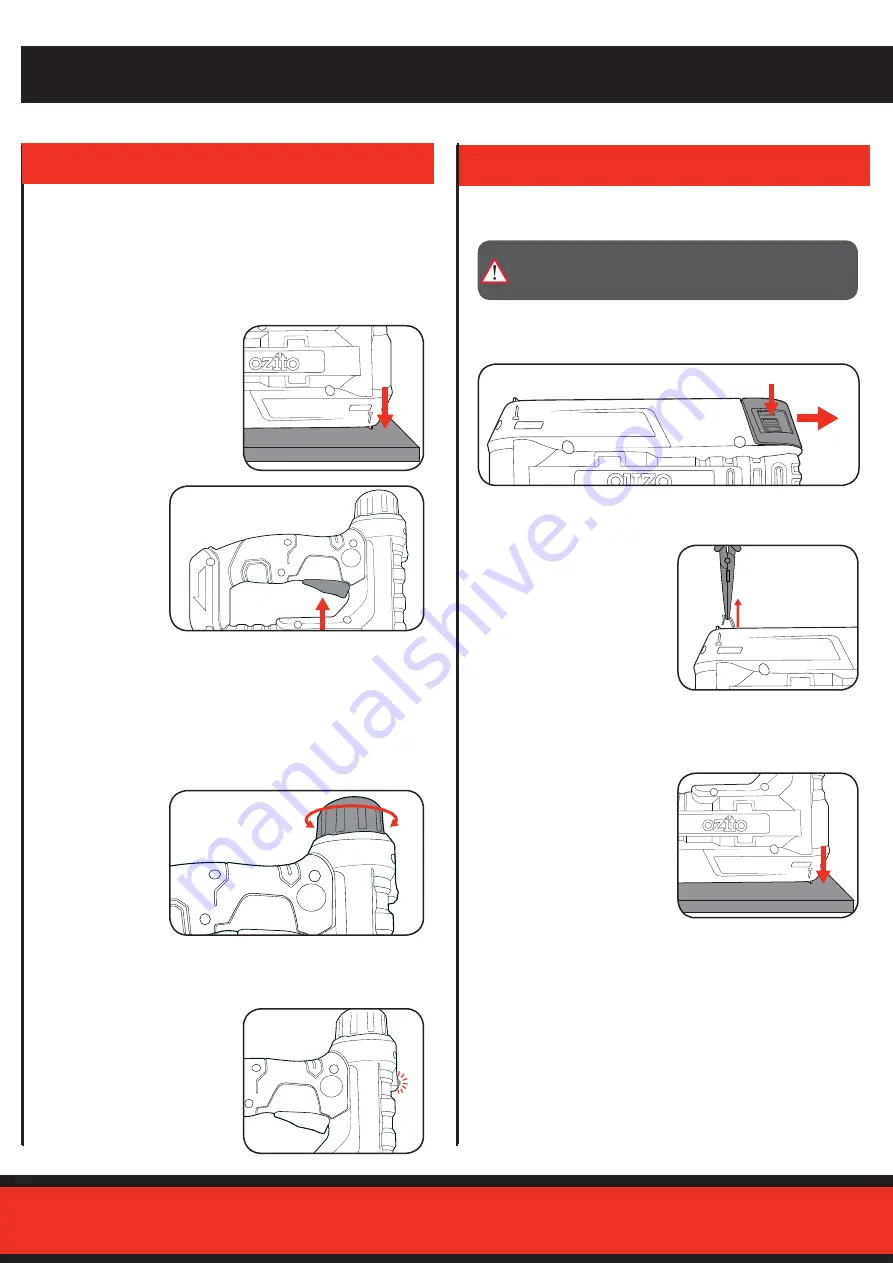
Firing A Staple or Nail
Charge Indicator Light
2 To fire the staple
nail gun, squeeze
the on/off trigger.
The Safety Striker System is a two step process where a staple or nail
will only fire when the safety striker pin is pushed against the material
to be fastened.
The charge indicator will
illuminate red if the battery is low,
indicating that the battery needs
charging.
1 Push the safety striker pin
and nosepiece down onto the
surface to be fastened.
5. TROUBLESHOOTING
Jammed Staple Nail Gun
2 Using a pair of pliers, remove
any jammed staples or nails.
3 With the magazine still open,
tap the safety striker pin
against a surface to dislodge
any loose staples.
Note:
Be careful not to bend the end of the magazine. If this occurs the
unit will be inoperable.
Ensure the battery is properly charged. It will take 4-5 charging cycles
before the battery reaches optimum charge and run time.
1 Squeeze the magazine latches on either side of the tool and pull the
magazine out of the tool.
1 To adjust the
force of the staple
nail gun, turn the
dial clockwise
to increase
the strength or
anti-clockwise to
decrease it.
Staple/Nail Firing Force Adjustment
Some jobs require a lighter touch than others; reducing the force that
staples or nails are fired at reduces the chance of damaging thinner
more delicate surfaces.
Note:
Always test the setting on a piece of scrap material after making
any adjustments.
WARNING!
ENSURE THE TOOL IS SWITCHED OFF AND
THE BATTERY IS REMOVED BEFORE PERFORMING ANY
OF THE FOLLOWING TASKS.
The battery has a short run time


