


Never store a wet and/or soiled beach dome as mildew and corrosion
will form within a few days. This condition is not covered by warranty.
Always wash down with fresh water after use and allow the beach
dome to dry completely before packing and storing.
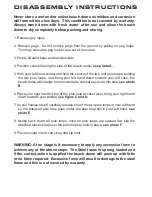
1. Release guy ropes
2. Remove pegs. Do not remove pegs from the ground by pulling on peg loops.
This may cause the peg loop to tear out of the seam.
3. Empty all sand bags and sand pockets
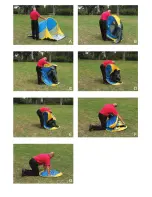
4. Position yourself along the side of the beach dome,
see photo A
.
5. With your left hand collect and hold the centre of the two roof pole loops, holding
the two pole loops, now bring your left hand down towards your left knee, the
beach dome will change from horizontal to vertical as you do this step,
see photo
B.
6. Place your right hand on top of the pole loop at chest level, bring your right hand
down towards your ankles,
see figure C and D
.
7. As you finalise step 6 carefully release one of the two pole loops in your left hand
so the released pole loop goes under the pole loop still in your left hand,
see
photo E
.
8. Neatly pack down all pole loops, once all pole loops are packed flat, slip the
attached elastic strap over the pole loops to hold in place,
see photo F
.
9. Place ensuite in tent carry bag and zip shut.
WARNING: At no stage is it necessary to apply any excessive force to
achieve any of the above steps. The Steel frame is sprung loaded and
if the correct action is applied the beach dome will pack up with little
or no force required. Excessive force will result in damage to the steel
frame and this is not covered by warranty.
DISASSEMBLY INSTRUCTIONS


