


6
Assembly Instructions cont.
Figure 10
Figure 11
Figure 12
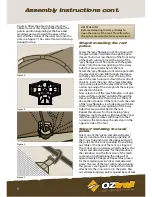
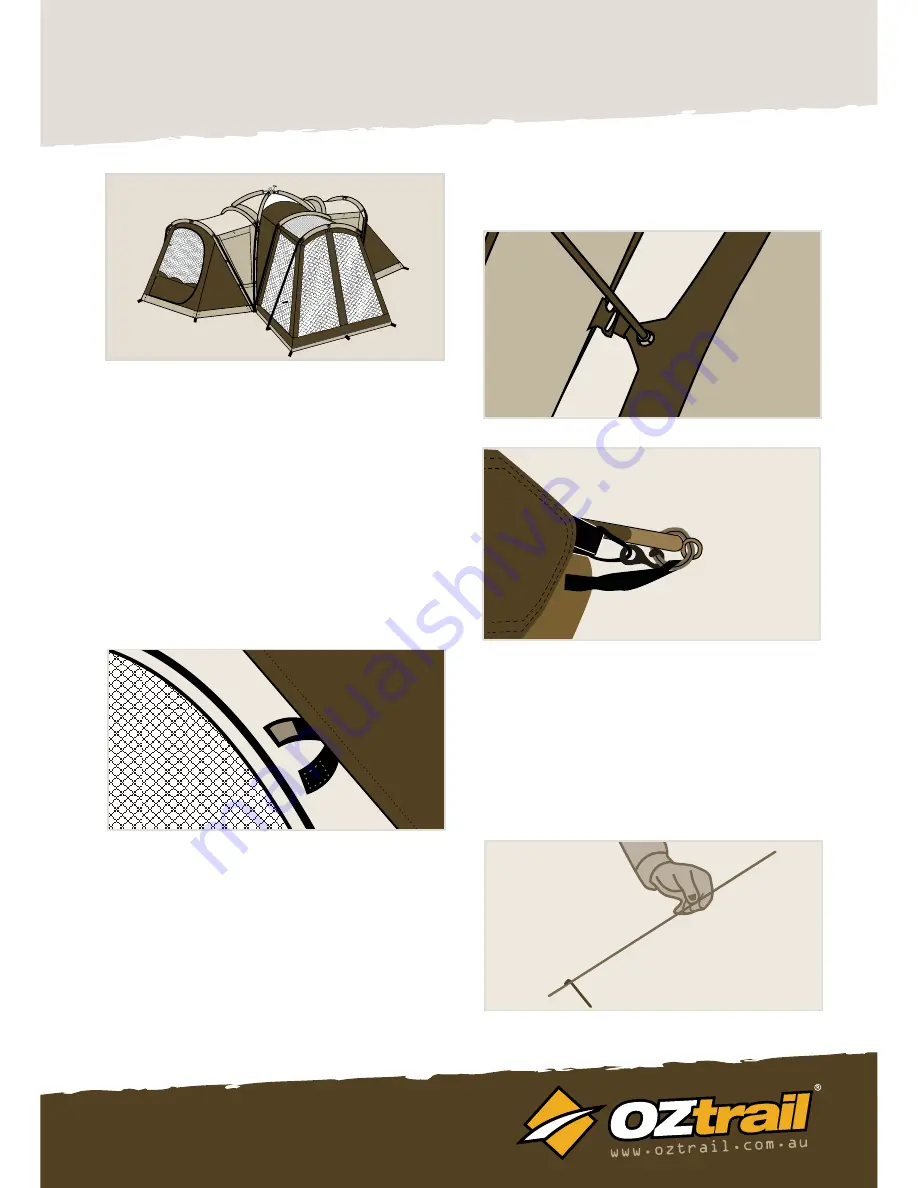
Figure 9
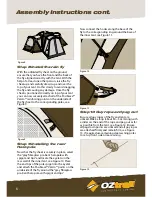
Step 8 Install the rain fly
With the unfolded fly sheet on the ground,
ensure that you have the front and the back of
the fly aligned correctly with the tent. With the
help of at least one other person, raise the fly
sheet up and carefully draw it up and over the
top of your tent. Do this slowly to avoid snagging
the fly and causing any damage. Once the fly
sheet is positioned correctly on top of your tent
you can now securely attach all of the Posibrace™
Velcro™ reinforcing points on the underside of
the fly sheet to the corresponding poles, see
Figure 9.
Step 9 Installing the rear
Halo pole
Now that the fly sheet is securely in place, select
the “grey fibreglass pre-bent halo pole with
spigot end tips” and locate the eyelets on the
rear wall of the inner tent, see Figure 10. Place
the end tips of the pole spigot into the eyelet
and attach the Posibrace™ Velcro™ points on the
underside of the fly around the “grey fibreglass
pre-bent halo pole with spigot end tips”.
Step 10 Guy rope and peg out
Ensure all guy ropes of the fly and tent are
utilised. Make a loop (about 30 – 50cm long) with
a slider on the end of the rope and peg out as far
as possible from the tent, see Figure 12. Ensure
all peg down points are utilised and all guy ropes
are attached firmly and remain firm, see Figure
13. If required use remaining steel awning poles
to set up front, side or rear awning.
Figure 8
Now connect the hooks along the base of the
fly to the corresponding ring around the base of
the inner tent, see Figure 11.


