Cordless Impact Drill
6
ing the charging procedure does not damage
the battery.
The lithium-ion battery is protected against
deep discharging. When the battery is empty,
the machine is switched off by means of a
protective circuit: The inserted tool no longer
rotates.
►
Do not continue to press the On/Off
switch after the machine has been au-
tomatically switched off.
The battery can
be damaged.
Battery charge indicator
The green LEDs on the battery charge indica-
tor show the charge level of the battery. For
safety reasons, the charge indicator is only
active when the power tool is at rest.
Press the battery indicator button to view the
state of charge. This is also possible with the
battery removed.
If no LED lights up after pressing the battery
indicator button, the battery is defective and
must be replaced.
Operation and meaning of
charger indicator elements
1. Connect the charger to the mains (without
battery) - the green indicator will light up.
2. Insert the battery into the charger socket -
the red indicator will light up, the green one
will go out.
3. When the battery is fully charged - the red
indicator will turn off, the green indicator will
start flashing.
4. Alternate flashing of green and red indica
-
tors indicates a malfunction of the charger or
b attery.
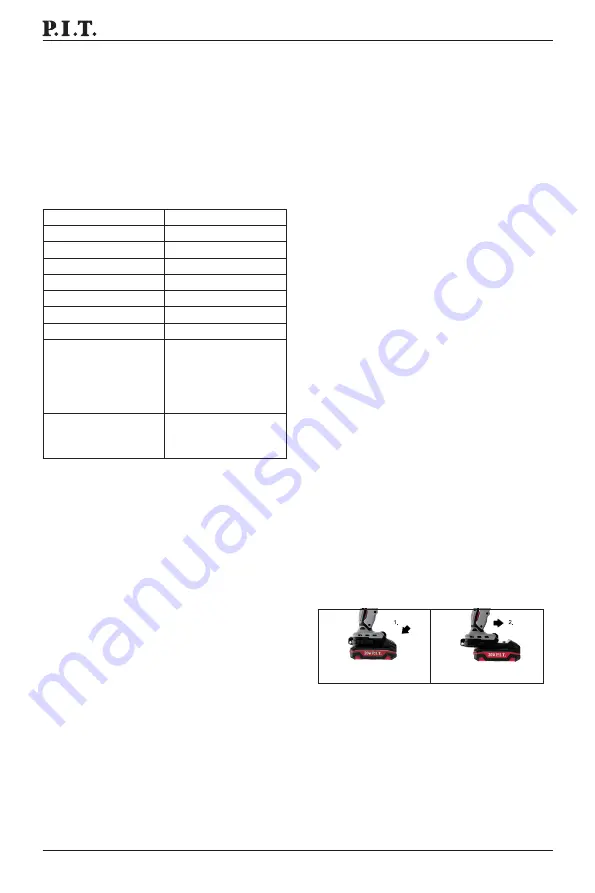
The battery is equipped with two locking lev-
els that should prevent the battery from falling
out when pushing the battery unlocking but-
ton unintentionally. As long as the battery is
inserted in the power tool, it is held in position
by means of a spring.
To remove the battery, press the unlocking
button and pull out the battery toward the
front.
Do not exert any force.
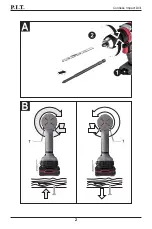
Changing the Tool (see figure A)
►
Before any work on the machine itself (e. g.
maintenance, tool change, etc.) as well as
during transport and storage, remove the
battery from the power tool. There is dan-
ger of injury when unintentionally actuating
the On/Off switch.
Open the keyless chuck by turning in rotation
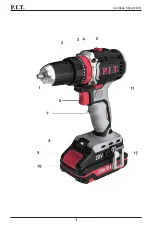
(3) Torque setting ring
(4) Operating mode switch
(5) Speed switch
(6) Switch
(7) Rotation direction switch
(8) Backlight
(9) Battery release button
(10) Battery
(11) Handle (with insulated surface)
(12) Hanging bracket
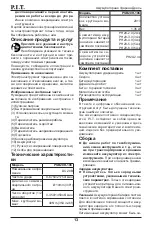
Technical data
Model
PSB20H-10C
Voltage
DC 20V
Impact Rate
0-6750/21750ipm
Chuck size
Ø10mm (3/8")
Speed
0-450/1450r/min
Max.torque
40N·m(354 in-lbf)
Torque setting
20+3
Weight
1.35kg
Compatible battery
(depends on the sales
package)
PH20-2.0 (2Аh)
PH20-3.0 (3Аh)
PH20-4.0 (4Аh)
PH20-5.0 (5Аh)
PH20-6.0 (6Аh)
Compatible charger
(availability varies by
package)
PH20-2.4A
Contents of delivery
Cordless impact drill 1 pc
Drill bit 4 pcs
Double-sided bit 1 pc
Bit holder 1 pc
Socket 3pcs
Metal bracket 1 pc
Instruction manual 1 pc
Note
Technical errors and typographical errors
may be made in the text and numerical
designations of the instructions.
S i n c e t h e p r o d u c t i s c o n s t a n t l y b e i n g
improved, P.I.T. reserves the right to make
changes to the specifications and product
specifications specified here without prior
notice.
Assembly
Battery Charging
Note:
The battery supplied is partially
charged. To ensure full capacity of the battery,
completely charge the battery in the battery
charger before using your power tool for the
first time.
The lithium ion battery can be charged at any
time without reducing its service life. Interrupt-
Summary of Contents for PROFESSIONAL PSB20H-10C
Page 1: ......
Page 2: ...Cordless Impact Drill 1...
Page 3: ...Cordless Impact Drill 2...
Page 11: ...10...
Page 12: ...11...
Page 13: ...12 P I T 2...
Page 15: ...14 1 2 3 4 A 1 2 2...
Page 16: ...15 1 2 P I T https pittools ru servises B...
Page 17: ...16 10 50 80 2 2 1 2 I 3 4 0 4...
Page 18: ...17 3 2 2 5...
Page 23: ......


