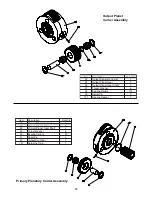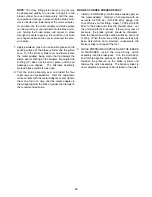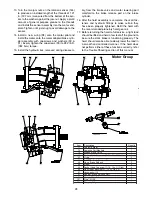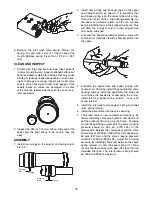
Disassembly
1. With a pin-punch, drive the spirol pins into the plan-
et gear shafts until the spirol pins clear the planetary
carrier. Slide the planet gear shafts out of the carrier
far enough to allow access to the drive the spirol
pins out of the shafts.
2. Finish removing the planet shafts, gears, bearing
rollers and thrust washers from the planet carrier.
Thoroughly clean all parts and inspect for damage
and wear.
• The bearing rollers should not exhibit any irregu-
larities. If the rollers show any sign of pitting, cor-
rosion or discoloration the rollers must be
replaced. If replacing one roller, then ALL the
rollers must be replaced.
• The gear teeth wear surface must be smooth and
free of any pitting or uneven wear. The bearing
roller contact surfaces inside the gear must be
smooth and free of pitting, scoring or discol-
oration. If the gear shows any abnormal signs, the
gear must be replaced.
• The planet gear shafts must be smooth and free
of any pitting, uneven wear or discoloration. If the
shafts show any abnormal signs, the shaft must
be replaced.
Assembly
1. Place the planetary carrier on a clean work surface
with the splined collar facing up.
2. Apply a liberal coat of oil–soluble grease, such as
Lubriplate 105, to a thrust washer and center the
washer on one side of a planet gear. Place the plan-
et gear on a clean surface with the thrust washer
down. Apply a liberal coat of oil-soluble grease in the
bore of the gear then stack a row of bearing rollers
into the planet gear, using the grease to hold the
rollers in position. There are 19 rollers in each pri-
mary planet gear and two rows of 19 rollers separat-
ed by a spacer ring in the output planet gears. Place
a second thrust washer on top of the planet gear.
Carefully slide the planet gear with, bearing rollers
and thrust washers into the carrier. Install the planet
gear shaft taking care to align the roll-pin hole with
the roll-pin hole in the carrier.
3. Install NEW spirol pins into the carrier and planet
gear shafts. Drive the spirol pin, far enough into the
planetary carrier to equally engage the shaft and the
planet carrier. The outer end of the spirol pin should
be recessed approximately 1/32 in. (1 mm) in the pri-
mary planetary carrier and recessed approximately
1/16 in. (2 mm) in the output planetary carrier. With
a center punch, deform (stake) the outer edge of the
planetary carrier next to the spirol pin to prevent the
pin from backing out.
4. Repeat this assembly procedure for the remaining
planet gears.
PLANETARY CARRIER SERVICE
Do not reuse spirol pins. Their resistance to move-
ment is reduced with reuse. Reusing spirol pins may
result in a pin moving out of the planet gear shaft and
carrier which may lead to misaligned gears, foreign
object damage to the gear train and catastrophic
gear train failure. Gear train failure may result in loss
of load control, property damage, injury or death.
The planet gear shafts will pass easily through the
planet gear bearing rollers and thrust washers with
only a slight amount of drag. If there is any binding,
STOP and realign the rollers and thrust washers. DO
NOT drive the planet gear shafts into the carrier with
a hammer as damage to the thrust washers and
bearing rollers may result. Damaged gear train com-
ponents may cause a catastrophic gear train failure
that may lead to loss of load control, property dam-
age, injury or death.
(See the following page for illustrations)
21


