....
•
rl
..
-
---------- MAINTENANCE
-
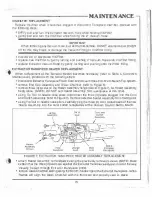
V!SLFILTER REPLACEMENT
Repl.;.-ice Vi
.s
1
F
1
l
t
e
r
whe-n l oecomes c
l
og
�
e
d
o
r
dis
cc
l
o
r:e
d
.
To
rep
l
a
c
e Vist
Fl
l
l
e
l
,
proceed with
the ro11ov,1 ng '!"
t
e
o
s
;
•
g.1:mlly
p
u
l
l and urn t
e:
E.,:m1i:tor
Var:uum
Hose
whtli:!' holding
V
i
s
1
Fi
l
t
e
--
•
gently pull and
turn
t
e
V{siFi
t
e
r
Y.hlte nc
l
d1
n
g
lhe
r
Vacuum Hose.
1 �PORTANT
Whien removing any Va
cuu
"Tl
Hos
e
,
pull ar:d tum X) rel"!'ICNe. DO NOT attempt to pull sualgtii
off far t
h
i
s
may break or damagt.i tne Vacu1Jm Filting or Vis1Filter htt
1
n
g,
..
cfscard c
,
l
d
er dlscolorec VfslFl ter.
•
rnpface
re,.v
Vl�fFilter
t,,_,•
ge
n
l
l
y
,urning and pushing
2"'
Vacuum Ha:se or,1c:i Vis1Filler
'
t
tl
ng
.
"
niplece E.x
t
raac
r
Vacuum
Hose
by gen
ly
turning;
and pus"ling o
n
t
o
V
is
i
Fi
ll
e
r Fit
t
i
n
g
.
EXTRACTOR HANDPIE:CE HEATER REPLACE 1ENT
When replacement o� lhe Extractor Heater becomes nece-ssar1 (rarer to Tab
l
e .:., Cone
ct
i
\;v
a n
t
e
n.a
n
c.e)
,
proceed with the
f
i1Jl
l
o-
.
'll
n
g
si�ps·
•
cl
scon
n
ea
Extractor
Handpiece Pov.e
r
Cord and Vacu\lm
ose
from M1ero
Bench
Top System.
•
remove
End Cap Assemb
l
y
a.rd
Glass Ch
a
m
b.e
r
(ref-er ta Figure 6).
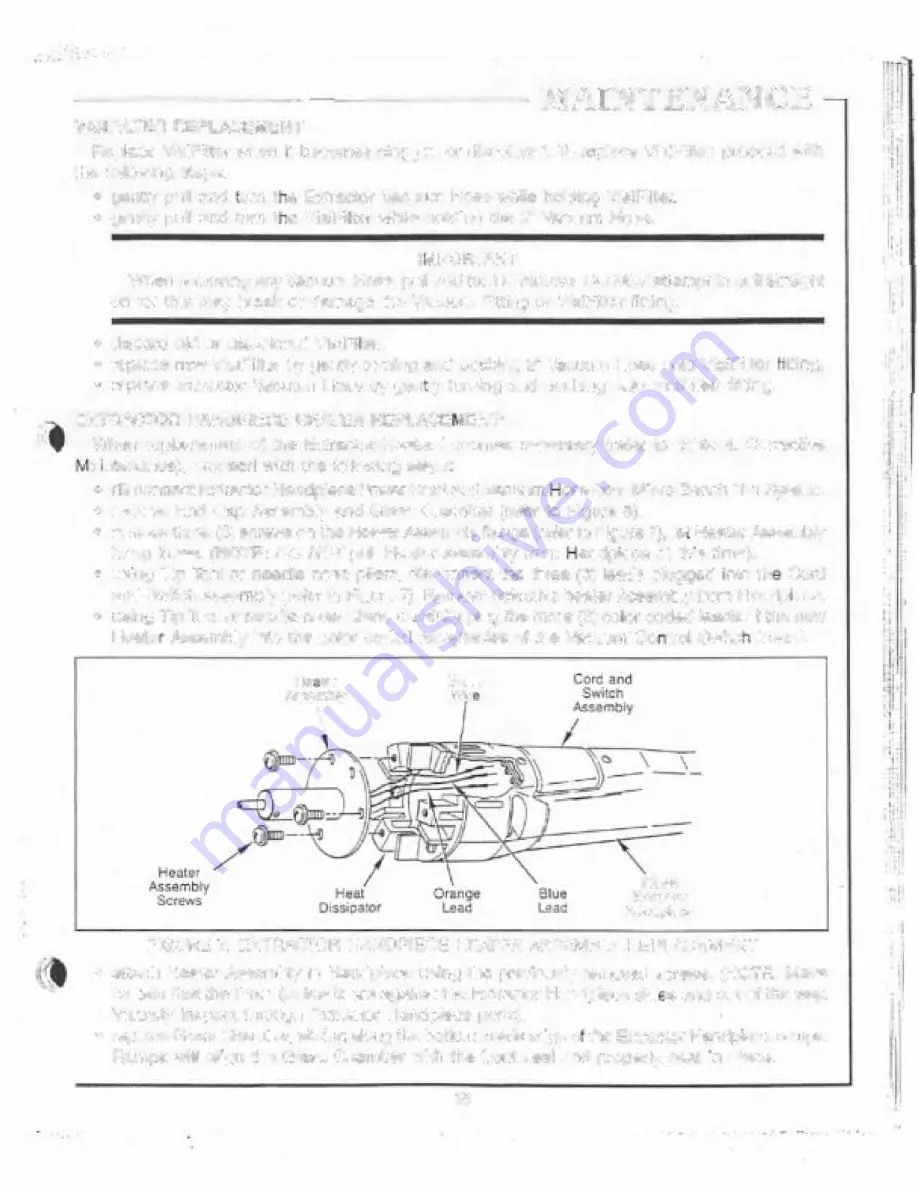
• ,�mcve three (3) screws on the
H
e
al.
er
Assembly flange (re1er tc
Fi
g
u
r
� 7), le· Heater Assembly
rang loose, (NOTE: DO Nar pull Heater Asse
mb
l
y from andp,ece at 1h1s tirne).
•
using Tip
Tool or needle nose pliers.
d
i
s
co
n
ne
c
t th� lhree (3) leads plugged nto th
Corn
a
n
d
Switch Assembly
(
ref
e
r to Figure 7). Remo..,e defective hea,e
r
Assembly from Handp ece.
•
using Tip
Tool or
11eedle nose
pilers.
caretully
plug
lhc three
(3)
co
or
coded leads or lhe new
Heare Assemb
l
y
1
nco the color coded receptacles
or
the Vacuum Ca t
ro
l
Sw,lc board.
1-1� l.c:'l
Asumcly
\
Gri!en
"Nit
SX
·
5S
Extractor
:-li!n1p-
!!C!!I
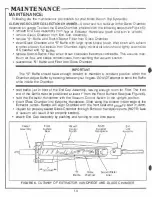
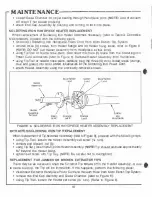
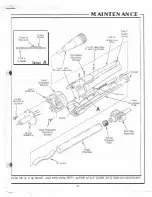
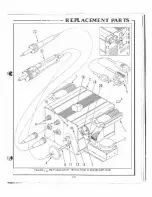
FIGURE 7. EXTRACTOR
H
AND
P
I
E
CE .-rEATER ASSEMBLY REPLACEMENT
•
a.Ila.en
Healer
Ass
e
mb
l
)
' to Handp,ece using the prev1ou.sly rnmoved
s
crews
,
(NOTIE: Make
certain that. the three (3)
l
e
a
ds
are against the Extractor Handnlece sid sand out of the way .
�suall:,i i
n
s
pe
ct
through
E
x
t
rac:
c
r
Har,dpfeee ports)
,
•
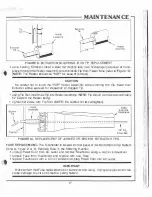
replace
Glass Chamoer, shding aiong tne tottom
i
n
slde
edge
o lhe Extractor
H
an
d
p
1
ec
e
ramps.
Ramos will align the Giass Chamber wilh the front seal and properly s.eat m place.
15
I I


