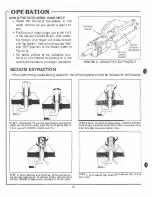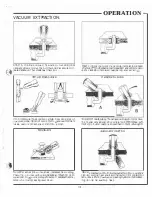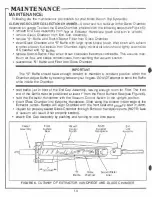
OPERATION
-
-
--
-
---
--
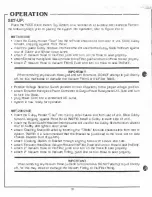
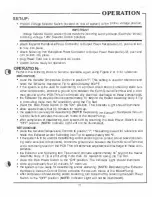
SET-UP:
P
l
ac
e
t
he PACE Micro Be
n
c
n
Tep System on
ai
•,•.-arkbench er
s
u
i
t
a
b
le i,.ror< surface.
Pe
r
'o
r
m
ho folLo..-.lng steps prior to placing the -s-ys..em
I
nto o
p
erauon
;
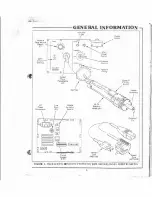
refer 10 Figure 2 or 3:
M
BT
-
100
/1
00
E
•
in
5
e
r
l
11'11= Cubby
Hol
c:e
r
"T-baf
into
he top
side
c
h
as
s
i
s
s
l
ot
rrom tear
of
u
n
i
t
S
li
d
o Cuooy
rorward, siopping a
ga
f
n
s
[
Front Panel.
11
Imm
he
plastic
Cu
boy Holdown Into �he same slot
used
tor
the
Cubby. Stlde- Holaown against
r
ea
r
of
Cubby and
t
f
ghcen down screw.
•
at�ach
2·
Vacuum Hose co V1sjF1lter, push and
turn
on
he
Hose ta seat properly,
•
ar..ach E
xt
r
ac1o
r
H:andpf�ce
Vac;t.um
Yose to
V
t
s1F
1
l
tijr
,
push and turn
on
Hose
to
seat
p
r
op
e
r
l
�
.
1111
ar.:acn 2
'"
vacuum Hose to Vacuum FiWng, push and t
u
r
1
on Hose ro seru properly.
IMPORTANT
•
When
re
rn
ov
l
n
g any Vacuum Hose, pull and t
r
,
to iemcve, .DO 1'1JOT attempl to
p
u
ll d
i
r
e
c
t y
oH, rcr t
h
,
s
may break or damage the Vacuum Flttlng o
r
Vis1F
f
l
t
e
r
rilUng.
•
Position Vo
l
t
a
ge Sele
ct
o
r
Sw
l
tc
h
(
j
o
ca
t
e
d
on rear of system} lo thB pro
p
e
r
vc
l
t
a
g
e
posl
1
0111
.
• ariach
E
xt.
rec
to
r
Handplece Po�:!" Connector to O
ut
p
u
t
Power Receptacle (J1)i, pl.sh and turn
10
l
o
c
k
i
nt
o place.
• prug Po•.ver
C
o
r
d
into a convenient AC out
l
e
t.
• S'JS�am 1s now re a.dy for ope ration
.
MaT-200l20CIE
•
insert
the Cubby
Helder
�bar"
into
t
s
top side ch
ass
i
s
s
l
o
t
from
ear of unit. Shes Cubby
fcvward, stopping �gainst Front
Pan
e
l
.
(NOTE!
Install a Cubby to each
side
ol
u
,
t
)
,
•
insert the
plashc
Cubby Holdovm ,ntc the same s
lo
t
u.sed
far :he Cubby. Slide H
o
f
d
c·.
·
m
agau,st
rear of Cubby and
t
i
g
ht
e
n down s
c
r
e
w
.
111
attach Cleaning Sta
t
l
o
n
Bracket
by
l
n
s
§
rl:
l
n
g the "T-8olts" Into side chass
i
s slots from rfar o
S'.-"S':em. (NOTE.:
I
t
,
s recommended
t
ha
t
t
h
e Bracket be
p
o
si
1
ioned in the ewer s
l
o
l
on side
chassis tow-arcs front a, system},
• attach C
l
e
a
n
ing S
t
a
u
on tc Bracket
t
hr
o
u
g
h
aligning hole.s wm, scre,,,vs and uts.
•
attach Ext
r
acto
r
l-landpiece Vacuum Hose to VisiFlller, push and
�
urn
011
H
os
e
o seat p
r
o
p
e
rty
.
• attach 2" vacuum Hoss 10 Vis1Flllet, p
us
h
and
t
u
rn on U1e Hose lo seat proper1y.
•
attach 2" Vacuum Hose to
Vacuum
Frttlng,
push and turn an Hose
to
seat pro
p
er
l
y
.
IMPORTANT
VV e rernO'-'lng any V
ac
u
u
m Hose,
p
u
ll
and turn o remove. 00
N
O
T
attempt to pull
d
i
r
e
ct
l
y
of!. for
t
h
i
s may break or damage u,e vacuum F
i
ttin
g or Vis1
F
il
:er
fit
U
ng
.
-
�
0


