background image

SX-80

SX-80

SX-80

SX-80

SX-80

4

Handpiece Setup

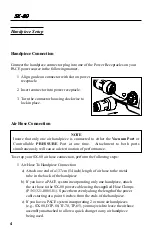
Handpiece Connection

Connect the handpiece connector plug into one of the Power Receptacles on your
PACE power source in the following manner.

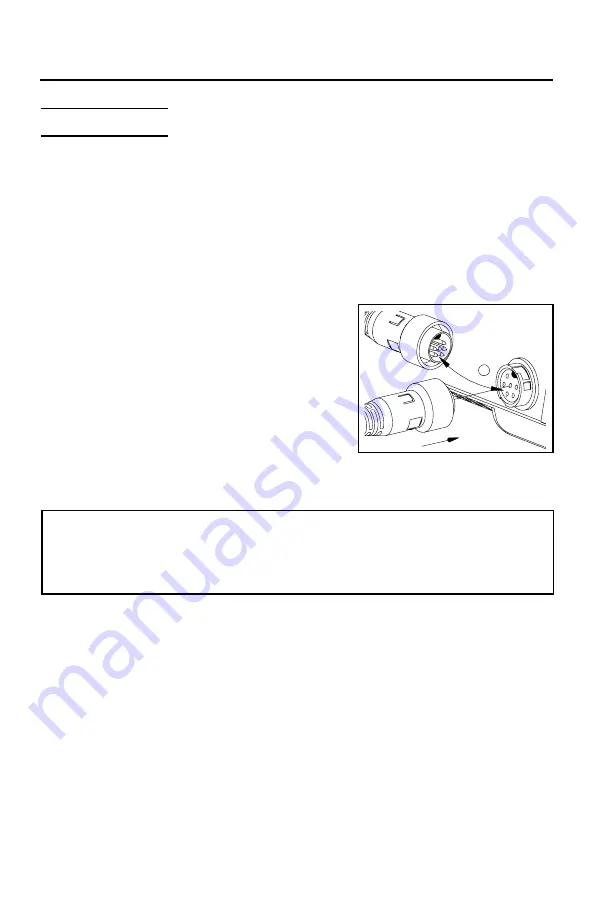
1. Align guide on connector with slot on power

receptacle.

2. Insert connector into power receptacle.

3. Turn the connector housing clockwise to

lock in place.

Air Hose Connection

NOTE

Insure that only one air handpiece is connected to either the 

Vacuum Port 

or

Controllable 

PRESSURE

 Port at one time.  Attachment to both ports

simultaneously will cause a deterioration of performance.

To set up your SX-80 air hose connection, perform the following steps:

1. Air Hose To Handpiece Connection

a) Attach one end of a 137cm (54 inch) length of air hose to the metal

tube in the back of the handpiece.

b) If you have a PACE system incorporating only one handpiece, attach

the air hose to the SX-80 power cable using the supplied Hose Clamps
(P/N 1321-0085-01).  Space them evenly along the length of the power
cable starting at a point 6 inches from the ends of the handpiece.

c) If you have a PACE system incorporating 2 or more air handpieces

(e.g., SX-80, DTP-80, TJ-70, TP-65), you may wish to leave the air hose
assembly unattached to allow a quick change to any air handpiece
being used.

Summary of Contents for Sodr-X-Tractor SX-80

Page 1: ...actor Handpiece Operation MaintenanceInstructions Operation MaintenanceInstructions Operation MaintenanceInstructions Operation MaintenanceInstructions Operation MaintenanceInstructions SX 80 SX 80 SX...

Page 2: ...C FLO D SODR MINI WAVE PACE SENSATEMP SNAP VAC SODRTEK SODR X TRACTOR THERMOFLO THERMOJET THERMOTWEEZ TOOLNET VISIFILTER 2000 PACE Incorporated Laurel MD All rights reserved Printed in the U S A For a...

Page 3: ...ilure to do so may cause burns to the operator equipment or work surfaces and may be a potential ignition source if combustible materials are nearby Always use this handpiece in a well ventilated area...

Page 4: ...will cause a deterioration of performance To set up your SX 80 air hose connection perform the following steps 1 Air Hose To Handpiece Connection a Attach one end of a 137cm 54 inch length of air hose...

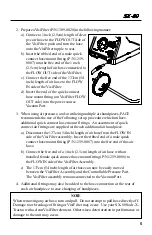
Page 5: ...air fittings are supplied with each additional air handpiece a Disconnect the 137cm 54 inch length of air hose from the FLOW IN side of the VisiFilter assembly Insert the ribbed end of a male quick co...

Page 6: ...e basic types 1 Endura Desoldering Tips These tips are tinnable and provide enhanced thermal performance for thru hole desoldering on high mass boards 2 EnduraPik Tips ProvidessaferemovalofTQFP ThinQu...

Page 7: ...safest removal some components on extra heavy assemblies may require preheating or auxiliary heating Tip Cleaning During heavy continuous desoldering on boards with flux residues or other contaminati...

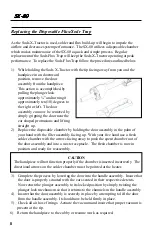
Page 8: ...ar the ear shaped protrusions and lifting straight up 2 Replace the disposable chamber by holding the door assembly in the palm of your hand with the filter assembly facing up With your free hand use...

Page 9: ...SX 80 SX 80 SX 80 SX 80 SX 80 9 Heater Replacement NOTE Confirm that the heater assembly of your handpiece is defective by referring to the Corrective Maintenance section of the manual...

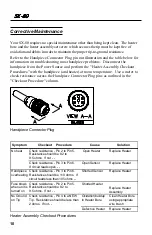
Page 10: ...p Resistance should be less than 2 ohms If not Oxidation buildup in Heater Bore Clean Heater Bore using appropriate wire brush Defective Heater Replace Heater Handpiece Connector Plug Corrective Maint...

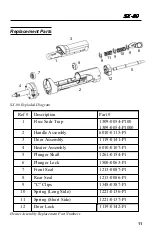
Page 11: ...t 1 Flux Sodr Trap 1309 0054 P100 1309 0054 P1000 2 Handle Assembly 6010 0115 P1 3 Door Assembly 1119 0141 P1 4 Heater Assembly 6010 0107 P1 5 Plunger Shaft 1261 0154 P1 6 Plunger Lock 1500 0063 P1 7...

Reviews: