background image

All rights reserved Pacific Communications 2001 

45 


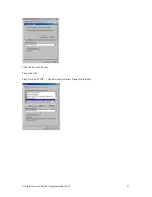
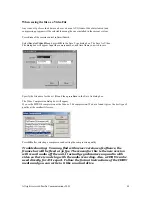
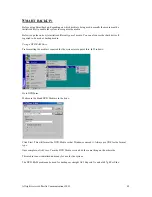
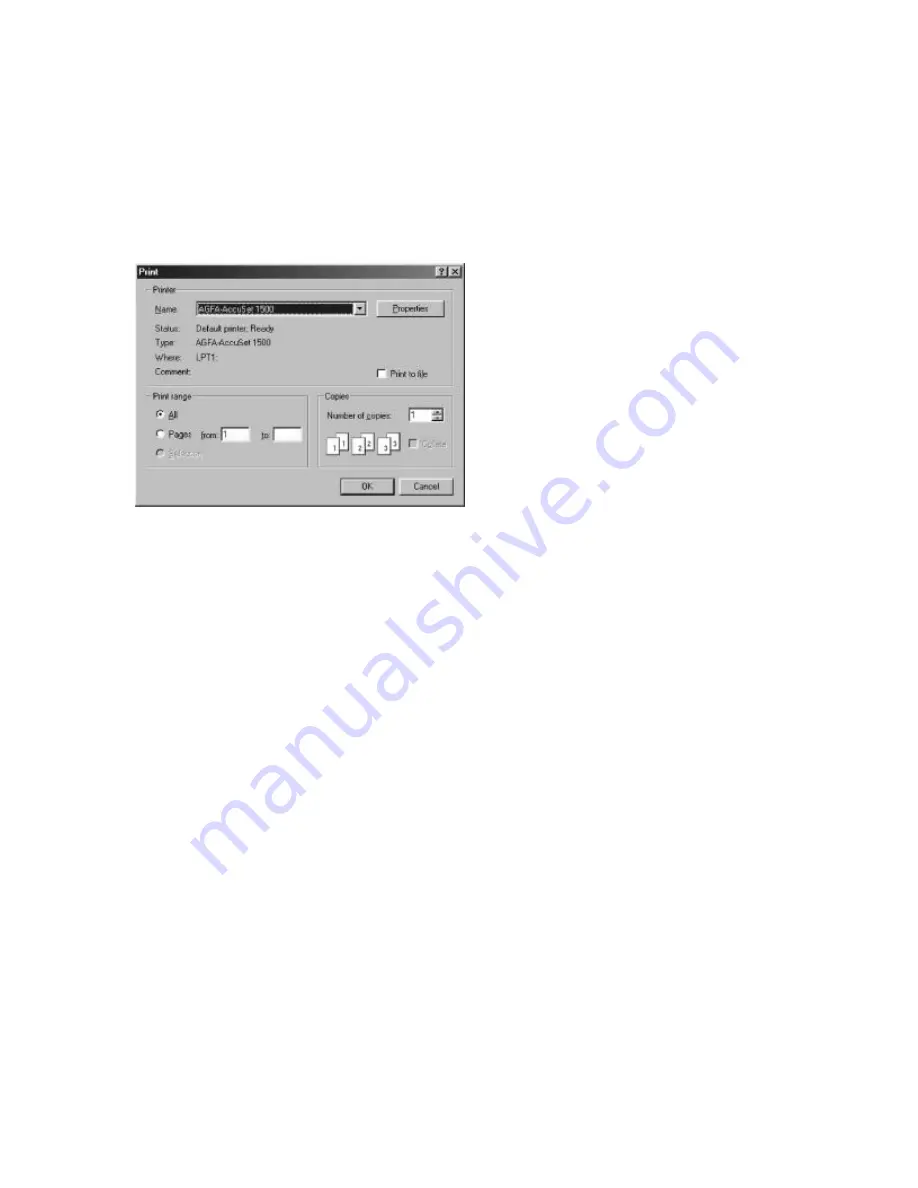
When clicking the Print button, as long as there is a printer installed it will print the current image.  


Depending on the printer installed will also depend on the quality of the picture. 

Summary of Contents for IDR 016 Series

Page 1: ...In the course we will look at the way in which Windows 98 interacts with the IDR s hardware and the software It should be noted that the student should have a good understanding of Windows 98 and be a...

Page 2: ...ons walking on it 10 Lighting For added protection for this equipment during a lighting storm or when it is left unattended and unused for long periods of time unplug it from the wall outlet and disco...

Page 3: ...2 Smartguard Page 8 Accessing Windows Page 13 General Setup Page 17 Including Webguard Setting up Cameras Page 20 Advanced Setup Page 22 Schedules Page 23 Sensors Page 24 Alarm Connectors Page 25 Moti...

Page 4: ...p Page 48 Restoring Reviewing Backup Page 58 Chapter 5 Bank Setup Page 61 HDD Table Page 63 Disk Space Issues Page 64 Chapter 6 Setting Up a Base Unit Page 65 Using Windows 2000 ME Page 73 Networking...

Page 5: ...r performance display and recording and expansion capacity The IDR series provides functions such as high quality recording long term recording easy scheduling quick searching and image processing The...

Page 6: ...re Installation of any Pacific Communications supplied software is done at the installers own risk No title or intellectual property right is transferred with the sale of software from Pacific Communi...

Page 7: ...ode display Sequence mode available in all screen formats Hardware watchdog timer function Programmable motion detection for each camera input using graphic user interface Various image enhancement fu...

Page 8: ...t time you turn on the system it will immediately begin recording If you have less than 16 cameras you must enter the setup screen and deactivate any inputs to which cameras are not connected Features...

Page 9: ...urs 24hours Click the left button on the mouse to set display mode Click the right button to set clock Caution Images dated later than the modified date time are deleted Back up the images if you want...

Page 10: ...from full screen mode click the left button on the mouse anywhere on the monitor Camera Click one of the buttons shown below to choose camera function Click A or B to select the range of cameras A fo...

Page 11: ...ll This is apparent when the hard drive disk usage is full Note The IDR records only in accordance with the recording schedule which is set manually in the Setup dialog box refer to the Setup section...

Page 12: ...l Alarm Output When Alarm is clicked the SmartCap board sounds an alarm The alarm sounds automatically when any related sensor is activated The user can activate alarm output manually by pressing the...

Page 13: ...Dialogue box will appear Type in IDISMAN and press enter A menu will appear Note There is no feedback when typing in this password UNTICK the Automatic Shutdown and click OK Other features in this me...

Page 14: ...the unit follow the below procedure Upon re powering up Windows hold down the LEFT CTRL button on the Keyboard This will not enable the IDR Software It will stay in Windows More about Smartshell Smar...

Page 15: ...ograms SmartSetup Refer to the IBank Setup section in Chapter SmartScan This is invisible software It scans the hard driver for recording SmartGuard Refer to SmartGuard section in this chapter SmartSe...

Page 16: ...nu This menu allows you to view the log file which logs every operation of the system System Menu Close Closes SmartShell and accesses Windows Restart Restarts the system Shutdown Shuts down the syste...

Page 17: ...camera can be sequenced to watch all cameras on one monitor Event monitoring dwell Sets the dwell time of one screen mode when a related sensor is activated If set to 0 the IDR will not sequence throu...

Page 18: ...section in this chapter Setup pager Not available in Australia Setup Web Server Set up a personal web server for WebGuard This is only a v on IDR 2016 3016 Load Loads typical setting values for all C...

Page 19: ...Bar Camera Screen Mode PTZ Control Screen Adjust 56 How to connect WebGuard Start the Web browser Internet Explorer in your local PC and enter the IP address of the IDR system in the location address...

Page 20: ...mera will not be displayed on the monitor The images from that camera will be recorded however It will however be available on remote access and can be viewed on search The spot output when sequencing...

Page 21: ...y adjusting the compression ratio Troubleshooting When clicking on PTZ in Camera Setup ensure the following Make sure the baud rates and parity are all the same on the converter the PTZ Camera and the...

Page 22: ...will apply After Hour When the unit is out of work hours eg after 5pm you are able to save valuable hard drive space by reducing resolution and speed Another way this can be achieved is to use motion...

Page 23: ...s weekends and holidays can be scheduled The following function compensates for different holidays in different countries Important Notes The holiday must be setup Every Sunday must be put into the sc...

Page 24: ...to Record Audio if you want to record audio when the associated sensor is activated optional Note Recording audio will be activated when at least one camera is associated Setup Audio Select an audio...

Page 25: ...munications 2001 25 ALARM CONNECTORS ON THE DIGITAL RECORDERS IDR1508 This connector is normally a DB9 connector IDR2016 1 2 3 4 5 6 7 8 9 Com Rel Alarm In 1 NC Rel Alarm In 2 NO Rel Alarm In 3 Alarm...

Page 26: ...nd card provides two types of audio input Microphone and Line in You must select manually the recording input type Setup zone Each screen is made up of a 30x40 grid To activate the grid turn on the Dr...

Page 27: ...ay also be associated The connected alarms will go off when a related sensor is activated Tricks If the Show Results is ticked a blue type box will appear when motion is detected If you do not want th...

Page 28: ...eletes users access from remote sites Transmit speed Specifies the number of images that can be transmitted per second Setup network Only the administrator can change the setup variables from a remote...

Page 29: ...add a new password and confirm the new password Click OK The user has now been added in for Remote Access Troubleshooting When assigning usernames and password the maximum length is six characters for...

Page 30: ...ng must be setup The assumption is made that the network card has already been installed Right Click on this and go to Properties This screen appears Click on Identification Under this you can call th...

Page 31: ...All rights reserved Pacific Communications 2001 31 Click the two check boxes Then click OK Then Click on TCP IP The network Card driver Name D Link 530tx...

Page 32: ...ork Click OK twice It will now install the settings It will ask to reboot the computer Click YES Once the PC has been rebooted the network settings will be saved and should now be fully working To che...

Page 33: ...es or taken from the system If you network card needs to be removed the drivers need to be removed also Right click on Network Neighborhood and go to Properties Then click on D Link 530TX Network Card...

Page 34: ...mmodate this You will need to be in Windows for this You will need to also activate Dial Up Server within Windows to allow communications between the Base and Post computers Go to My Computer Dial Up...

Page 35: ...Up Server It will bring up this menu box Make sure Allow Caller Access is ticked Click on Server Type There are three options here Make sure PPP is selected and click OK NOTE Ensure that Enable Softwa...

Page 36: ...a computer with a hand appears in the corner Now that the modem and Dial Up Server has been installed we need to specify an IP address for the modem Right Click on Network Neighborhood and click Prop...

Page 37: ...o restart your computer Click Yes The modem Dial Up Server and IP Address has been set up Troubleshooting When setting up the Digital Recorder Post Machine it is very important to ensure that the IP a...

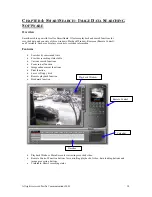
Page 38: ...lays or controls recorded information Features Searches by camera and time Provides recording status table Various search functions Zoom in out function Image enhancement functions Print function Save...

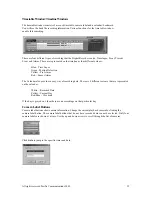
Page 39: ...Green Motion Detection Yellow Pre Alarm Red Sensor Alarm The Calendar also provides a easy way of searching data There are 4 different colours that are represented on the calendar White Recorded Data...

Page 40: ...sion The IDR provides multi screen playback function You are able to review more than one camera at a time Series Review images frame by frame Note Only one camera can be selected for this function Zo...

Page 41: ...al buttons Its features are similar to VCR remote control Close To quit SmartSearch click Close Small Playback Window Displays the current playback image When zooming in a box will appear move it by c...

Page 42: ...The ending time Find All Finds all time within the range and then lists it Find Next Finds one event at a time Result Displays the Find results Motion Detection Area setup icons Use the icons to set...

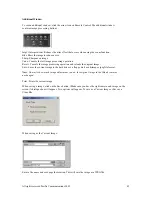
Page 43: ...mage processing operation and reloads the original image Save Saves the current image to the hard drive or a floppy dis k as a bitmap or jpeg file format Note No matter how much image adjustment you d...

Page 44: ...file and then press Save in the Save As dialog box The Video Compression dialog box will appear We use the MPEG4 compression or the Indeo v5 04 compression We have found it gives the best type of qual...

Page 45: ...d Pacific Communications 2001 45 When clicking the Print button as long as there is a printer installed it will print the current image Depending on the printer installed will also depend on the quali...

Page 46: ...ndow Back up to DVD RAM tape or the network drive Automatic Data Loading When you load SmartSearch data normally will not appear If this box is checked SmartSearch will load the data automatically whe...

Page 47: ...arm and recording the one channel of audio it is possible for this to be played back Under the Setup menu in search Ensure that audio play is ticked to enable audio playback Note If there is audio pla...

Page 48: ...sed as backup media Using a DVD RAM Drive Pre formatting the media is required for the system to recognize this In Windows Go to DVDForm Make sure the blank DVD Media is in the drive Click Start This...

Page 49: ...ckup is by far the best type of archival storage media It can hold 50gb of data which equates to around 2 3 days of recordings with 16 cameras The media for the on stream is pre formatted which means...

Page 50: ...period of each source or target drive Status Shows drive s status Working source drive Backup backup target drive Recording Shows the recording period of the source drive Latest Backup Shows the date...

Page 51: ...is cases the system must be backed up manually Refer to the Manual Backup section in this chapter Latest Backup Time Shows the latest backup date and time Period time The IDR backs up during this set...

Page 52: ...f using a network drive it will appear as the share given to it by the Network Administrator You must Initialize the media first Click on Initialize This screen will appear We are basically adding emp...

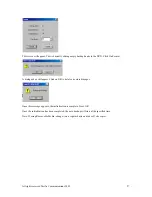
Page 53: ...Manual backup starts REC will stop Click OK to continue Once Backup is complete it will notify you whether it was successful or not Troubleshooting Manual and Automatic Backup will not back up Pre and...

Page 54: ...cording Backup Status Displays the backup status of a target bank Check whether a target bank is already backed up or not Selected Banks Displays the number of selected banks to back up in the list Fr...

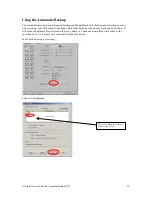
Page 55: ...s not stop recording and will backup all the banks Automatic backup backs up only motion and time lapse It will not back up alarms How it works is that every 66mb or 1 bank once completed will backup...

Page 56: ...ect the time you would like to have to backup Note If using a Network it is Preferable to backup at night when there is the least amount of network traffic The Backup Drive needs to be initialized Cli...

Page 57: ...VD Click On Format A dialogue box will appear Click on OK to delete any stored images Once this message appears the initialization is complete Press OK Once the initialization has been completed the a...

Page 58: ...backup drive having backup data in Backup Drive 3 Click Backup after returning to the main window of SmartSearch The following Backup dialog box appears Note If the specified backup drive is randomly...

Page 59: ...ways to select the bank for restoring in the list of Backup Restore dialog box Note Restore is not required in case of backing up to HDD or DVD RAM Note We strongly recommend that you stop auto backu...

Page 60: ...s is more than the one of available banks shown under Restore Drive reset the number of banks you selected Refresh Reloads the data from the backup drive Note Renew the list by clicking Refresh if the...

Page 61: ...d disk drive available The banks are a file structure that allocates the files to the hard disk drives Regardless of if the unit has been setup for the first time or has images recorded the banks are...

Page 62: ...e video on the banks Once this has been done you cannot retrieve the video The Exit button will end the IbankSetup program Warning You cannot allocate more than 2000 banks per drive letter If you allo...

Page 63: ...OFF LINE and the unit restarts the SysInfo and FileInfo will be corrected for the HDD that has gone OFF LINE Once the HDD is bought back ON LINE then the banks will need to be re setup for the correc...

Page 64: ...Hard Disk Drive Low Space warning do the following on all units It will ask which drive to Clean Select the newly installed drive Click on the Settings Tab Go to the settings Tab and UNTICK the box C...

Page 65: ...Base Unit MUST BE THE SAME Video resolution must be set at 1024x768 in 24 bit True Colour With the post software there are four diskettes Disk 1 Disk 2 OEM Disk Drivers The OEM disk contains all the...

Page 66: ...up exe Insert the disks as required When it comes to ibank setup wizard only allocate 10 ibanks If you have a network card in the Base Unit you must configure the IP address for the Base Unit You must...

Page 67: ...c Communications 2001 67 Right Click on this and go to Properties This screen appears Click on Identification Under this you can call the Computer Name whatever the convention is being used on the sit...

Page 68: ...Communications 2001 68 Click back on the configuration tab and select File Print Sharing Click the two check boxes Then click OK Then Click on TCP IP The network Card driver Name D Link 530tx Once hi...

Page 69: ...ked click on Specify IP Address Put the address of the network in there Note This must be a unique number to the network Click OK twice It will now install the settings It will ask to reboot the compu...

Page 70: ...etwork all IP addresses and computer names must be unique All units must be on the same subnet Mask Example IDR2016 1 IP 192 168 1 10 S Net 255 255 255 0 IDR2016 2 IP 192 168 1 15 S Net 255 255 255 0...

Page 71: ...All rights reserved Pacific Communications 2001 71 Click on TCP IP Dial Up Adapter Click Properties A Dialogue box will appear Click OK Note different IP Address...

Page 72: ...ed Pacific Communications 2001 72 You will need to Specify an IP Address We normally set it to the above address Base units are configured to the above address Click OK twice You will be asked to rest...

Page 73: ...ng Make Sure Internet TCP IP is installed Double click on Internet TCP IP and make sure the IP Address is 10 10 10 10 Then click ok Exit out of that You may need to restart your unit Dial Up and enjoy...

Page 74: ...hrough cable RJ45 This is the colour scheme Straight Through Cable CrossOver Cable Use this cable when connecting two computers to each other with no hub Can only be used when connecting only two comp...

Page 75: ...software come and go you will find it necessary to upgrade clients software to later versions You will need to save the configuration file In the main GUI click on setup At the bottom go to Save A dia...

Page 76: ...ftware Upon re powering up Windows hold down the LEFT CTRL button on the Keyboard This will not enable the IDR Software It will stay in Windows You must now uninstall the IDR Software Go to Start Sett...

Page 77: ...7 Go to Start Run Insert Disk 1 into the Drive and run setup Note Post Software has 3 Disks Disk1 Disk2 and the OEM Disk The OEM Disk has all the pictures for the IDR Software When it comes to the IBA...

Page 78: ...Once the DVR has rebooted the software will automatically startup Click on Setup in the main GUI At the bottom Press Load In file Name type in a filename cfg This is now loading the configuration file...

Page 79: ...ific Communications 2001 79 Setting up Configuring Users on a IDR Base System Go to SmartBase A dialogue box will appear with a list if configured of IP Addresses if using a LAN Click Close Click on S...

Page 80: ...01 80 Click on Local Setup Click on the Remote Tab Depending on what you are using will determine which setup to use If you are using a modem for connection Tick the box that says Use Modem Then click...

Page 81: ...Normally a empty list will appear To Add new sites Click Add Add a Site Name and Phone Number Then Click OK For the Camera Assignment Select Each Site Name ID with the camera you would like For settin...

Page 82: ...All rights reserved Pacific Communications 2001 82 Once the Modem box is unticked Click on Setup Site This box will appear Click Add Enter in the Site Name and IP Address Then press OK...

Page 83: ...iple DVR s Just change the Site ID and Camera Assignment to the units required With Dial Up you cannot do this Once you have setup Click OK You will be sent back to the main GUI Click on Connect to se...

Page 84: ...let you know whether or not logon was successful and show you the status of the connection Once connected click dismiss All the cameras on the DVR will now start to show If you wish to Record press RE...

Page 85: ...s reserved Pacific Communications 2001 85 The search menu will now appear If SmartBase was already running it can use the same details for the network and modem Click on Remote A Connection window wil...

Page 86: ...r a Username Password Enter the username Password that was created on the Post DVR Machine It will let you know whether or not logon was successful and show you the status of the connection Once conne...

Page 87: ...All rights reserved Pacific Communications 2001 87 WHEN THINGS GO WRONG TROUBLESHOOTING...

Page 88: ...the Display Properties appears click on the Screen Saver tab Set the Screen saver to None Click Apply When you click Apply you may be presented with the following dialog box Click Apply the new color...

Page 89: ...Settings tab Set Colors to True Color 24 bit or higher Set Screen area to 1024 by 768 pixels Click Apply Click Advanced Under Adapter ensure that the correct video adapter is installed If the adapter...

Page 90: ...of monitor is installed If the you do not have the correct monitor installed refer to installing a monitor If the correct monitor is installed click the OK If the correct monitor in not installed cli...

Page 91: ...All rights reserved Pacific Communications 2001 91 Select Search for a better driver Click Next Insert the floppy disk that was supplied with the monitor...

Page 92: ...This section should display the model of monitor in use if it doesn t click back and select specify a location and browse to find the necessary files and click Next again If the model of monitor is di...

Page 93: ...All rights reserved Pacific Communications 2001 93 Click Finish Click OK Click OK to return to the desktop...

Page 94: ...tandby 5 volts supplied to card Incorrect PCI Slot Software Problems The Smart Capture card driver has not been installed correctly The incorrect version of Smart Capture driver has been installed As...

Page 95: ...of Direct X 7 0 or higher and install it Another error that may occur is as follows If you have a green screen it is not due to a hardware fault it is due to software settings This fault relates the r...

Page 96: ...en when the telephone line is not busy Try to connect again Problem I cannot hear dial tone Solution Sometimes the modem cannot access a dial tone if your telephone is an extension Follow the instruct...

Page 97: ...e Display setup is not correct error message appears and opens up in the Windows mode when OK is clicked Solution IDR X016 requires 1024X768 resolution and true color This message will be printed on t...

Reviews: