28
INSTALLER
INFORMATION
Installation
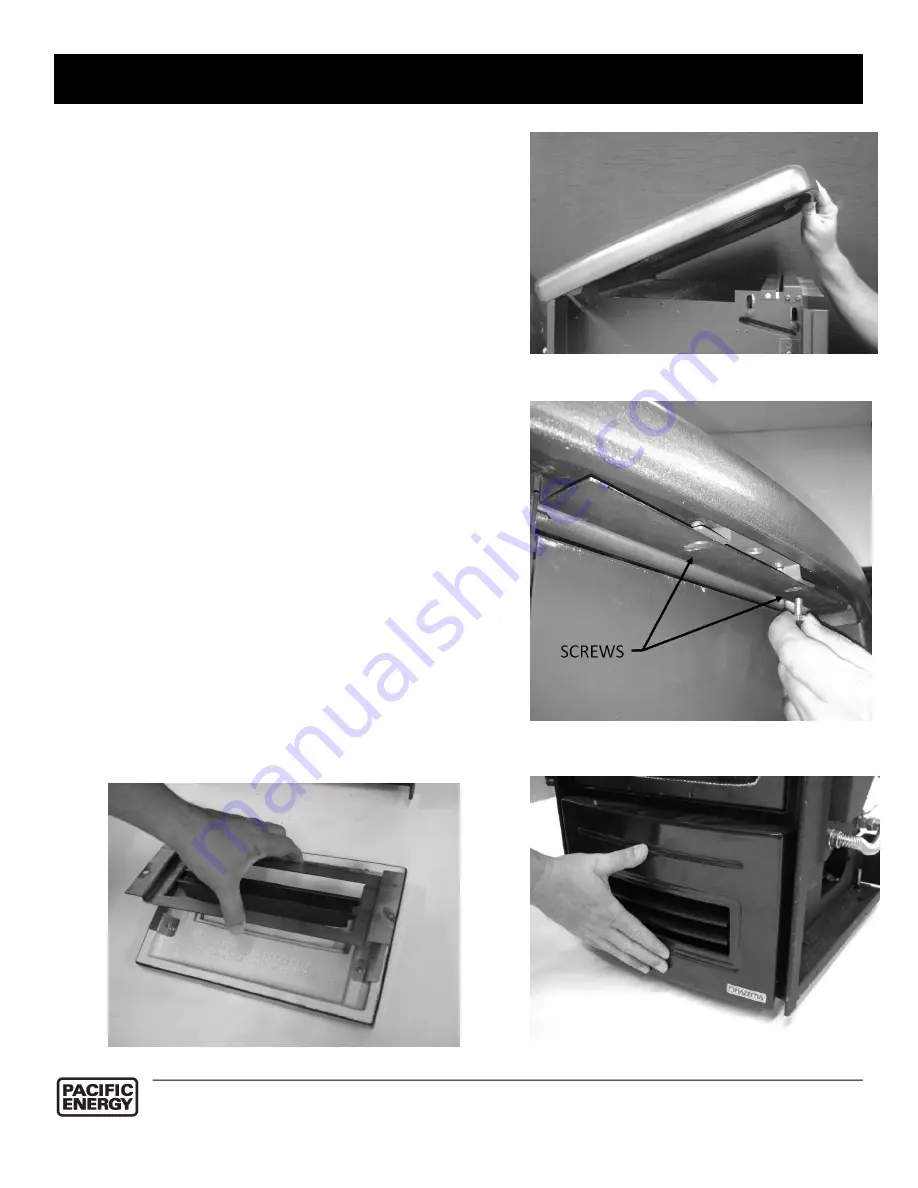
1. Slide back the top cladding piece into the top of
the appliance as seen in Figure 38. Fasten using
screws on front of appliance shown in Figure
39.
2. Place metal grill onto lower front cladding as seen
in
Figure40.
3. Place lower front cladding through the screw holes
and secure screw nut onto the back of the
cladding bolt as shown in Figure 40 & Figure 41.
4. Repeat step 3 for upper front cladding.
5. Secure side cladding stand using bolts as shown
in Figure 42.
6. Slide front side of left side cladding into front
clamps as shown in Figure 43. Secure back with
hex bolts as shown in Figure 45.
7. Repeat step 6 for the right side cladding.
Removal
1. Unscrew hex bolts on back of appliance and slide-
out side cladding.
2. Repeat step 2 for the cladding on the other side.
3. Unscrew and remove side cladding stands.
4. Unscrew bolts behind front upper cladding and
remove cladding.
5. Repeat step 5 for the front lower cladding.
6. Unscrew top cladding screws then slide out and
remove upper cladding.
Figure 38: Top Cladding
Figure 39: Top Cladding Screws
Figure 40: Metal Grill Attachment
Figure41: Lower Front Cladding
Cladding Installation / Removal
Summary of Contents for G963
Page 14: ...14 OWNER S INFORMATION DIMENSIONAL DRAWINGS Fig 19 PROFLAME Transmitter dimensional drawing ...
Page 16: ...16 OWNER S INFORMATION Lighting Instructions ...
Page 17: ...17 INSTALLER INFORMATION G963 Fireplace Dimensions Figure 20 Fireplace dimensions ...


