- 17 -
REMOVAL & INSTALLATION
SQUEEGEE USE
SQUEEGEE SYSTEM
Squeegee Blades and system should be inspected and maintained regularly to achieve peak machine performance.
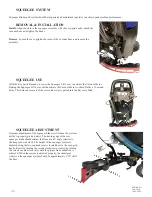
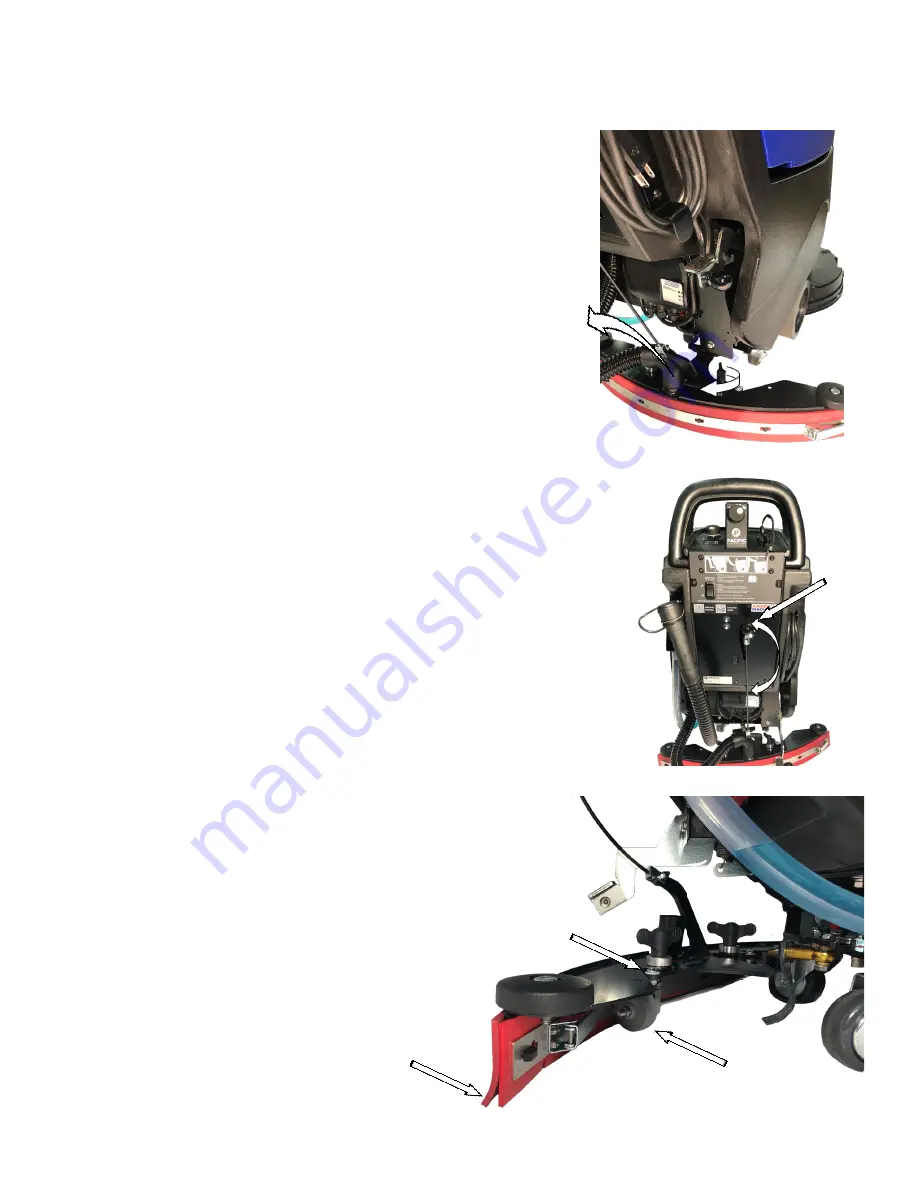
Install
: Align the slots in the squeegee assembly with the easy-grip knobs, attach the
vacuum hose, and tighten the knobs.
Remove
: Loosen the easy-grip knobs, remove the vacuum hose, and remove the
assembly.
With the Key Switch turned on, lower the Squeegee Lift Lever to activate the Vacuum Motor.
Raising the Squeegee Lift Lever will deactivate the Vacuum Motor to shut off after a 10 second
delay. This delay ensures all of the recovered water is pulled into the Recovery Tank.
SQUEEGEE ADJUSTMENT
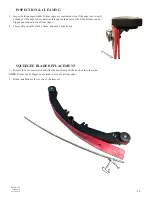
Improper adjustment of the squeegee blades will reduce the systems
ability to properly pick up water. The leading edge of the rear
squeegee blade should contact the floor at a 45° angle (similar to
the image shown below). The height of the squeegee system is
adjusted using the two cap head screws located next to the easy-grip
knobs. Raise (by turning the screws clockwise) or lower (by turning
the screws counter-clockwise) until the proper blade deflection is
achieved. When the system is adjusted properly, the small gray
wheels on the squeegee system should be approximately 1/32” off of
the floor.
Summary of Contents for S-20
Page 5: ...PAGE INTENTIONALLY BLANK...
Page 25: ...20 RETURN TO TABLE OF CONTENTS PAGE INTENTIONALLY BLANK...
Page 29: ...RETURN TO TABLE OF CONTENTS 24 PAGE INTENTIONALLY BLANK...
Page 40: ...35 RETURN TO TABLE OF CONTENTS CONTROLS S 24XM TRACTION MODELS...
Page 42: ...37 RETURN TO TABLE OF CONTENTS S 20HD CONTROLS...
Page 50: ...45 RETURN TO TABLE OF CONTENTS S 20HD DISK SCRUB HEAD...
Page 61: ...RETURN TO TABLE OF CONTENTS 56 PAGE INTENTIONALLY BLANK...
Page 62: ...RETURN TO TABLE OF CONTENTS 57 DATE MAINTENANCE LOG...
Page 63: ...58 RETURN TO TABLE OF CONTENTS DATE MAINTENANCE LOG...
Page 66: ...www pacificfloorcare com...

