


7
Electrician Installation Manual
EM-E Ceiling Fan
1.
Do not
attempt to operate the fan (or optional light kit) with any wall control that is not
approved by Pacific International Fans for use with its fans. DO NOT use solid state
controllers. The use of unapproved controllers will void your warranty.
2.
Do not
mix blade sets from one fan to another as this may upset the balance of the fan. If
only one blade is damaged you are still required to replace with a new set.
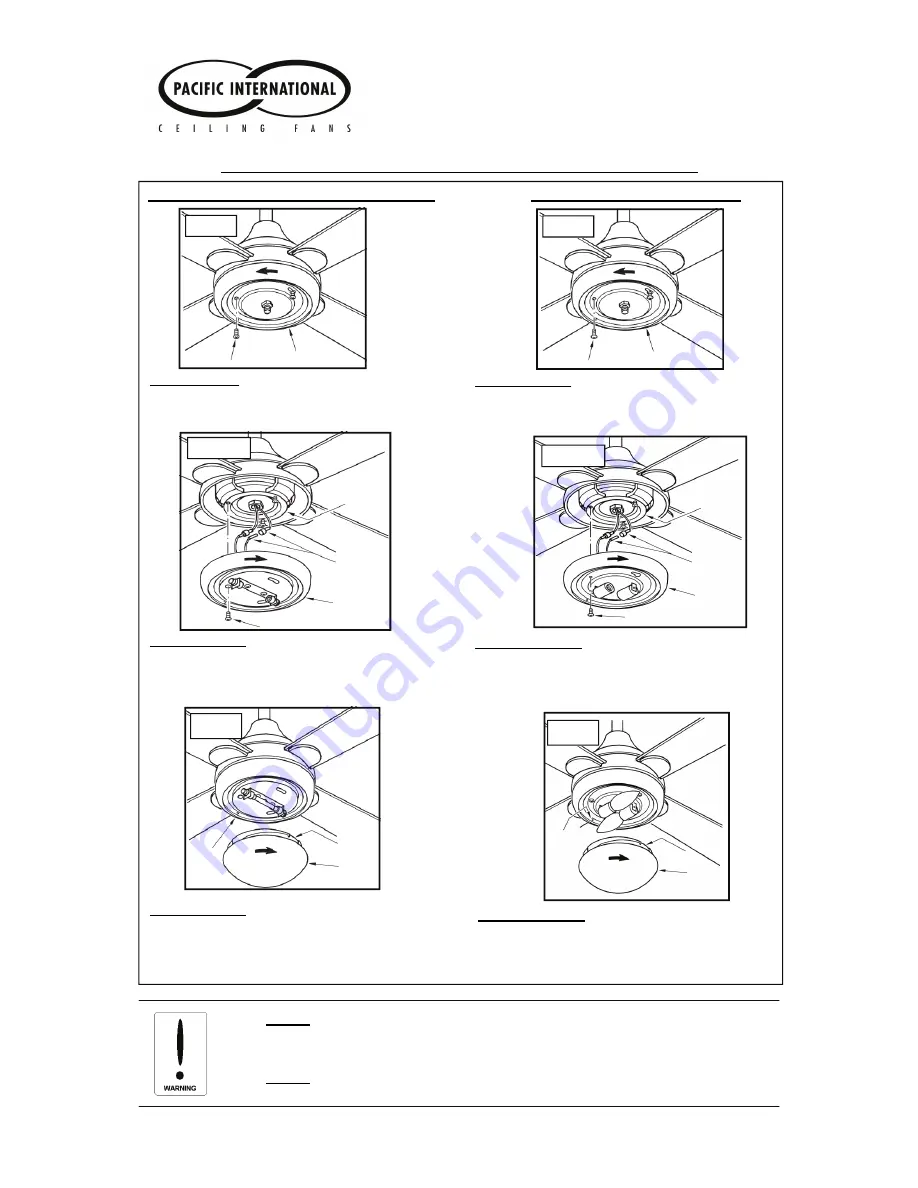
Attaching an accessory light kits—EM-E light kit
STEP 2 (Fig. 10)
a)
Use the connectors to attach the light wires from
the motor housing to light assembly kit.
b)
Attach and secure the light assembly kit using the
3 screws provided.
STEP 3 (Fig. 11)
a)
Plug the light globe into the socket.
DO NOT
touch the light globe with your fingers.
b)
Gently push the glass cover upwards and turn it to
attach the light glass to the fan.
78mm halogen light (MAX 100W)
E14 light ( MAX 2x40W)
STEP 2 (Fig. 13)
a)
Use the connectors to attach the light wires from
the motor housing to light assembly kit.
b)
Attach and secure the light assembly kit using the
3 screws provided.
STEP 3 (Fig. 14)
a)
Install the light bulbs in the light sockets.
b)
Gently push the glass cover upwards and turn it to
attach the light glass to the fan.
Fig. 9
Lower Rim
Screws
STEP 1 (Fig. 9)
a)
Turn base plate to remove the plug and base plate
from the motor housing.
b)
Loosen screws to remove the lower rim.
Lower
Rim
Screw
Light wire
connectors
Upper Mounting
Rim
Fig. 10
Lug
Groove
Fig. 11
Glass Cover
Fig. 12
Lower Rim
Screws
STEP 1 (Fig. 12)
a)
Turn base plate to remove the plug and base plate
from the motor housing.
b)
Loosen screws to remove the lower rim.
Lower
Rim
Screw
Light wire
connectors
Upper Mounting
Rim
Fig. 13
Fig. 14
Lug
Groove
Glass Cover


