background image

16

DAILY MAINTENANCE

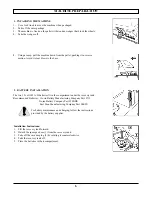
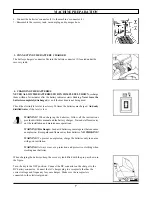
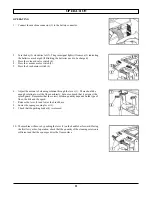
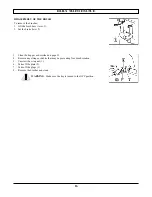
DISASSEMBLY OF THE BRUSH

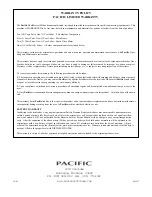
To remove the brushes:
1. Lift the brush base (lever 1).
2. Set the brake (lever 2).

3.

Clean the hopper as described on page 13.
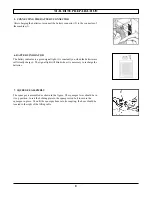
4.

Remove any strings or debris that may be preventing free brush rotation.
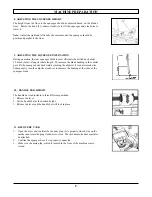
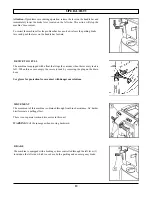
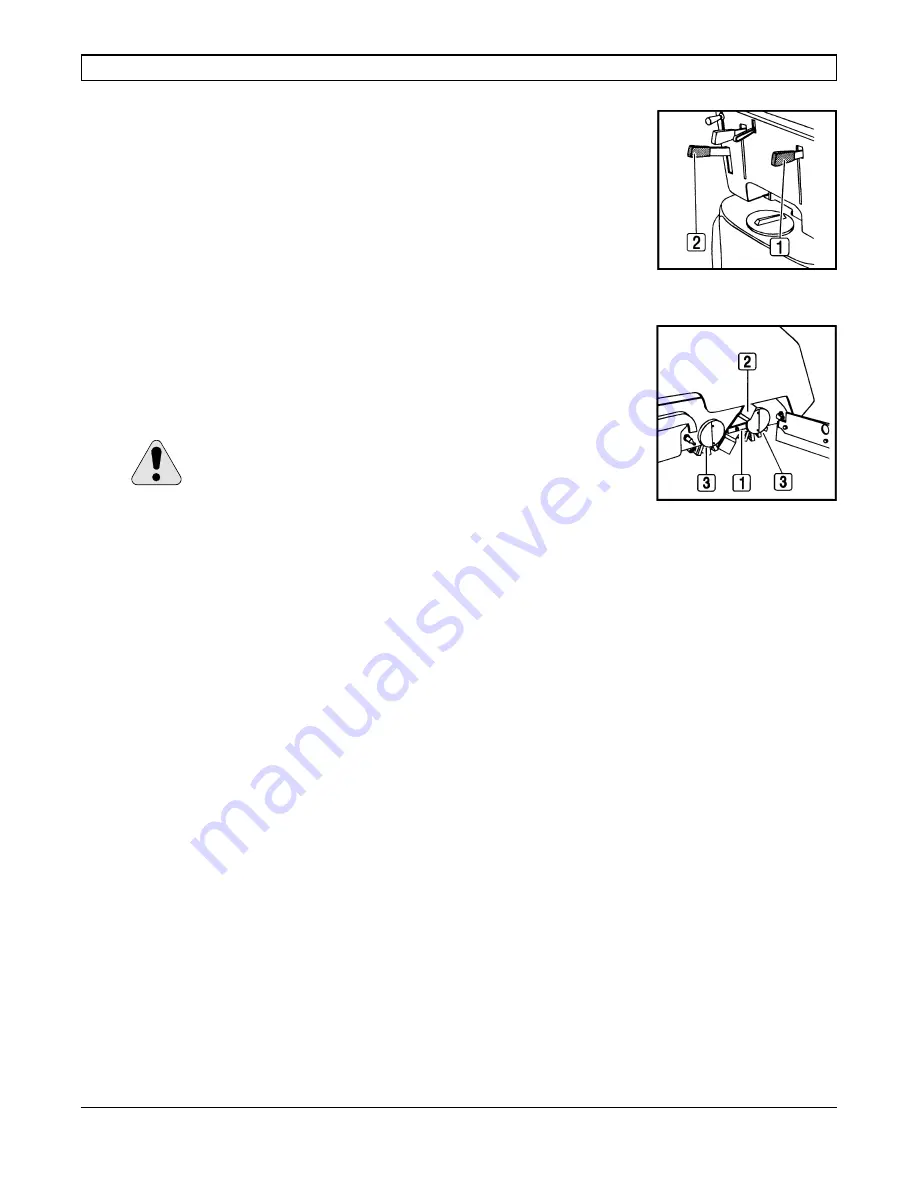
5.

Unscrew the wing nut (1).

6.

Take off the plate (2).
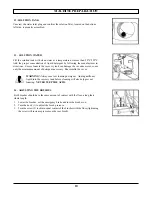
7.

Take off the plugs (3).
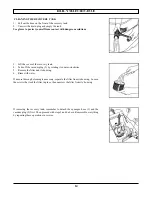
8.

Remove the brushes and clean.

WARNING:  Make sure the key is turned to the OFF position.

Summary of Contents for Floormaster 18B

Page 1: ...S READ THIS BOOK This operator s book has important information for the use and safe operation of this machine Read this book carefully before starting the machine Keep this book and tell all operator...

Page 2: ...ON TANK 13 SOLUTION WATER 14 ADJUSTING THE BRUSHES OPERATION OPERATING DEVICE TOO FULL MOVEMENT BRAKE UPON COMPLETION OF THE WORK DAILY MAINTENANCE CLEANING THE RECOVERY TANK CLEANING THE SOLUTION TAN...

Page 3: ...amp or incline 13 When the machine is parked take out the key and set the parking brake 14 During any maintenance operation disconnect the power supply from the machine 15 Lead acid batteries generate...

Page 4: ...brush motor switch Symbol for the vacuum motor Indicates the vacuum motor switch Symbol indicating the raised or lowered position of the squeegee Indicates the squeegee lever position Symbol indicatin...

Page 5: ...ank Symbol indicating the adjustment lever for the handle bar height Symbol for the key switch Symbol for the coupling Indicates the anchor points and the load direction This symbol serves as a remind...

Page 6: ...N The two 12 volt 145 A H batteries fit in the compartment under the recovery tank Recommended Batteries Crown Battery Manufacturing Company Part 711 Trojan Battery Company Part 30XHS East Penn Manufa...

Page 7: ...charging the batteries follow all the instructions provided with this manual and the battery charger Trained staff must carry out the installation and maintenance operations WARNING Fire Danger Lead...

Page 8: ...ntly on when the batteries are sufficiently charged The signal light will blink when it is necessary to recharge the batteries 7 SQUEEGEE ASSEMBLY The squeegee is assembled as shown in the figure The...

Page 9: ...in the central part tilt the squeegee body backward by turning the adjuster 1 counter clockwise Subsequently turn the adjuster clockwise to increase the bending at the sides of the squeegee blade 10...

Page 10: ...motor so use only the minimum amount of detergent necessary Reassemble the cover 14 ADJUSTING THE BRUSHES Both brushes should have the same amount of contact with the floor along their whole length 1...

Page 11: ...n through the lever 1 There should be enough solution to wet the floor uniformly but not so much that it gets past the splash guard Remember that the correct solution quantity depends on the type of f...

Page 12: ...at stops the vacuum when the recovery tank is full When this occurs empty the recovery tank by removing the plug on the drain hose Use gloves for protection from contact with dangerous solutions MOVEM...

Page 13: ...alve switch 1 5 Switch off the brush switch 2 6 Switch off the vacuum motor switch 3 7 Transport the machine to the location where the recovery tank should be emptied 8 Turn the key 4 OFF 9 Set the pa...

Page 14: ...vacuum plug 2 by rotating it counter clockwise 5 Remove the filter and its housing 6 Rinse with water If a more thorough cleaning is necessary separate the filter from its housing Loosen the screws t...

Page 15: ...t is released 7 Wash all components thoroughly 8 Reassemble repeating the above operations inversely CLEANING THE SQUEEGEE To obtain the best drying results keep the squeegee clean To clean the squeeg...

Page 16: ...2 Set the brake lever 2 3 Clean the hopper as described on page 13 4 Remove any strings or debris that may be preventing free brush rotation 5 Unscrew the wing nut 1 6 Take off the plate 2 7 Take off...

Page 17: ...on the squeegee 2 Take off the other end from the recovery tank 3 Wash the inner part of the hose with a water jet from the tank side 4 Reassemble WARNING Do not wash the hose that goes from the vacuu...

Page 18: ...n 2 Adjust the inclination of the squeegee see MACHINE PREPARATION 9 3 Confirm the vacuum hose is correctly fitted in its housing on the recovery tank 4 Take off the entire vacuum assembly and clean i...

Page 19: ...19 NOTES...

Page 20: ...other instructions pertaining to your warranty difficulty 2 Upon compliance with the above warranty procedure all warranted repairs will be completed at no additional charge or cost to the user 3 Onl...

Reviews: