2.
Installation
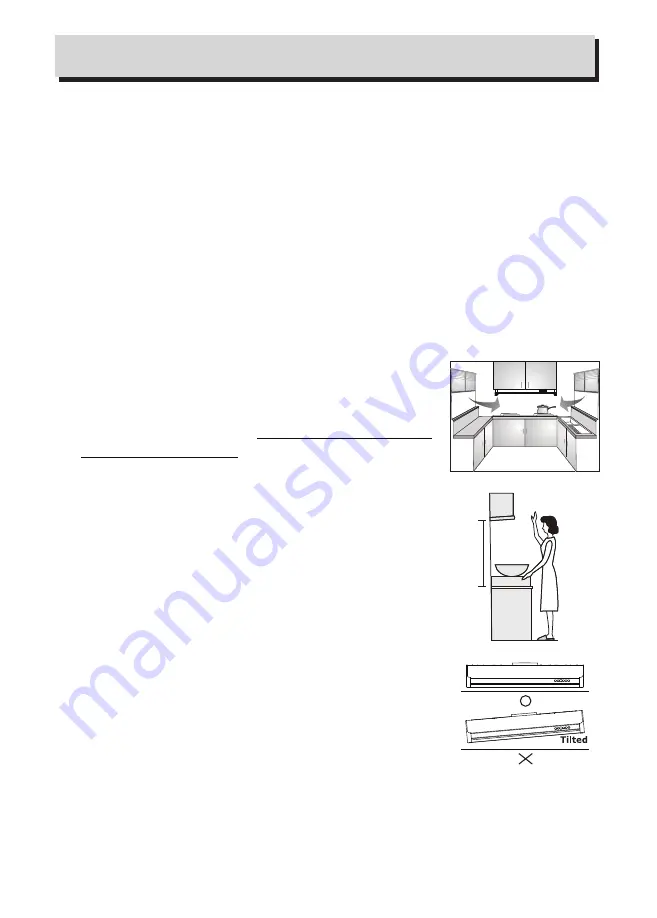
2. Position
•
Avoi
d
th
e
oi
l
leakin
g
fro
m
oi
l
cup.
1. Location
b
y
closin
g
certai
n
o
f
the
m
before using the hood or
during using the hood.
•
Th
e
smok
e
rise
s
t
o
2
5
c
m
t
o
hi
t
th
e
suctio
n
rang
e
o
f
the
ma
y
affec
t
th
e
effectivenes
s
o
f
th
e
rang
e
hood
.
I
t
helps
rang
e
hood.
•
Ai
r
turbulenc
e
comin
g
fro
m
th
e
window(s
)
o
r
door(s)
4. Exhaust duct
•
6 diamete
r
exhaus
t
duc
t
i
s
recommende
d
t
o
maximize
"
performanc
e
an
d
reduce
d
th
e
amoun
t
o
f
bend
s
als
o
helps
.
•
Befor
e
installin
g
th
e
hood
,
pleas
e
appl
y
fas
t
dryin
g
glu
e
t
o
th
e
colla
r
an
d
securely
attac
h
i
t
t
o
th
e
to
p
o
f
th
e
cooke
r
hood'
s
ven
t
lid
.
Instal
l
th
e
cooke
r
hoo
d
an
d
exhaust
duc
t
t
o
th
e
plasti
c
colla
r
an
d
sea
l
wit
h
fas
t
dryin
g
glue.
•
Th
e
installatio
n
heigh
t
i
s
measure
d
verticall
y
fro
m
center
o
f
fa
n
grill
e
o
f
hoo
d
t
o
th
e
to
p
o
f
th
e
stove.
Th
e
minimum
installatio
n
heigh
t
shoul
d
no
t
b
e
les
s
tha
n
6
5
c
m
an
d
there
commende
d
heigh
t
is
70±
5
cm.
y
3. Keep the range hood horizontall
•
Avoi
d
left-righ
t
o
r
front-droppe
d
inclination.
(
)
FIG.1
(
)
FIG.2
(
)
FIG.3
70
cm ± 5
cm
•
s
Packing materials (plastic bags, polystyrene, etc.) must be kept out of children
’
reach, as they are potentially dangerous.
•
Installation must be carried out by a qualified technician.
•
Check the voltage on the rating plate which should corresponds to the voltage in
your home.
•
Connect the power and switch on the motors and lighting system to check the operation.
•
Check the following accessories before installation:
a. Detachable oil cup x 1 pc
c. 6" round collar x 1 pc
b. Round oil dish x 1pc
d. Instruction manual 1 pc
e. Hardware package x 1 set
(M6 x 1" wooden screw x 4 pcs + M6 x 1-1/2" wooden screw x 4 pcs + 3/16" x
1/2"screw x 6 pcs + Mounting bracket x 2 pcs + Rubber x 2 pcs)


