3D
3E
3F
3G
3
B
3
C
3H
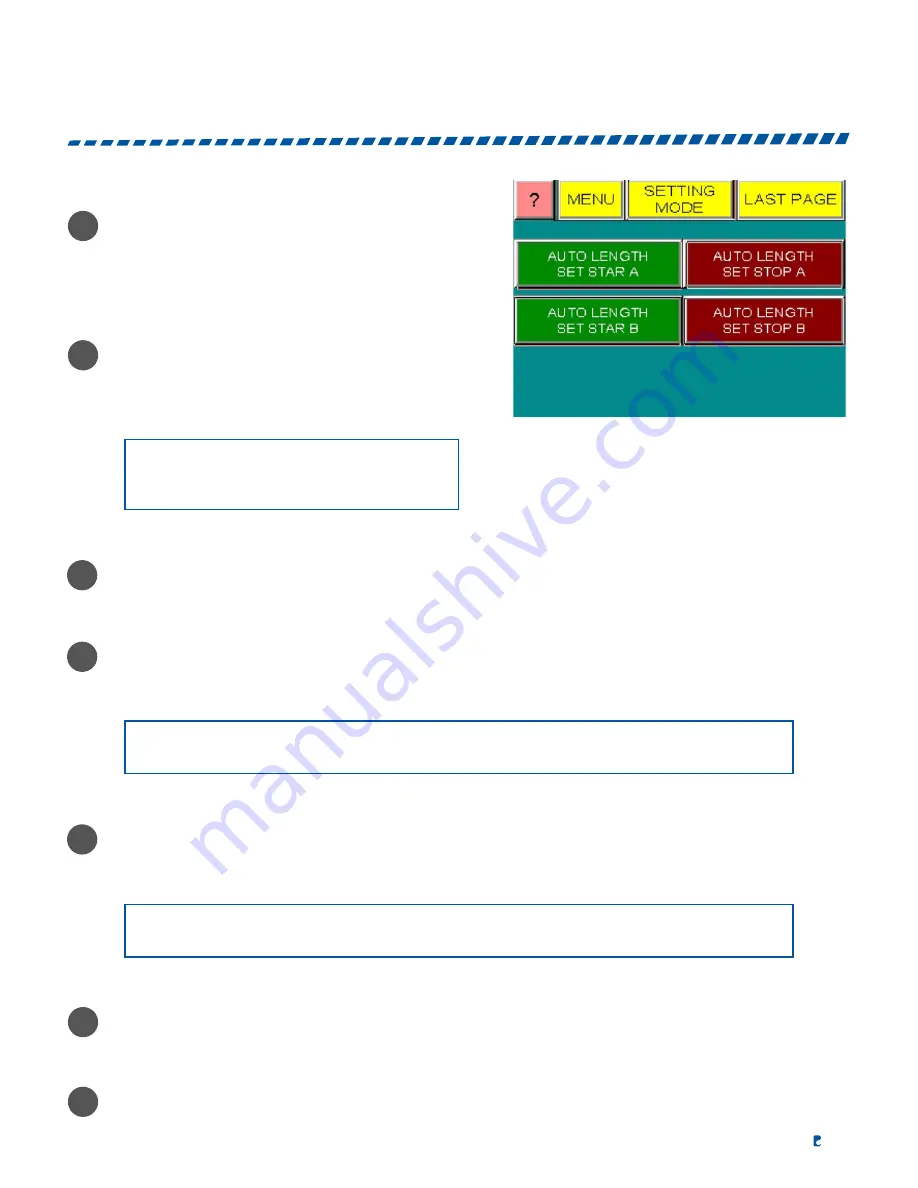
Auto length set: Press the “AUTO LENGTH SET
START”, then the label head will slowly pull the
label until the finger is released, at the same
time, the LCD will show the memory to be set
for the length of the label.
Manual length set: Press “AUTO LENGTH SET
STOP” to stop auto length set. Keep pressing
“LENGTH SET” until the appropriate label
length is registered.
Turn ON the “CONVEYOR “ and “LABELING” to start labeling process after labeling length set.
Inspect the label is in appropriate position on object. If not, adjusting the object sensor position or
press “LABEL PEEL DELAY” icon (when label come-out too early) for appropriate dispense timing.
Regarding the “PRECOUNT SETTING”, input the required number of product need to labeled. The
conveyor will stop and the counter will reset to zero automatically when the number of label is attained.
Turn ON the “Conveyor” to continue labeling.
NOTE:
It is important to turn off the conveyor first
before keying in the new settings. Before label length
setting please adjust label sensor first.
NOTE:
If the pre counter is turned on, the pre-count set must have a number on the setting or else the machine
will not function.
NOTE:
If the data shown on the screen is 0 this means the original position. Adding numbers will delay the
dispenser and so it will apply the label a bit to the left.
Press “ SETTING MODE” button to set up speed of conveyor, Missing label set, and speed of printer.
| 21
MACHINE OPERATION
DIAGRAM 3-2
Summary of Contents for PRO-625W
Page 3: ...MACHINE SPECIFICATIONS ...
Page 5: ... 5 MACHINE DIMENSIONS 2800 1339 1824 ...
Page 9: ...GENERAL INFORMATION ...
Page 19: ...MACHINE OPERATION ...
Page 28: ...ELECTRONIC PANEL ...
Page 29: ...ELECTRONIC DIAGRAM 29 ...
Page 30: ...APPLICATOR ...
Page 31: ... 31 LABEL SUPPLY PLATE ASSEMBLY ...
Page 38: ... 38 PU ROLLER ASSEMBLY ...
Page 40: ... 40 APPLICATOR EXPLODED VIEW WITHOUT BRUSH ...
Page 42: ... 42 APPLICATOR EXPLODED VIEW WITH BRUSH ...
Page 50: ... 50 BASE PAPER COLLECT ASSEMBLY ...
Page 56: ... 56 LABEL PRESS ASSEMBLY ...
Page 62: ... 62 CHAIN ALIGNER ASSEMBLY RIGHT ...
Page 64: ... 64 CHAIN ALIGNER ASSEMBLY LEFT ...
Page 68: ... 68 SPONGE ROLLER ASSEMBLY LEFT ...
Page 70: ... 70 SPONGE ROLLER ASSEMBLY RIGHT ...
Page 72: ... 72 DRIVING SPACING WHEEL ASSEMBLY RED RUBBER ...
Page 75: ... 75 DRIVEN SPACING WHEEL ASSEMBLY ...
Page 77: ... 77 WRAP STATION ASSEMBLY ...
Page 95: ... 95 CONVEYOR AND SEPARATOR ASSEMBLY 2 8M164W ...
Page 103: ... 103 HMI ASSEMBLY ...
Page 109: ... 109 PRESSURE PLATE ADJUSTMENT ASSEMBLY ...
Page 111: ... 111 WRAP STATION UP DOWN ADJUSTMENT ASSEMBLY ...
Page 114: ... 114 CHAIN ALIGNER ADJUST ASSEMBLY MOTOR SIDE ...
Page 116: ... 116 TOP HOLD DOWN ADJUSTMENT ASSEMBLY ...
Page 126: ...WRAP STATION FEATURES ...
Page 127: ...PRESSURE PLATE ...
Page 128: ...CONVEYOR ...
Page 129: ...GUIDE RAIL ...
Page 130: ...FOOT STAND ...


