134
Chapter 3
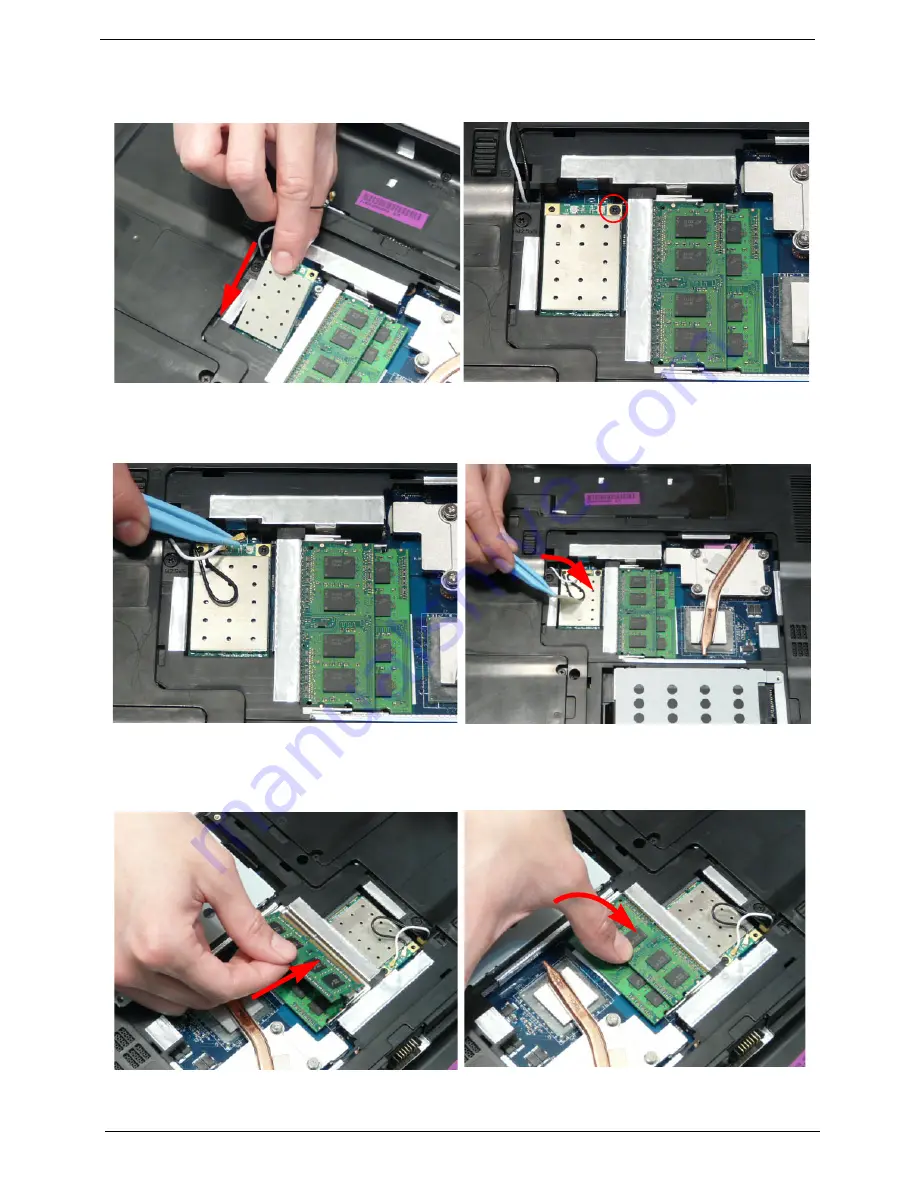
Replacing the WLAN Module
Replacing the DIMM Modules
1.
Insert the WLAN Module into the WLAN socket.
2.
Replace the single screw to secure the module.
3.
Connect the two antenna cables to the module.
4.
After connecting the cables to the terminals,
secure the cables in place using adhesive tape.
NOTE:
Cable placement is
Black
to the
MAIN
terminal (left) and
White
to the
AUX
terminal (right).
1.
Insert the DIMM Module in place.
2.
Press down to lock the DIMM module in place.
Summary of Contents for EasyNote LJ77
Page 6: ...VI...
Page 10: ...X Table of Contents Online Support Information 207 Index 209...
Page 15: ...Chapter 1 5 System Block Diagram...
Page 58: ...48 Chapter 2...
Page 71: ...Chapter 3 61 5 Remove the HDD from the carrier...
Page 85: ...Chapter 3 75 11 Carefully remove the LCD module from the chassis...
Page 94: ...84 Chapter 3 5 Lift the entire Speaker assembly clear of the Upper Cover...
Page 148: ...138 Chapter 3...
Page 178: ...168 Chapter 4...
Page 186: ...176 Chapter 5...
Page 199: ...Chapter 6 189...
Page 216: ...206 Appendix B...
Page 218: ...208 Appendix C...
Page 222: ...212...


