99999
Packard Bell EasyNote ML Disassembly Manual
9
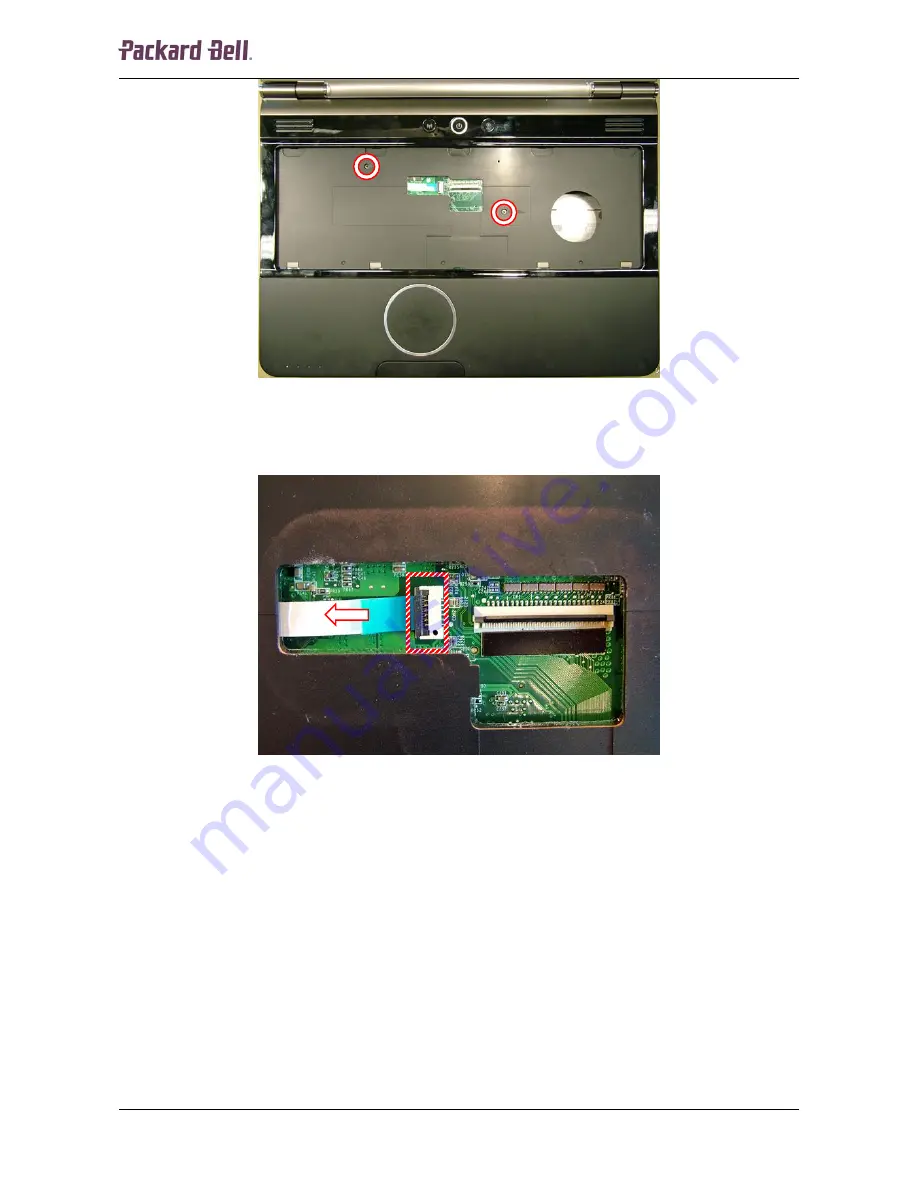
Fig. 11
Location of the touchpad connector.
2. Carefully unlock the keyboard cable connector.
3. Pull the cable out of the connector.
Fig. 12
Location of the bottom base screws.
4. Turn the notebook over so the top is facing down and remove the 22 screws
securing the top cover:
a. Twelve screws on the back panel
b. One screw underneath the WLAN panel
c. Two screws below the left HDD panel
d. Two screws below the right HDD panel
e. Five screws inside the battery compartment


