User’s Manual
66
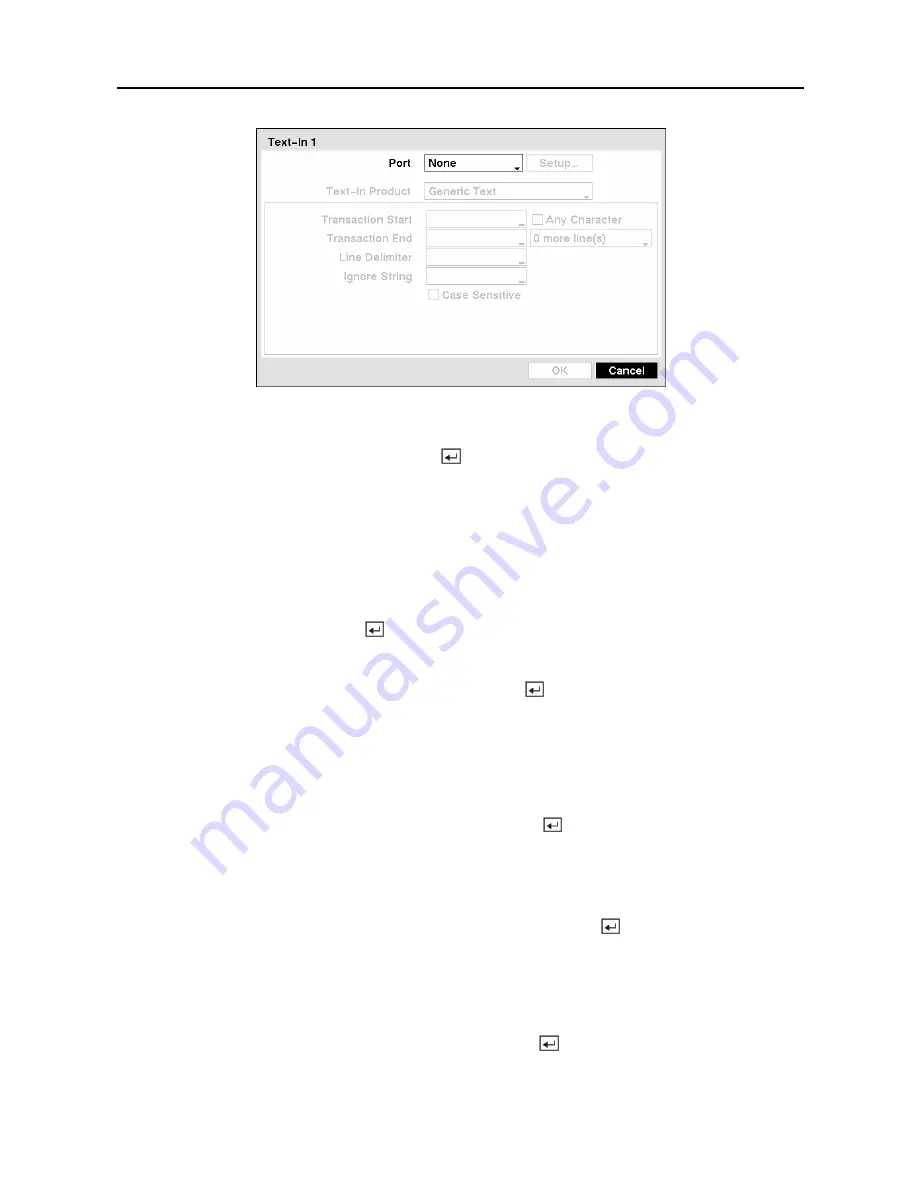
Figure 89 — Text-In Device Settings screen.
Highlight the box beside
Port
, and press the button. Select from None, RS232, RS485 and
USB-Serial (1~8).
NOTE: If you have set the Port as
None
, you will not be able to make any changes to the
screen.
NOTE: When using the USB to serial text-in device, do NOT remove the USB cable from
the port while the system is running.
Highlight
Setup…
, and press the button. Use the ATM or POS manufacturer’s
recommended settings when configuring the RS232, RS485 or USB-Serial ports.
Highlight the box beside
Text-In Product
, and press the button. Select your device from the
list.
NOTE: The following description is for a
Generic Text Device
. The screen changes for
different types of text input devices, and there will be different parameter boxes for you
to enter information.
Highlight the box beside
Transaction Start
, and press the button. Use the virtual keyboard
to enter the Transaction Start string. Refer to the device manufacturer’s documentation for the
text string that the device first sends when a transaction starts.
If you want the DVR to react to any character sent from the text input device, you will want to
turn On
Any Character.
Highlight
Any Character
, and press the button to toggle between
On and Off.
NOTE: If
Any Character
is turned On, you will not be able to enter any text in the
Transaction
Start
box.
Highlight the box beside
Transaction End
, and press the button. Use the virtual keyboard
to enter the Transaction End string. Refer to the device manufacturer’s documentation for the
text string that the device sends when a transaction ends.
Summary of Contents for PDR-9LX
Page 1: ......
Page 2: ......
Page 12: ...User s Manual x...
Page 86: ...User s Manual 74...


