Digital Video Recorder
11
3.
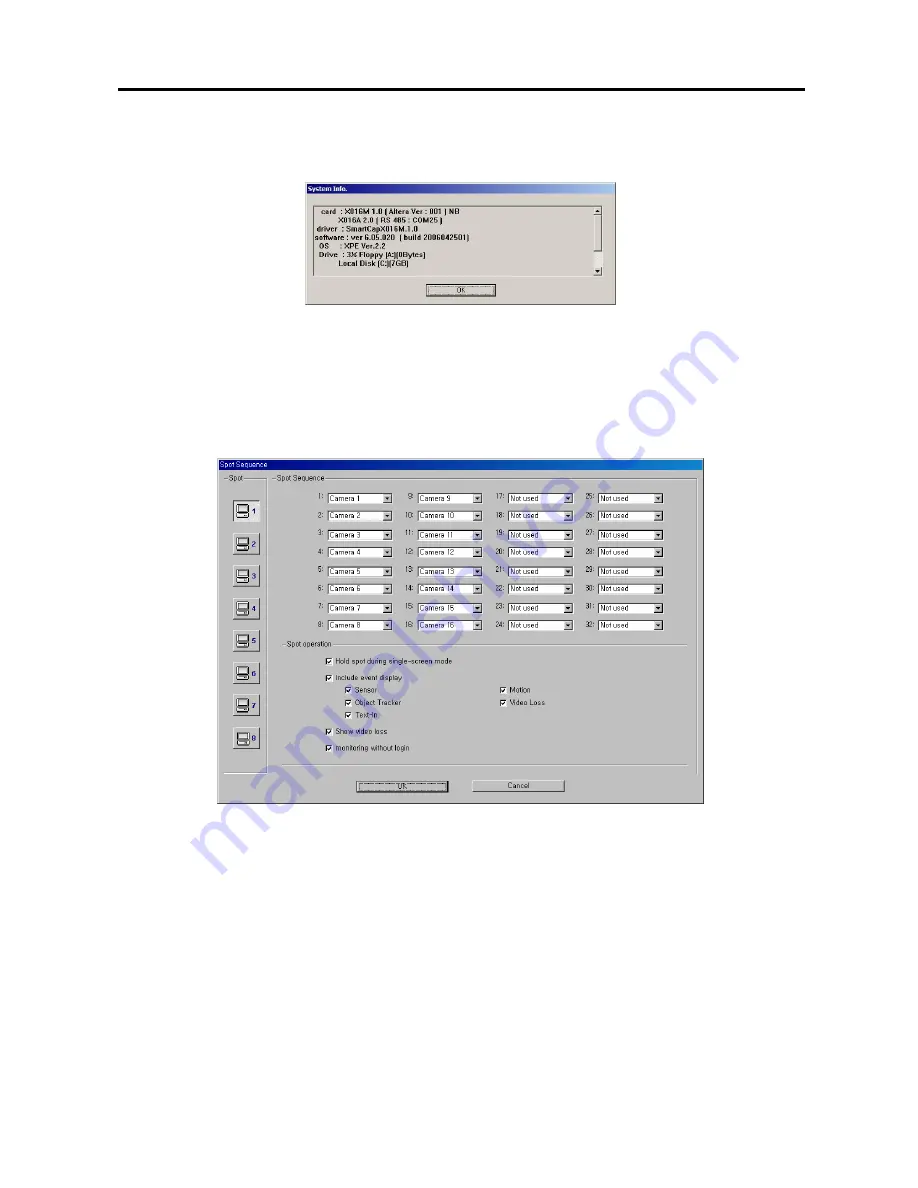
Click the
System Info…
button, and the
System Info.
dialog box appears. The dialog box displays the
information of the installed cards, driver, software, hard disk drive, and OS on the system.
4.
Click the
Event log
button to display the event log list of the system.
5.
Click the
Help (F1)
button to display the electronic file of user’s manual. The Help function also can be enabled
by hitting the F1 key on the keyboard.
6.
Move to
Spot sequence dwell
, and set the sequence dwell time for the Spot monitor by holding down and
dragging the pointer. If you set the value to
3
seconds, the camera display will sequence every three seconds on
the Spot monitor.
7.
Click the
More…
button, and set up the spot sequence in detail.
8.
Move to
Spot
, and click the Spot monitor icon to connect. No (0), one, four or eight monitors can be connected
according to the DVR specification.
9.
Move to
Spot Sequence
, and select the camera number for each number (32-channel DVR:
Camera
1
to
16
for
Spot 1
to
4
and
Camera
17
to
32
for
Spot 5
to
8
,
16-channel DVR: Camera
1
to
16
for
Spot 1
to
8)
to
sequence or
Not Used
from a drop-down list.
10.
Move to
Hold spot during single-screen mode
, and check the box if you do not want the cameras sequence on
the Spot monitor while the main monitor is set to the single-screen display mode.
11.
Move to
Include event display
, and check the box and select the type of event you want to display during spot
sequence. Multiple events can be selected.
NOTE:
Event display will be enabled when you set up the event monitoring during the Camera advanced setup.
Refer to the
Setting Up Cameras
section for details.
12.
Move to
Show video loss
, and check the box if you want to show the video loss image during spot sequence.
13.
Move to
Monitoring without login
, and check the box if you want to view video on the Spot monitor without
login.


