Digital Video Recorder
19
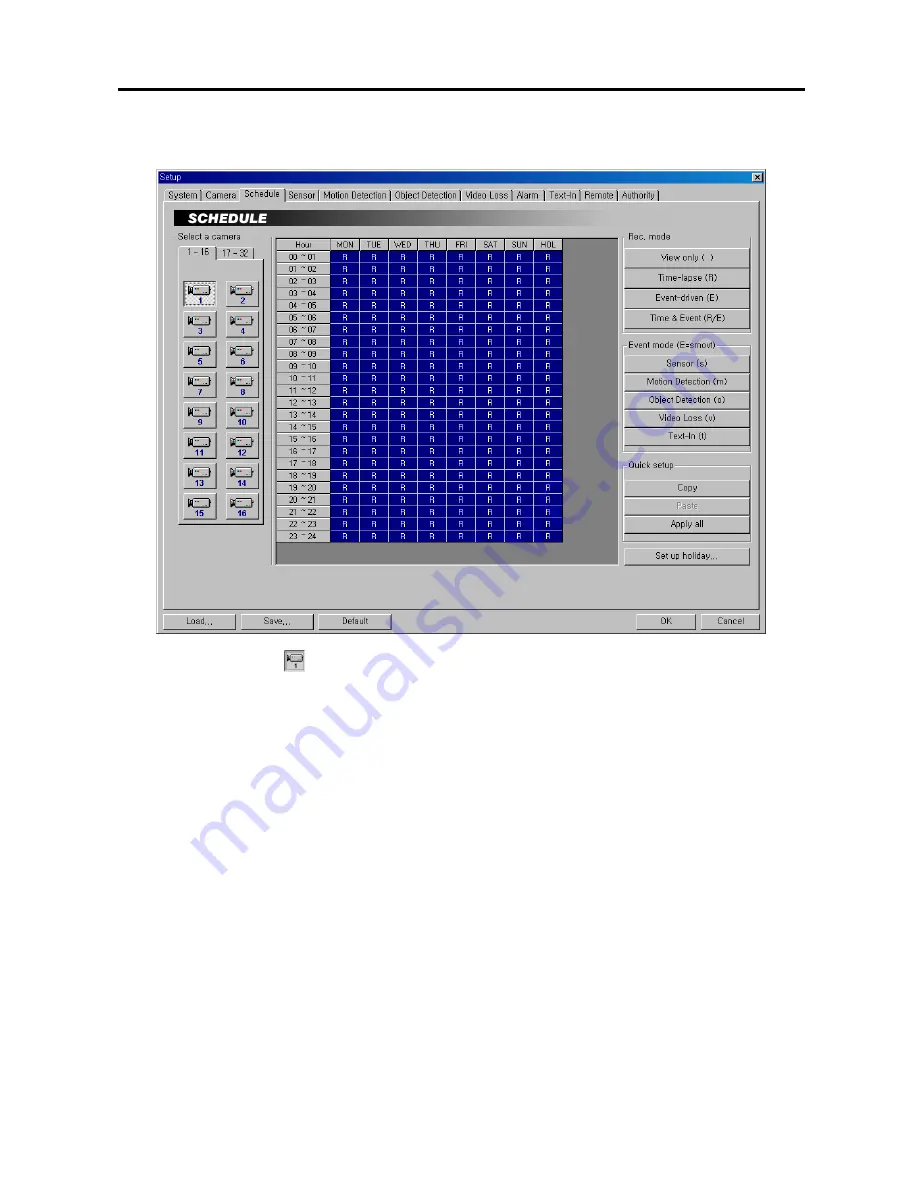
Setting Up Schedules
1.
Click the
Camera
icon.
2.
Move to the hour table, and set the recording schedule for each day (
MON
to
SUN
) and holidays (
HOL
). Select
the hours to record by holding down on the recording start time and dragging to recording finish time. The hour
selection will be made through both hours and days. The cells you select will be filled in blue.
3.
Click the desired recording mode button under the
Rec. mode.
The recording modes are:
View only (
blank
)
,
Time-lapse (R)
,
Event-driven (E)
or
Time & Event (R/E)
. If you click the
Time-lapse
button, an
R
will
display in the selected cells. Nothing displays when selecting
View only
.
NOTE:
The DVR provides four different recording modes.
View only mode
—
No recording will be made during
selected hours.
Time-lapse mode
—
Time-lapse recording will be made during selected hours.
Event mode
—
Event-driven recording will be made during selected hours.
Time & Event mode
—
Time-lapse
recording will be made during selected hours and the DVR will go into the event-driven recording mode during
selected hours when an event occurs.
4.
Click the desired event(s) button under the
Event mode (E=smovt)
to be associate with the event recording
mode. Click the event button to toggle On and Off.
Various recording modes (e.g. R, R/s, s, mo, smov, R/smov,
R/E, etc) may display in the time table according to settings of user defined Event modes. If you select all
available events, and
E
will display in the selected cells.
NOTE:
Video Loss (v)
in Event mode includes both video loss and video obscuration detection.
5.
Use the
Quick setup
to adjust the current settings of the selected camera to another camera. Click the
Copy
button, and select another camera to be scheduled by clicking the camera icon in the same dialog box, and then
click the
Paste
button.
6.
Click the
Apply all
button if you want to adjust the current settings to all cameras.


