User’s Manual
40
11.
In the
Save As Video File
dialog box, click the
Start
button to save the video. Selecting
Cancel
cancels the
saving operation and closes the dialog box without saving the settings.
NOTE:
The target disk for saving AVI files must have at least 150 MBytes free space.
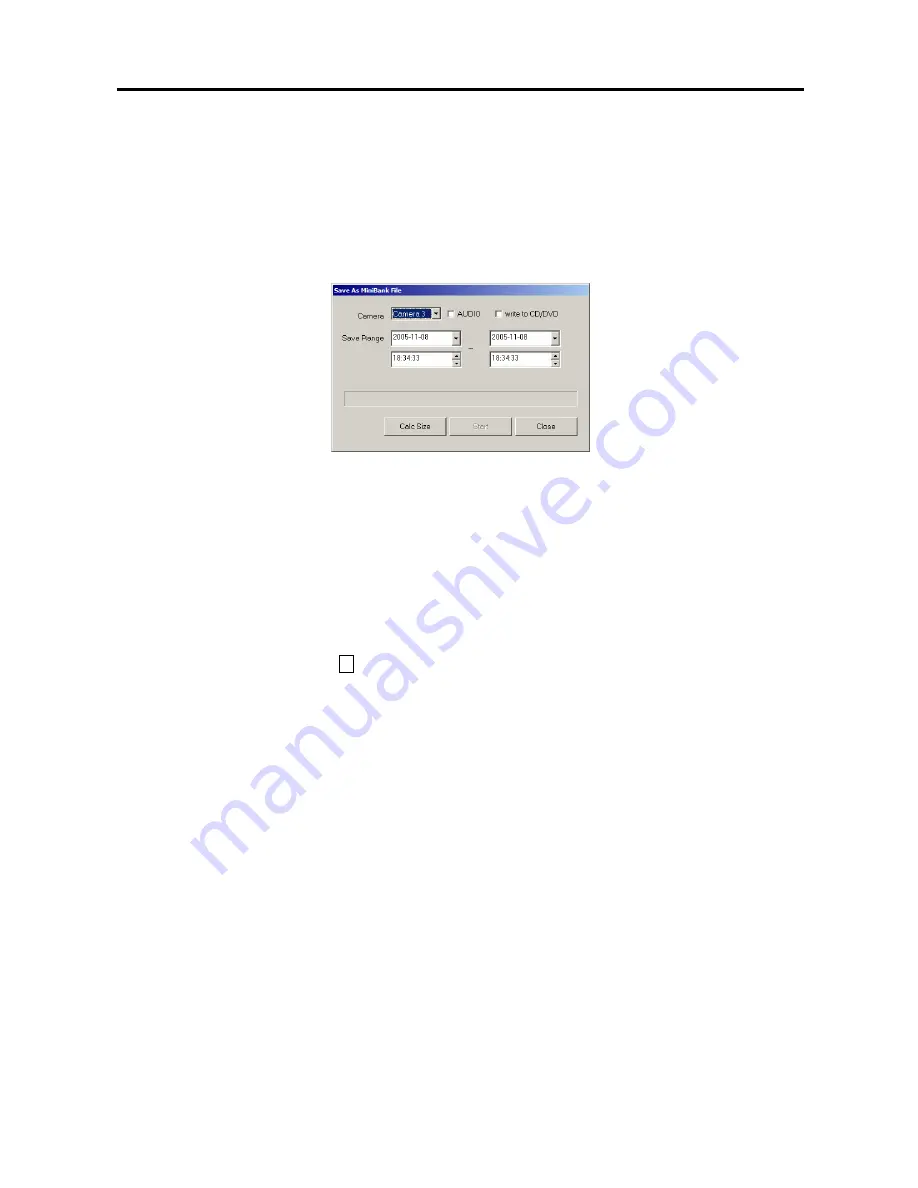
MiniBank Save
1.
Click the
MiniBank Save
radio button in the
Save Type
dialog box, and click the
OK
button.
2.
Move to
Camera
, and select the camera number to save from the drop-down list.
3.
Move to
AUDIO
, and check the box to save audio with video.
4.
Move to
write to CD/DVD
, and check the box if you want to save the video clip on the CD or DVD drive directly.
NOTE:
Writing on the DVD is available only on the Windows XP embedded version over 2.0.
5.
Move to
Save Range
, and set the saving range using the arrow buttons.
6.
Click the
Calc Size
button to calculate and preview the backup file size you are saving.
7.
Click the
Start
button to display the
Save As
dialog box. Selecting
Cancel
cancels the saving operation and
closes the dialog box without saving the settings. When the
write to CD/DVD
box is checked, the
Enter file
name
dialog box appears, and you need to select the CD recorder to use, and select the folder name to save on the
CD or DVD drive by clicking the -> button.
8.
In the
Save As
dialog box, select the save location from the drop-down list. In
Save in
, enter the file name using
either the actual keyboard or the virtual keyboard in the
File name
.
NOTE:
When you creating the file name for the video you are saving, you must enter "/" between the directory
name and file name. For example, if you enter "abank/test", a directory named “abank” with an ‘.exe’ file named
“test.exe” will be created.
9.
Click the
Save
button to save the video, Selecting
Cancel
returns to the
MiniBank Save
dialog box without
saving the settings.
NOTE:
When saving a minibank file on a floppy disk or zip disk, it can be saved on multiple disks if the file size
is larger than the disk capacity. Split files can be merged using the provided MiniBank Wizard. Double clicking
the
MiniBankWizard.exe
file starts the MiniBank Wizard. Move to the
File Merge
tab in the MiniBank Wizard
dialog box, and select the folder where the split files are located. The first file among split files will be displayed
in the box next to the Folder. Click the displayed file and then click the
Merge Files
button. Double clicking the
merged file starts the
Player
program.
NOTE:
See the following
MiniBank Self Player
section for the reviewing the saved MiniBank video.


