©2020 PACE Inc., Vass, North Carolina,
All Rights Reserved
Page
9
Software Overview
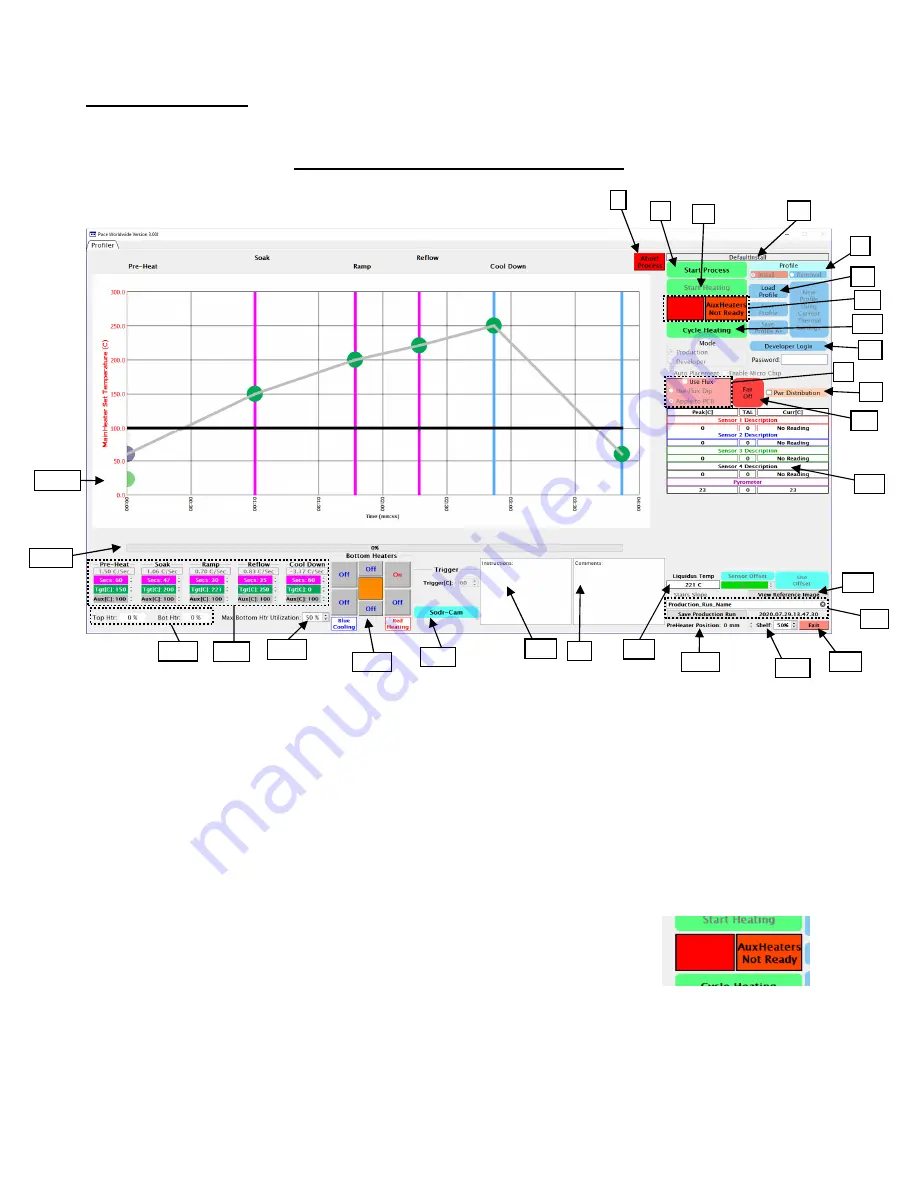
The Profiler Screen (Production Mode)
I.
Abort Button
– Used to end the current process and reset the machine back to home.
II.
Start Process
– Used to begin the removal or installation process from the home position.
III.
Start Heating Button
–Used to initiate heating, as directed by the selected profile. Initially, the bottom
heater will be used to achieve the “Target Temperature” of the PCB set for the profile. Once the “Target
Temperature” is reached, the main thermal profile will begin accordingly.
IV.
Profile Name
– Displays the name for the active profile.
V.
Profile type
– Indicates if the loaded profile is an install or removal. Options are grayed out and cannot
be selected in Production Mode. Profile type changes depending on the profile loaded. See Developer
Mode for more information on Profile creation.
VI.
Load Profile
– Click here to select an existing profile to be run.
VII.
Temperature Trigger indicators
– This area displays status of the machine
in relation to the Temperature Trigger Point. The Trigger Point must be
reached before the process can begin.
VIII.
Cycle Heating
– This button will move the heater head down into position
over the board assembly and run the thermal profile, skipping all set-up and alignment steps. For use
when manually placing components.
IX.
Developer Login
– Used to enter “Developer Mode” for profile creation and editing.
I
II
III
IV
XI
XXI
XVII
XVI
XV
XVIII
VI
V
VIII
IX
X
XI
XII
XXIV
XIII
XIV
XXII
XIX
XXVI
XXVIII
XXVII
XXV
VII
XXIII


