background image

4

                                       Installing the Transmitter

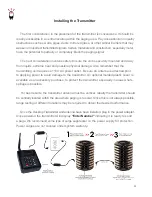
     The first consideration in the placement of the transmitter is convenience. It should be 
readily accessible in a central location within the paging area. Pay close attention to nearby 
obstructions such as walls, pipes, ducts, mirrored glass, or other similar barriers that may 
weaken or misdirect transmitted signals. Certain materials and construction, especially metal, 
have the potential to partially or completely block the paging signal. 

     The next consideration involves safety. Ensure the unit is securely mounted and away 
from liquids, extreme heat and possible physical damage. Also remember that the 
transmitting unit requires a 110V AC power outlet. Be sure an antenna is attached prior 
to applying power to avoid damage to the transmitter. An optional molded plastic cover is 
available as an accessory purchase, to protect the transmitter, especially in areas where 
spillage is possible.

     For best results, the transmitter antenna must be vertical. Ideally the transmitter should 
be centrally located within the area where paging is to occur. Since this is not always possible, 
range testing at different locations may be required to obtain the desired performance.     

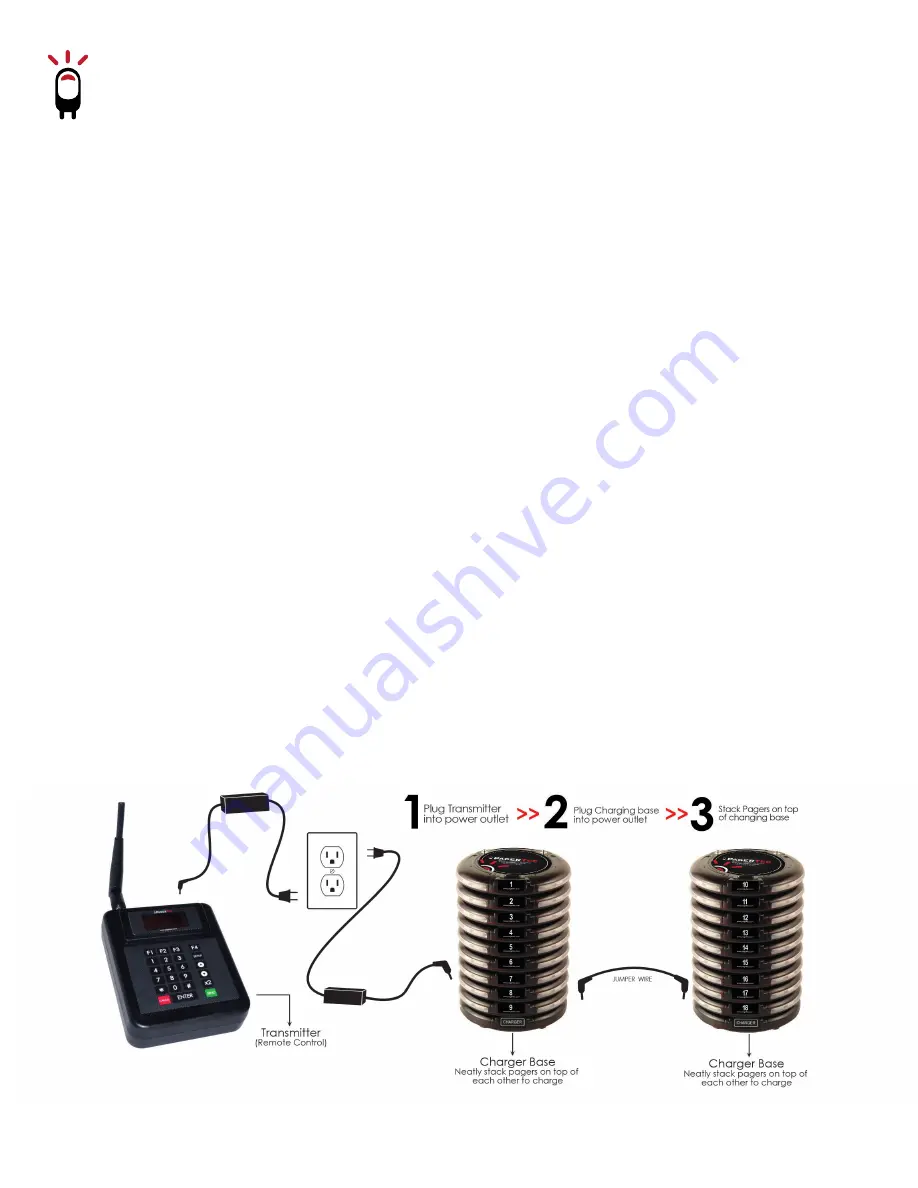
     Once the Desktop Transmitter and antenna have been installed, plug in the power adapter.           
Once powered the transmitter will display


“Enter Number’’ 

indicating it is ready to send 

a page. We recommend some type of surge suppressor on the power supply for protection. 
Power surges are not covered under system warranty.

Summary of Contents for SMART STACK PAGING SYSTEM

Page 1: ...Smart Stack Paging System...

Page 2: ...operating your system The manual will provide you with installation instructions and offer suggestions to ensure you receive all of the many benefits your system can provide Additionally this manual w...

Page 3: ...3 Smart Stack PAGING SYSTEM...

Page 4: ...uires a 110V AC power outlet Be sure an antenna is attached prior to applying power to avoid damage to the transmitter An optional molded plastic cover is available as an accessory purchase to protect...

Page 5: ...base plates to a single power supply Only use the power supply that came with your charger Damage caused from improper electrical connection including but not limited to the incorrect power supply is...

Page 6: ...nt 1 Take a clean cloth and an isopropyl alcohol based cleaner 2 Wet the clean cloth with the isopropyl alcohol cleaner 3 Wipe down the pagers or equipment 4 When dry place rechargeable pagers back on...

Page 7: ...alert type of your pagers follow the below instructions 1 At the Set Alert mode menu press the ENTER key Select one of 1 6 Alert modes then press SEND key 1 LED 2 LED Vibe 3 LED Beep 4 LED Vibe Beep 5...

Page 8: ...instructions 1 At the Set Alert Time menu press Enter 2 Use the key to scroll through the different times 3 Select one of 9 Alert times as below then press SEND 1 2 SEC 2 5 SEC 3 10 SEC 4 15 SEC 5 30...

Page 9: ...nform the guest that they are too far away and will miss their page The beeping will automatically stop when they step back within range Be sure you have all your pagers before performing this procedu...

Page 10: ...oasters do not flash consistently this is your maximum range If you would like to increase your power level exit range test and call Pagertec Press the CANCEL key to stop the range test Press the CANC...

Page 11: ...on If this equipment does cause harmful interference to radio or television reception which can be determined by turning the equipment off and on the user is encouraged to try correct the interference...

Reviews: