To set up the LittleGuy ScreenRoom Mini:
1
. Unpack the tent & lay out the floor (black) facing down
on a flat, level site on the ground.
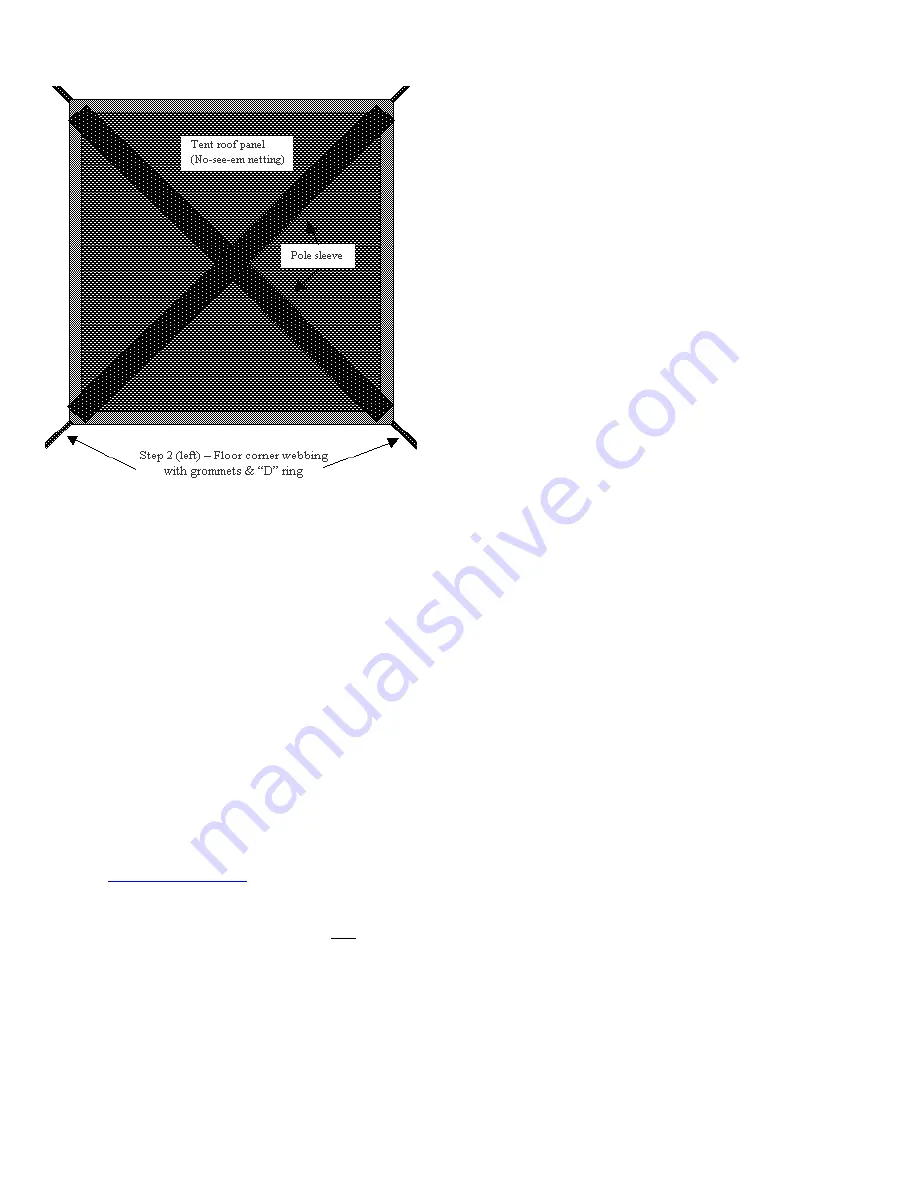
2. Locate the 4 floor corners webbing. Stretch and stake the
floor corners to the ground using the ground stakes
provided.
3. Unfold and assemble the 6 main poles (2 roof, 4 corner
poles). Be sure sections are fully engaged.
4. Locate the 2 mesh pole sleeves sewn into the mesh roof.
The sleeves cross at the center of the roof.
5. Insert the 2 long fiberglass "arch" poles through the roof
pole sleeves.
6. With the tent remaining on the ground, insert the end of
the roof poles into the connectors located at
all 4 corners of the roof. Be sure the sections are fully
engaged. Your tent roof will now have a dome shape.
7. Starting at one corner, insert the steel corner pole into the connector at the roof corner, and then insert
the pin located at the bottom corner of the tent into the bottom of the corner pole. Repeat this step at the
remaining three corners corners. Now your tent is fully erected.
NOTE: The small hole in each of the four corner poles should be closest to the roof. These are used to
install the rainfly.
8. Once the tent is erect, it can be repositioned & the floor re-staked to smooth out wrinkles.
9. To install the rainfly, simply pull the fly over the roof of the tent and secure by inserting the hooks on
the four corners of the fly into the holes in the corner poles.
10. Always be sure to use the provided guylines and ground stakes to secure your Green Mountain tent
to the ground.
11. To use the front door as an awning, extend the awning out, and insert the tips of the two awning
poles into the grommets on the outer corners of the awning. Attach guylines, and secure to the ground
using ground stakes provided. Adjust guylines as needed to adjust awning pitch and slope.
When used and cared for correctly, your new
LittleGuy ScreenRoom Mini
will provide years of
reliable service in any conditions. Thanks for being a PahaQue customer!
NOTE: Register your purchase, download additional copies of these instructions and more at
*Avoid prolonged exposure to the sun! UV damage is considered normal wear and tear, and is
not covered by your lifetime warranty.


