Section 150-319-254
Revision 02
Page 24
3. LOOPBACK DESIGN DESCRIPTION
3.01
All HiGain ELU/ERU system loop-up codes
must be initiated from either the front panel
pushbuttons or from the maintenance terminal. The
HiGain E1 system does not respond to any
in-band
codes.
3.02
Two additional loopback points are added
for
each EDU-451 doubler that is used as
shown in Figure 14. NDU1 and NDU2 are executed
towards the network. CDU1 and CDU2 are towards
the customer. NDU1 and NDU2, along with the rest
of the loopbacks towards the network, can be issued
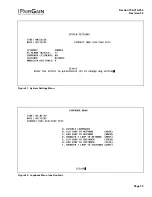
from the Loopback Menu shown in Figure 22.
3.03
Depressing both the MODE and SEL push-
buttons on the front panel for at least three
seconds initiates a MANUAL loopback session. This
session allows the user to SEL one of eight HiGain
system loopbacks. The message, “MAN LPBK”,
appears on the front panel display followed by the
message “NLO?” If the SEL push-button is now
pressed, an “NLOC” loopback is executed and the
message changes from “NLO?” to “NLOC”. If the
MODE button is pressed instead of the SEL push-
button, “NLO?” is replaced by “ND1?”. This now
allows an ‘NDU1’ loopback to be executed (if it is a
Doubler application) with the SEL push-button. If
this same routine is followed, all eight loopbacks
(NLOC, NDU1, NDU2, NREM, CLOC, CDU2, CDU1
and CREM) are presented and can be initiated in the
sequence listed. Pressing the MODE push-button
two more times yields the CRE and CLO loopback
options in the sequence listed. This interactive
push-button procedure permits any of the eight
HiGain loopbacks to be executed/activated. The
next loopback option is presented by pressing the
MODE push-button however, the previously
executed loopback will remain active until the SEL
push-button is pressed and a different loopback is
activated. If neither button is pressed for a period of
30 seconds and no loopback is in effect, the manual
loopback session terminates and the normal margin
displays reappear. If any loopback is in effect, the
30-second time-out is inhibited. The active loopback
and the manual loopback session continue until the
loopback times out in accordance with the user
selected LBTO setting. Only one loopback can exist
at any given time. Pressing both buttons again for
three seconds, terminates any active loopback, ends
the MANUAL loopback session and returns the
display to normal mode.
3.04
Note that these loopbacks can be
initiated from the RS-232 maintenance port
by choosing LOOPBACK MODE, option D, from the
main menu. This displays the Loopback Menu,
shown in Figure 22 from which you can initiate any
of the six loopbacks for this single doubler
application.
3.05
If the system should ever fail to respond to
any loopback command, go to the front
panel Option Setting mode and execute the
“DFLT/YES” command described in paragraph 5.05.
This will allow the system to respond to the loopback
commands. Reset the parameters to their original
non default values, if needed, at your convenience,
after the system resumes its proper response to
loopback commands.


