30
00 4776980 - 06/2018 - PN - Italy
INSTALLATION
6. Insert 6 mm plugs into the holes drilled and
¿
x
the base with the screws. (3) - (Fig. 6.1.4B).
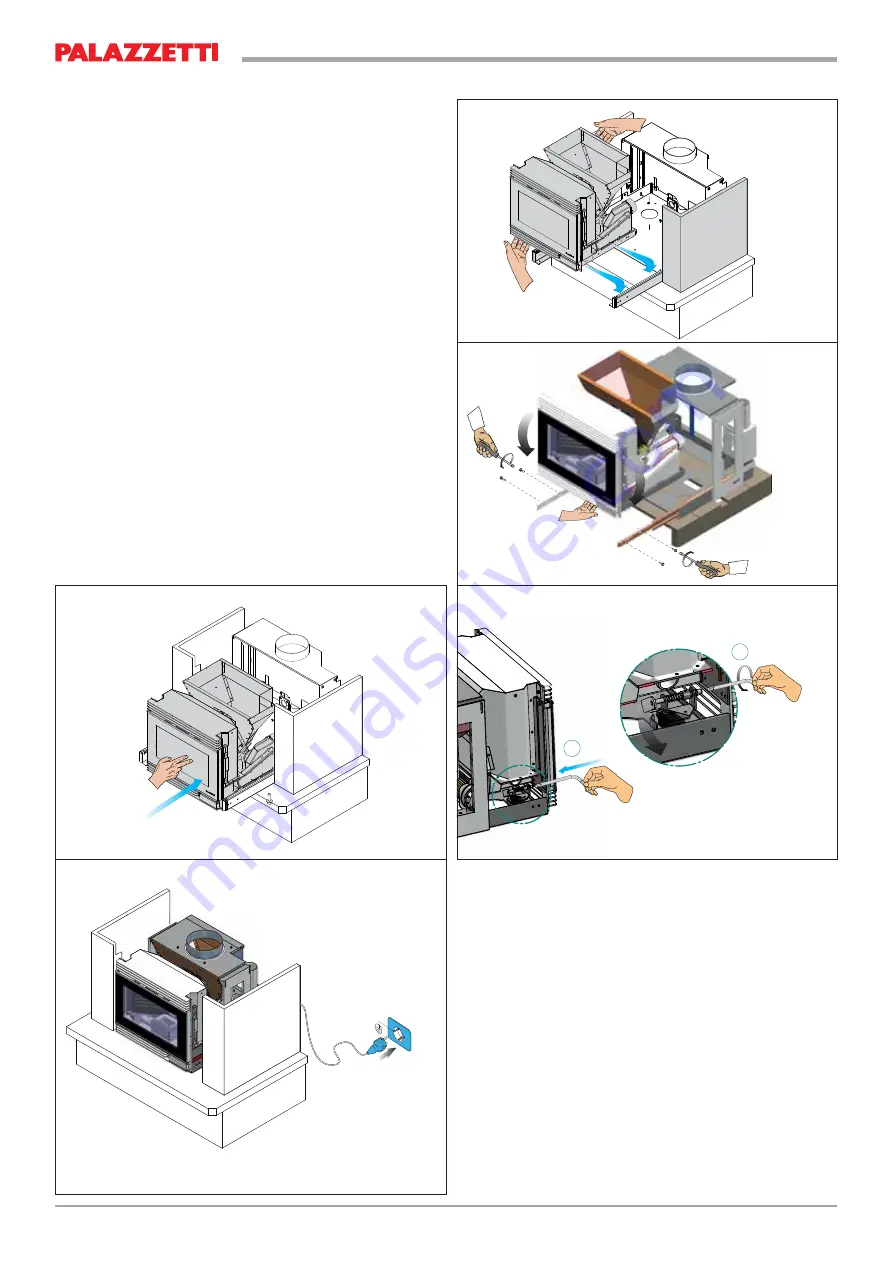
7. Reposition the machine in the sliding guides
(Fig. 6.1.5).
8. Reassemble
the
¿
xing bolts previously removed
(Fig. 6.1.6).
9. Push the machine to the end of the run of the
guides (Fig. 6.1.7).
10. Insert the Allen wrench (1) into the unlocked
unlocking seat; turn the locking lever clockwise
(2) to lock the guides (Fig. 6.1.8).
11. Predict the arrival of the electric line on the back
of the stove and connect the power supply cable
(Fig. 6.1.9).
1
2
Fig. 6.1.5
Fig. 6.1.6
Fig. 6.1.7
Fig. 6.1.8
Fig. 6.1.9


