Document #: 4100022 Revision: F
Page #: 15 of 21
10.6
Using the drive unit handle, raise the superconductive drive unit to an upright position.
While holding the drive unit in this position shift the latch toward the dolly/tank so that the
cross bar rests on the grooves in the guide rails (as shown in the forth segment of
DO NOT
put fingers under Locking Lever when locking the Drive Unit onto the Dolly
DO NOT
attempt to move the Dolly with the Drive Unit Handle while the system is
assembled (doing so might damage the drive unit). Always use the dolly push handle to
move the Dolly or Dolly/Drive Unit assembly.
10. DRIVE MOTOR OPERATION
11.1
Plug the power cord in to the proper power source identified on the nameplate of the
system.
11.2
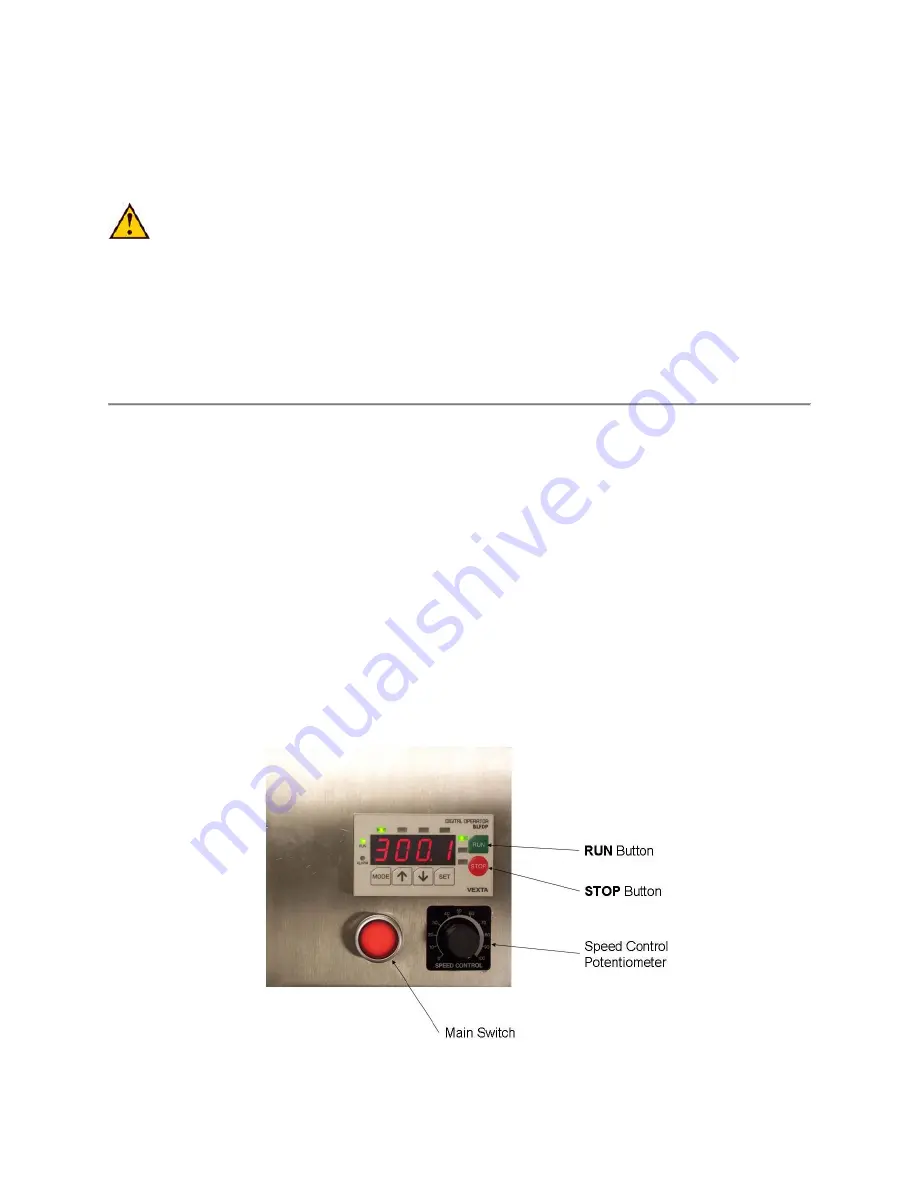
Place the knob of the speed control potentiometer in ZERO position by turning it all the
way counterclockwise.
11.3
Depress the round button of the main switch to energize the system (the button will
illuminate).
11.4
Press the RUN
(green)
button on the speed readout.
11.5
Set the speed of the mixer by turning the potentiometer clockwise until the desired
speed value illuminates on display.
11.6
To stop the motor press the STOP
(red)
button on the speed readout. Press the RUN
(green)
button to resume motor operation at a preset speed. See Figure 8 (below) for
details on the control Box.
Figure 8:
Control Box


