Using Graffiti 2 writing to enter data
25
■
The heavy dot on each shape shows where to begin the stroke. Certain
characters have similar shapes but different beginning and end points. Always
begin the stroke at the heavy dot. (You should not create the heavy dot; it is there
only to show you where to begin the stroke.)
■
Graffiti 2 includes symbols made with a single stroke and symbols made with
multiple strokes. With some multi-stroke symbols, the first stroke is the same as
a single stroke symbol. As a result, the down stroke for the letter “i” cannot be
recognized as an “i” at the end of the down stroke. The “i” will not be
recognized as an “i” until you enter another symbol that establishes, by its
shape or position, that the down stroke was not part of a two-stroke character
(such as “t” or “k”), or until a limited time window expires. Similarly,
recognition of a space symbol (a horizontal stroke from left to right) or a period
symbol after a down stroke is dependent upon where the down stroke was
drawn.
■
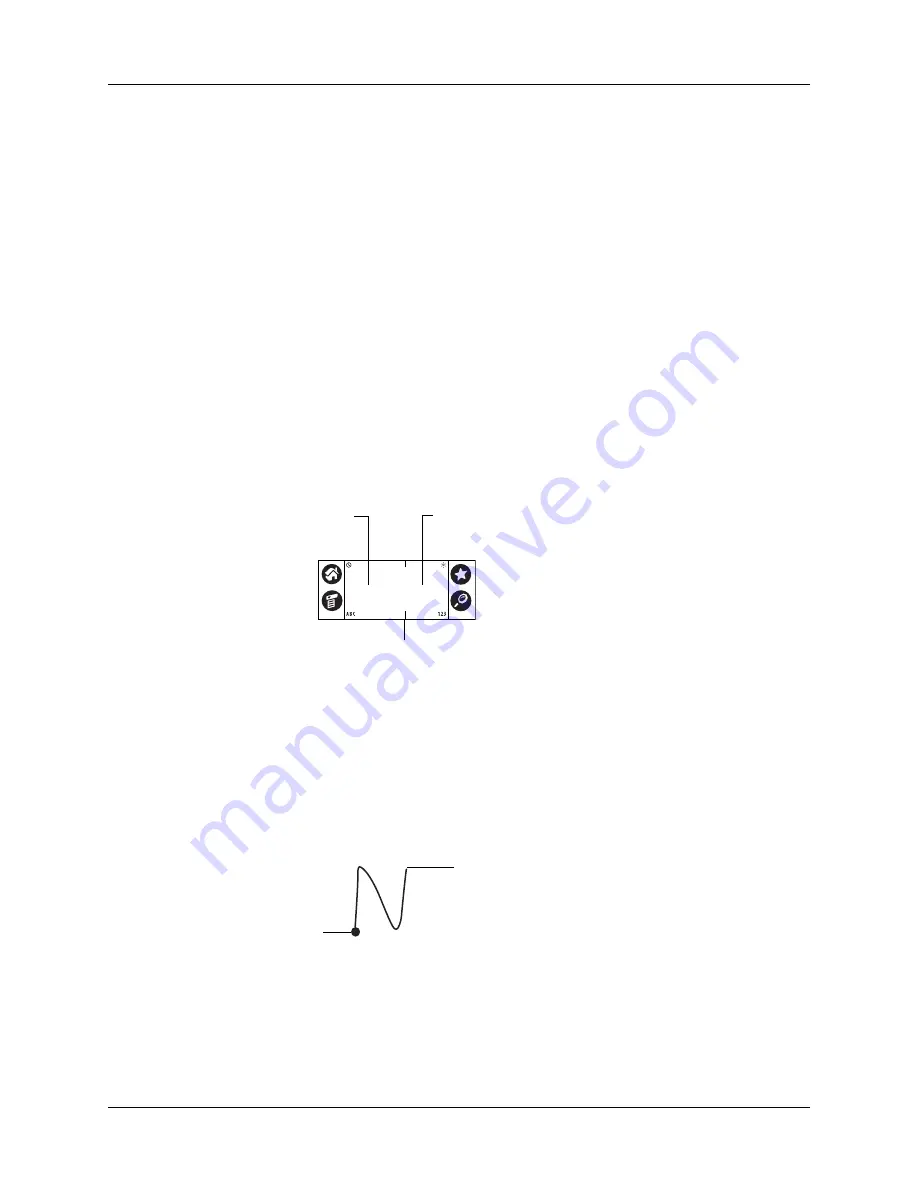
The Graffiti 2 writing area is divided into two parts: one for writing lowercase
letters and one for writing numbers. Capital letters are formed across the
imaginary line that divides the two areas. The small marks at the top and
bottom of the Graffiti 2 writing area indicate the two areas.
To write Graffiti 2 characters:
1.
Tap the screen where you want your text to appear.
You need to tap above the Graffiti 2 writing area, and you must see a blinking
cursor before you write the text.
2.
Use the tables on the following pages to find the stroke shape for the letter you
want to create. For example, the stroke shown below creates the letter
n
.
3.
Position the stylus in the left side of the Graffiti 2 writing area.
4.
Start your stroke at the heavy dot, and draw the first stroke shape as it appears
in the tables.
Write letters here
Write numbers here
Division marks
(Write capital letters here)
Start stroke
at heavy dot
Lift stylus
here
Summary of Contents for Tungsten T2
Page 1: ...Handbook for Palm Tungsten T2 Handheld...
Page 14: ...Contents xiv...
Page 16: ...About This Book 2...
Page 36: ...Chapter 2 Exploring Your Handheld 22...
Page 100: ...Chapter 5 Using Address Book 86...
Page 104: ...Chapter 6 Using Calculator 90...
Page 108: ...Chapter 7 Using Card Info 94...
Page 124: ...Chapter 8 Using Date Book 110...
Page 132: ...Chapter 9 Using Palm Dialer 118...
Page 144: ...Chapter 11 Using Memo Pad 130...
Page 162: ...Chapter 13 Using Palm Photos 148...
Page 320: ...Chapter 17 Using Palm VersaMail Personal E mail Software 306...
Page 330: ...Chapter 18 Using Voice Memo 316...
Page 356: ...Chapter 19 Using Web Browser Pro 342...
Page 462: ...Appendix A Maintaining Your Handheld 448...
Page 501: ...Index 487 Writing area on handheld 12 preferences 388 Writing See Entering data...
Page 502: ...Index 488...


