D
DE
ES
SC
CR
RIIP
PT
TIIO
ON
N
Palmgren 12
1
/
2
″
planer finishes rough-cut lumber to size and
planes soft and hardwoods up to 6
1
/
2
″
thick and 12
1
/
2
″
wide. Wood
feeds into two-blade cutterhead by rubber infeed/outfeed rollers.
Sturdy base construction and four-post design permits smooth
feeding and virtually snipeless planing. Planer comes with
enclosed, universal ball bearing, 1
1
/
4
HP motor with overload pro-
tection. Motor has ON/OFF switch with removable key to prevent
accidental start-up. Unit features easy hands-free replacement of
blades for safety and minimized downtime, built-in dust collector,
top mounted rollers for workpiece return and built-in carrying
handles. Planer takes cuts up to
3
/
32
″
per pass at 20 feet per minute.
Inch height scale has graduations in
1
/
16
″
increments, and metric
height scale has graduations in 1mm increments.
U
UN
NP
PA
AC
CK
KIIN
NG
G
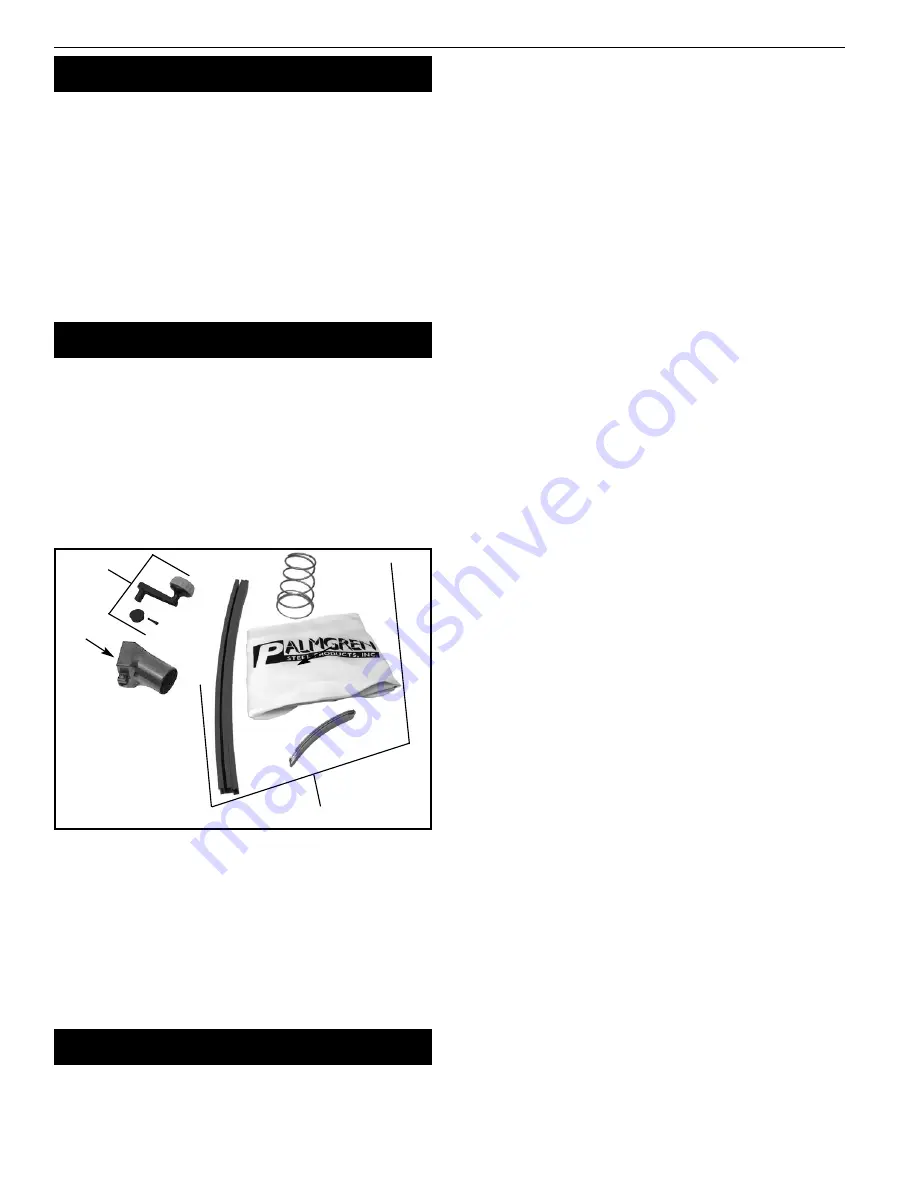
Refer to Figure 1.
Check for shipping damage. If damage has occurred, a claim must
be filed with carrier. Check for completeness. Immediately report
missing parts to dealer.
The planer comes assembled as one unit. Additional parts which
need to be fastened to planer should be located and accounted for
before assembling.
A. Handle Assembly with Bolt and Plug
B. Dust Chute with Screw
C. Half Bag Dust Collection Set
SPECIFICATIONS
Table Size. . . . . . . . . . . . . . . . . . . . . . . . . . . . . . . . . . . . . . . . . . . . . 12
1
/
2
x 12
1
/
2
″
Base Size . . . . . . . . . . . . . . . . . . . . . . . . . . . . . . . . . . . . . . . . . . . . . . 23
1
/
2
x13
1
/
2
″
Workpiece Width (max.) . . . . . . . . . . . . . . . . . . . . . . . . . . . . . . . . . . . . . 12
1
/
2
″
Workpiece Thickness (max.) . . . . . . . . . . . . . . . . . . . . . . . . . . . . . . . . . . 6
1
/
2
″
Maximum Depth of Cut . . . . . . . . . . . . . . . . . . . . . . . . . . . . . . . . . . . . . . .
3
/
32
″
Cuts Per Minute . . . . . . . . . . . . . . . . . . . . . . . . . . . . . . . . . . . . . . . . . . . 18,800
Feed Rate . . . . . . . . . . . . . . . . . . . . . . . . . . . . . . . . . . . . . . . . . . . . . . . . 20 FPM
Overall Dimensions . . . . . . . . . . . . . . . . . . . . 21
1
/
2
″
H x 23
1
/
2
″
W x 13
1
/
2
″
D
Weight . . . . . . . . . . . . . . . . . . . . . . . . . . . . . . . . . . . . . . . . . . . . . . . . . . . . . 70 lbs
S
SA
AF
FE
ET
TY
Y R
RU
UL
LE
ES
S
WARNING:
For your own safety, read all of the rules and precau-
tions before operating tool.
CAUTION:
Always follow proper operating procedures as defined
in this manual even if you are familiar with use of this or similar
tools. Remember that being careless for even a fraction of a second
can result in severe personal injury.
BE PREPARED FOR JOB
•
Wear proper apparel. Do not wear loose clothing, gloves, neck-
ties, rings, bracelets or other jewelry which may get caught in
moving parts of machine.
•
Wear protective hair covering to contain long hair.
•
Wear safety shoes with non-slip soles.
•
Wear safety glasses complying with United States ANSI Z87.1.
Everyday glasses have only impact resistant lenses. They are
NOT safety glasses.
•
Wear face mask or dust mask if operation is dusty.
•
Be alert and think clearly. Never operate power tools when
tired, intoxicated or when taking medications that cause
drowsiness.
PREPARE WORK AREA FOR JOB
•
Keep work area clean. Cluttered work areas invite accidents.
•
Do not use power tools in dangerous environments.
•
Do not use power tools in damp or wet locations. Do not
expose power tools to rain.
•
Work area should be properly lighted.
•
Proper electrical receptacle should be available for tool. Three-
prong plug should be plugged directly into properly grounded,
three-prong receptacle.
•
Extension cords should have a grounding prong and the three
wires of the extension cord should be of the correct gauge.
•
Keep visitors at a safe distance from work area.
•
Keep children out of workplace. Make workshop childproof. Use
padlocks, master switches or remove switch keys to prevent
any unintentional use of power tools.
TOOL SHOULD BE MAINTAINED
•
Always unplug tool prior to inspection.
•
Consult manual for specific maintaining and adjusting procedures.
•
Keep tool lubricated and clean for safest operation.
•
Remove adjusting tools. Form habit of checking to see that
adjusting tools are removed before switching machine on.
•
Keep all parts in working order. Check to determine that the
guard or other parts will operate properly and perform their
intended function.
•
Check for damaged parts. Check for alignment of moving parts,
binding, breakage, mounting and any other condition that may
affect a tool’s operation.
•
A guard or other part that is damaged should be properly
repaired or replaced. Do not perform makeshift repairs. (Use
parts list provided to order replacement parts.)
KNOW HOW TO USE TOOL
•
Use right tool for job. Do not force tool or attachment to do a
job for which it was not designed.
•
Disconnect tool when changing blades.
•
Avoid accidental start-up. Make sure that the switch is in the
OFF position before plugging in.
2
Palmgren Operating Manual & Parts List
84112
Figure 1 – Unpacking Planer
C
B
A
G


