10
Palmgren Operating Manual & Parts List
84315
OPERATION (CONTINUED)
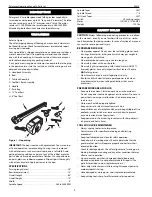
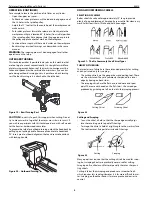
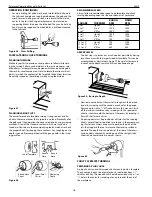
Three different chisel contact points are shown in Figure 27B. It will
be noted that when a chisel is above the workpiece center (or
below it) the work surface sweeps past the chisel edge at an angle
and tends to carry the chisel in one direction or the other along
the rest.
•
Only when the chisel contacts the work on the centerline, does
the work surface pass squarely under the chisel edge. This,
then, is the position in which it is easiest to hold the chisel
steady. To obtain this position, place the rest approximately
1
/
8
″
(thickness of chisel) below center.
USING THE GOUGE
Three gouges, the
1
/
4
,
1
/
2
and
3
/
4
″
sizes, are adequate for general
homeshop turning. Other sizes from
1
/
8
to 2
″
can be purchased to
provide more flexibility.
The chief use of the gouge is for rough circumference cutting of
raw stock down to a cylinder of working size. It is best to use this
tool for rapid cutting away of large areas of the workpiece. When
the tool is used this way, it does not produce a smooth surface.
With practice, the gouge can be used for cutting coves and the
shaping of long cuts.
•
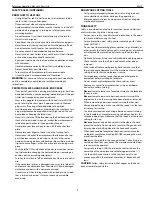
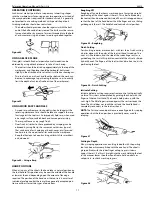
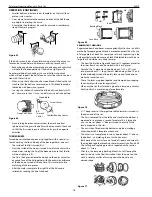
When used for cutting, the gouge is always held with the con-
vex side down. It should be rolled approximately 30° to 45° in
the direction in which it is being advanced along the rest and
the cutting edge should be slightly ahead of the handle.
USING THE SKEW
•
Two skews, the
1
/
2
and 1
″
sizes, are all that are needed for gen-
eral use. Other sizes are available.
This tool is nearly always used to make finished cuts, to cut vees
and beads, and to square shoulders. Properly used, it produces the
best finish that can be obtained with a chisel. It is not recommend-
ed for scraping because the edge tends to dull more quickly.
•
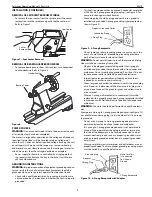
For finish cutting, the skew is held with the cutting edge con-
siderably in advance of the handle, bevel side down. Keep the
base of the bevel against the work. It is good practice is to
place the skew well over the work, pull it back until the edge
begins to cut, then swing the handle into position to advance
the cut.
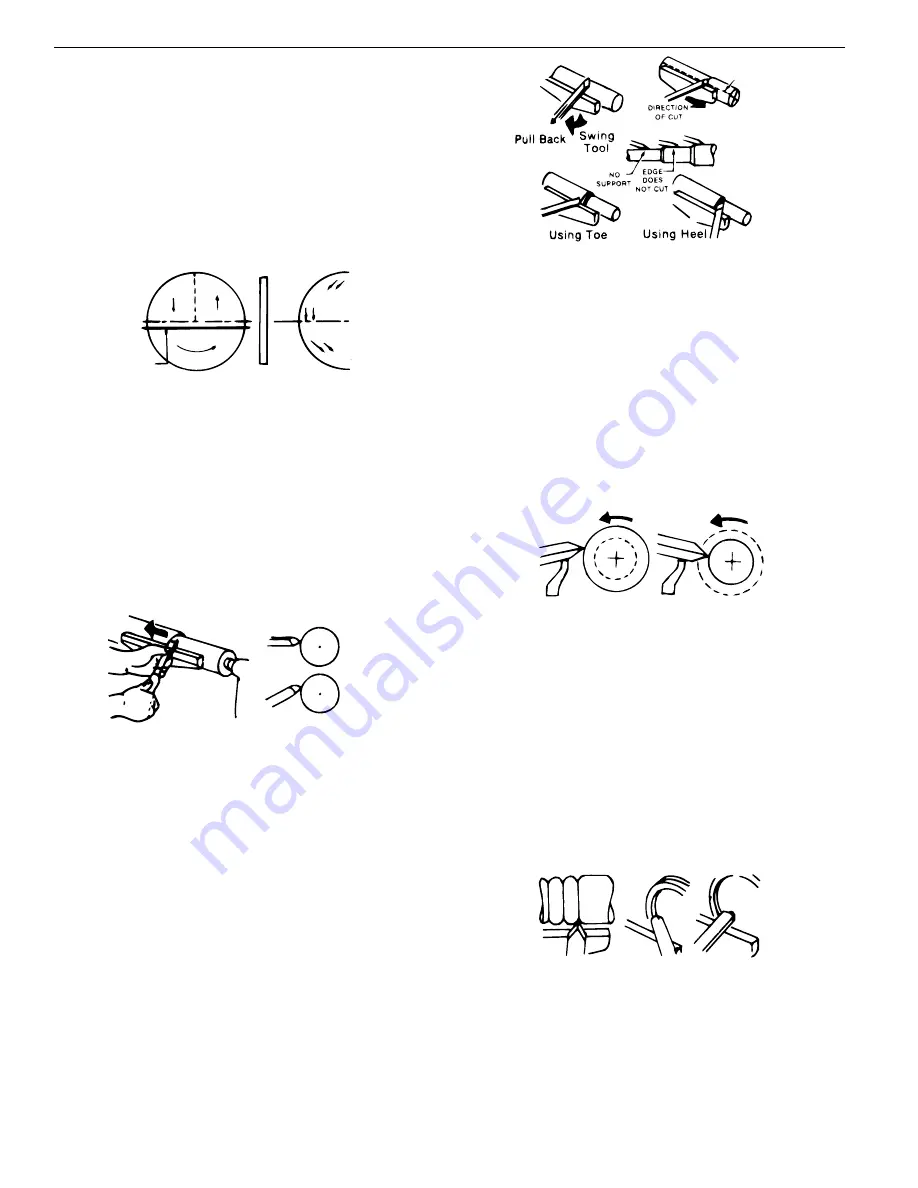
Both the toe and the heel of the skew can be used for taking light
cuts, but do not penetrate the wood too deeply without cutting
clearances. There is danger of burning the tip of the tool.
USING THE PARTING TOOL
The parting tool has just one primary purpose: to cut into the
workpiece as deeply as desired, or all the way through to make a
cut-off. It is, therefore, a very narrow tool (
1
/
8
″
wide) and shaped to
cut its own clearance so that the edge will not be burned. When
used for scraping, however, the parting tool should be backed off
regularly to prevent overheating.
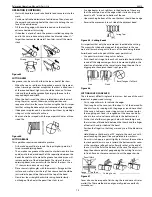
Unlike the gouge and skew, the parting tool is seldom held with
the bevel against the work. Since the amount of stock removal is
small, a support for the bevel is not necessary.
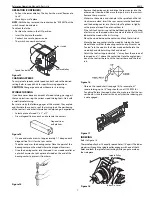
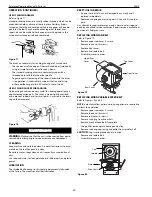
The tool is simply fed into the work at an angle (for cutting), or
pointed at the workpiece center (for scraping). It can be held easily
in one hand.
USING THE SCRAPING CHISELS
•
A
1
/
2
″
wide spear point chisel, a
1
/
2
″
wide round nose chisel, and
a 1
″
wide flat nose chisel complete the list of tools ordinarily
used by craftsmen and hobbyists.
Each of these scraping chisels can be purchased in various other
sizes for special purposes. All are very useful for diameter scraping
operations and for circumference scraping when cutting methods
cannot be employed.
•
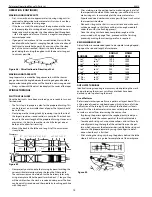
The spear point is used for fine scraping and delicate opera-
tions such as the forming of beads, parallel grooves and shal-
low vees.
•
Edges and bowl contours can be rounded with the round nose
chisel.
•
Any flat surface can be scraped with the flat nose chisel.
USING SHAPER OR MOULDING KNIVES
•
An old chisel can be made to serve as a holder for shaper or
moulding knives.
Figure 27
Fig. 27A
Fig. 27B
Rest
Figure 28
Cutting Edge
Advanced
Wrong
Right
Figure 29
Figure 30
Cutting
Scraping
Figure 31
Spear
Point
Round
Nose
Flat nose


