9
GETTING STARTED
SAFETY / SPECIFICATIONS
OPERATION
TROUBLESHOOTING
MAINTENANCE / REPAIR
ASSEMBLY / INSTALLATION
NOTE:
It is easier to thread the bolt part of the handle
on first, then attach the handle to it using the spring
loaded Allen head cap screw provided.
Angle scale
and pointer
Figure 11
23. Attach the Angle Scale Pointer (#16) to the sanding disc
frame with the M4 Phillips pan head Screw (#14). The pre-
drilled hole is located just below the angle gauge. As shown
above in figure 11.
Figure 12
Adjust the pointer after the table is set to 90°, see page 12.
The disc table will tilt from 45° to 90°. As shown above in
figure 12.
Install the belt sanding table
Tables should be adjusted to a distance of
about 1/16” away from the sanding disc or
belt to prevent accidents if work or your fingers get stuck in
the gap while the sander is running.
24. An adjustable Handle and Washer (#25, 26) are supplied to
hold the Sanding Belt Table (#79) in position on the Sanding
Frame (#64).
25. Position the sanding belt table around the belt, and so that
it’s lower bracket with the curved slot is in position with the
threaded hole in the frame.
Figure 13
26. Fasten the table in place. Thread the bolt portion of the
locking adjustable handle through the bracket’s slot and into
the threaded hole of the sanding frame as shown in figure 13.
The table will tilt from 45° to 90°.
NOTE:
See page 12 for additional information on
adjusting the sanding tables.
Install the tool holders
Wrench holder
Miter guage
holder
Figure 14
Holders (#88, 90) for convenient storage of the Miter Gauge and
Wrenches are supplied. Mount them onto the back of the Belt
Frame Casting (#64) with the Phillips Screws supplied (#89).
Mounting the sander to a workbench or stand
If during operation there is any tendency
for the sander to tip over, slide or walk on
the supporting surface, the sander must be properly
mounted to a workbench or stand.
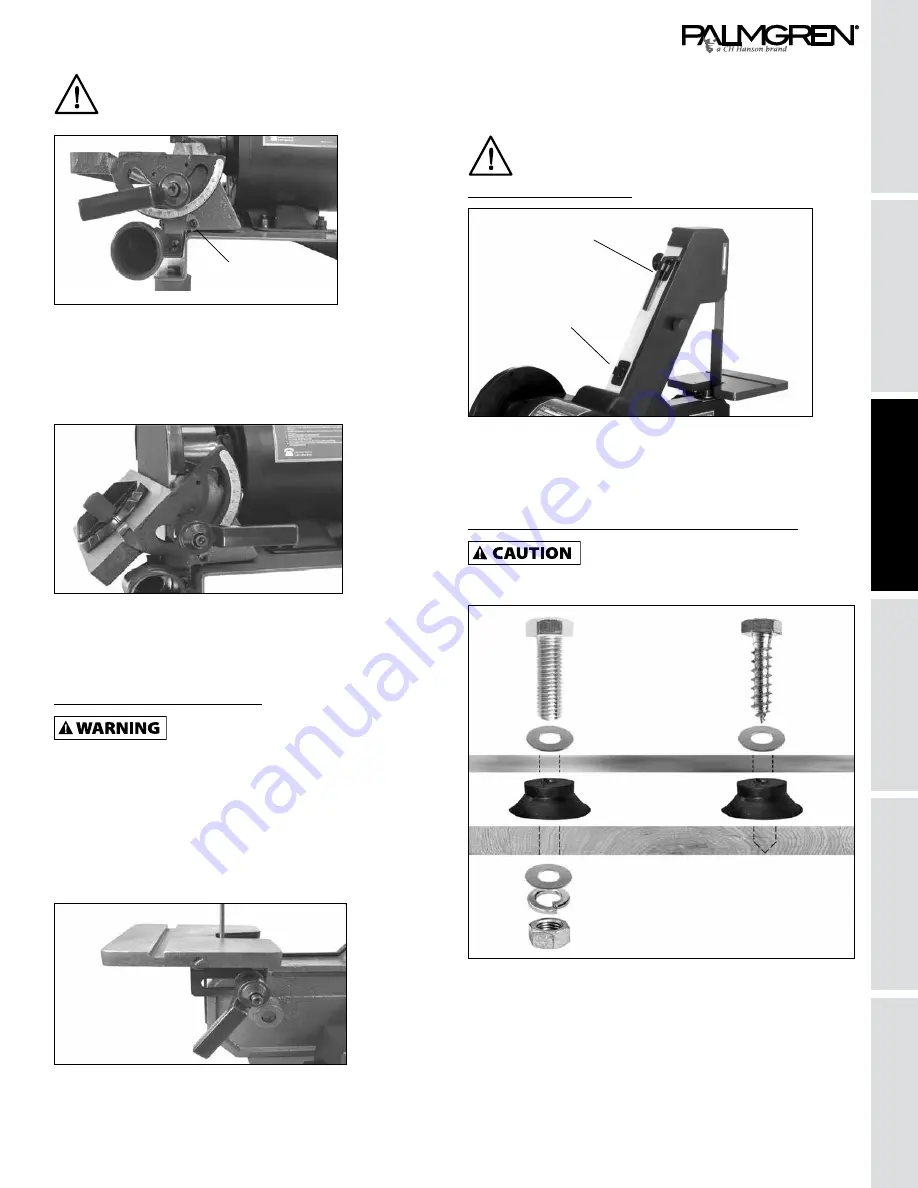
Machine
bolt
Lag
screw
Washer
Rubber feet
Washer
Lock washer
Nut
Workbench
Figure 15
1. Rubber feet are fastened to this sander prior to shipping.
They may, or may not, be used when attaching the sander to
a bench or stand.
2. Position the sander on the workbench.


