Page 25
TU2506
ǀ
TU2807V
US
Provide sufficient space for assembly and operating staff as well as for material transport.
Also allow for accessibility for setting and maintenance works.
Make sure that the main power supply for the machine is freely accessible.
Provide for sufficient illumination (minimum value: 300 lux, measured at the turning tool tip).
In case of insuffiecient intensity of illumination provide for additional illumination i.e. by a
separate workplace illuminator.
INFORMATION
The main power supply for the lathe has to be freely accessible for quick action disconnect.
3.4.2 Load suspension point
Fasten the load suspension gear around the lathe bed.
Make sure that you distribute the loads evenly so that the lathe cannot turn over while lift-
ing.
Make sure that no add-on pieces or varnished parts are damaged due to the load suspen-
sion.
3.4.3 Installation
WARNING!
Danger of crushing and overturning. The lathe must be installed by at least 2 people.
Check the horizontal orientation of the base of the lathe with level.
Check that the foundation has sufficient floor-load capacity and rigidity.
ATTENTION!
Insufficient rigidity of the foundation leads to the superposition of vibrations between
the machine and the foundation (natural frequency of components). Insufficient rigidity
of the entire lathe assembly also rapidly causes the lathe to reach critical speeds, with
unpleasant vibrations, leading to bad turning results.
Position the lathe on the intended foundation.
Secure the lathe to the foundation or stand of the machine using the through holes.
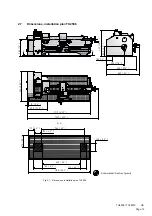
"Dimensions, installation plan TU2506“ on page 19,
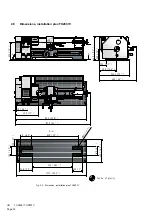
"Dimensions, installation plan TU2807V“ on page 20.
3.5
First use
WARNING!
Personnel and equipment may be endangered if the lathe is first used by inexpert
personnel.
We do not take liability for damage caused by incorrect commissioning.
Summary of Contents for TU 2506
Page 1: ...US Item No 9684509 Operating manual Version 2 2 2 Lathe...
Page 74: ...Page 74 TU2506 US...
Page 92: ...Page 92 TU2506 TU2807V US 8 Wiring diagrams 8 1 TU2506 Fig 8 1 Wiring diagram TU2506...
Page 93: ...Page 93 TU2506 TU2807V US 8 2 TU2807V 230V Fig 8 2 Wiring diagram TU2807V...
Page 98: ...Page 98 TU2506 TU2807V US...


