©
Palo
Alto
Networks,
Inc.
Panorama
6.1
Administrator’s
Guide
•
205
Administer
Panorama
Monitor
Panorama
Step
2
Configure
Panorama
for
SNMP
monitoring.
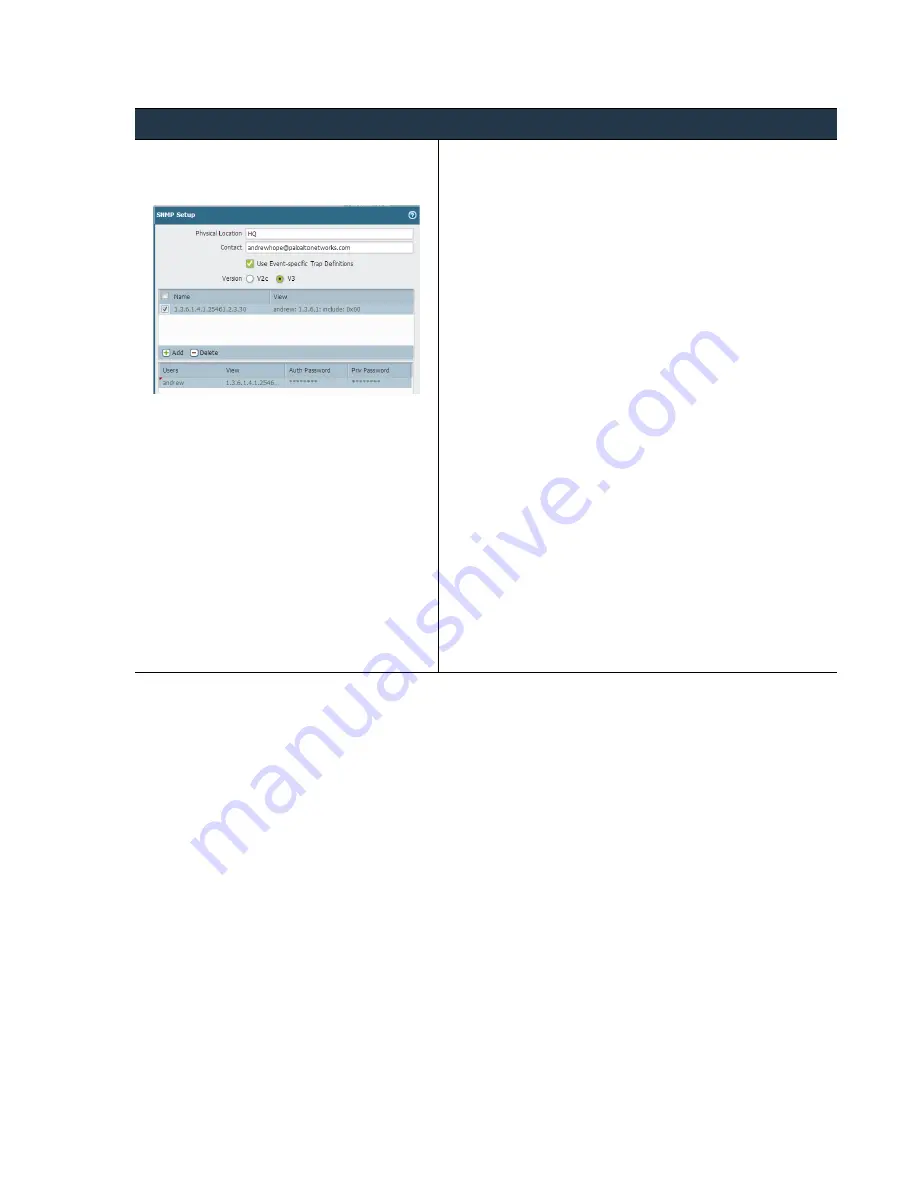
This
screen
shot
is
for
SNMP
v3.
1.
Select
Panorama > Setup > Operations
.
2.
In
the
Miscellaneous
section,
select
SNMP Setup
.
3.
Enter
a
text
string
to
specify
the
physical
Location
of
Panorama.
4.
Add
the
address
of
one
or
more
administrative
Contact
.
5.
Select
the
SNMP
Version
and
then
enter
the
configuration
details
as
follows
(depending
on
which
SNMP
version
you
are
using)
and
then
click
OK
:
•
V2c
—Enter
the
SNMP Community String
that
will
allow
the
SNMP
manager
access
to
the
SNMP
agent
on
Panorama.
The
default
value
is
public
.
However
because
this
is
a
well
‐
known
community
string,
it
is
a
best
practice
to
use
a
value
that
is
not
easily
guessed.
•
V3
—You
must
create
at
least
one
View
and
one
User
in
order
to
use
SNMPv3.
The
view
specifies
which
management
information
the
manager
has
access
to.
If
you
want
to
allow
access
to
all
management
information,
just
enter
the
top
‐
level
OID
of
.1.3.6.1
and
specify
the
Option
as
include
(you
can
also
create
views
that
exclude
certain
objects).
Use
0xf0
as
the
Mask
.
Then
when
creating
a
user,
select
the
View
you
just
created
and
specify
the
Auth
Password
and
Priv Password
.
The
authentication
settings
(the
community
string
for
V2c
or
the
username
and
passwords
for
V3)
configured
on
Panorama
must
match
the
values
configured
on
the
SNMP
manager.
6.
Click
OK
to
save
the
settings.
7.
Click
Commit
,
and
select
Panorama
as
your
Commit Type
to
save
the
changes
to
the
running
configuration.
Set
Up
SNMP
to
Monitor
Panorama
(Continued)


