78
•
Panorama
6.1
Administrator’s
Guide
©
Palo
Alto
Networks,
Inc.
Set
Up
Administrative
Access
to
Panorama
Set
Up
Panorama
Enable
Certificate
‐
Based
Authentication
for
the
Web
Interface
As
a
more
secure
alternative
to
using
a
password
to
authenticate
a
user,
enable
certificate
‐
based
authentication
for
securing
access
to
Panorama.
With
certificate
‐
based
authentication,
a
digital
signature
is
exchanged
and
verified,
in
lieu
of
a
password.
Use
the
following
instructions
to
enable
certificate
‐
based
authentication.
This
example
uses
a
CA
certificate
generated
on
Panorama.
To
enable
certificate
‐
based
authentication,
you
must
configure
Panorama
to
use
a
client
certificate
profile
(as
described
in
the
following
procedure).
When
you
enable
a
client
certificate
profile,
each
administrator
must
use
a
client
certificate
for
access
to
Panorama.
Enable
Certificate
‐
Based
Authentication
for
the
Web
Interface
Step
1
Generate
a
CA
certificate
on
Panorama.
To
use
a
certificate
from
a
trusted
third
‐
party
or
enterprise
CA,
you
must
import
that
CA
certificate
in
to
Panorama.
To
generate
a
CA
certificate
on
Panorama:
1.
Log
in
to
the
Panorama
web
interface.
2.
Select
Panorama > Certificate Management > Certificates
and
click
Generate
.
3.
Enter
a
Certificate Name
.
Add
the
IP
address
or
FQDN
of
Panorama
for
listing
in
the
Common Name
field
of
the
certificate.
Optionally,
you
can
change
the
cryptographic
settings,
and
define
certificate
options
such
as
country,
organization,
or
state.
4.
Make
sure
to
leave
the
Signed By
option
blank
and
select
the
Certificate Authority
option.
5.
Click
Generate
to
create
the
certificate
using
the
details
you
specified
above.
Step
2
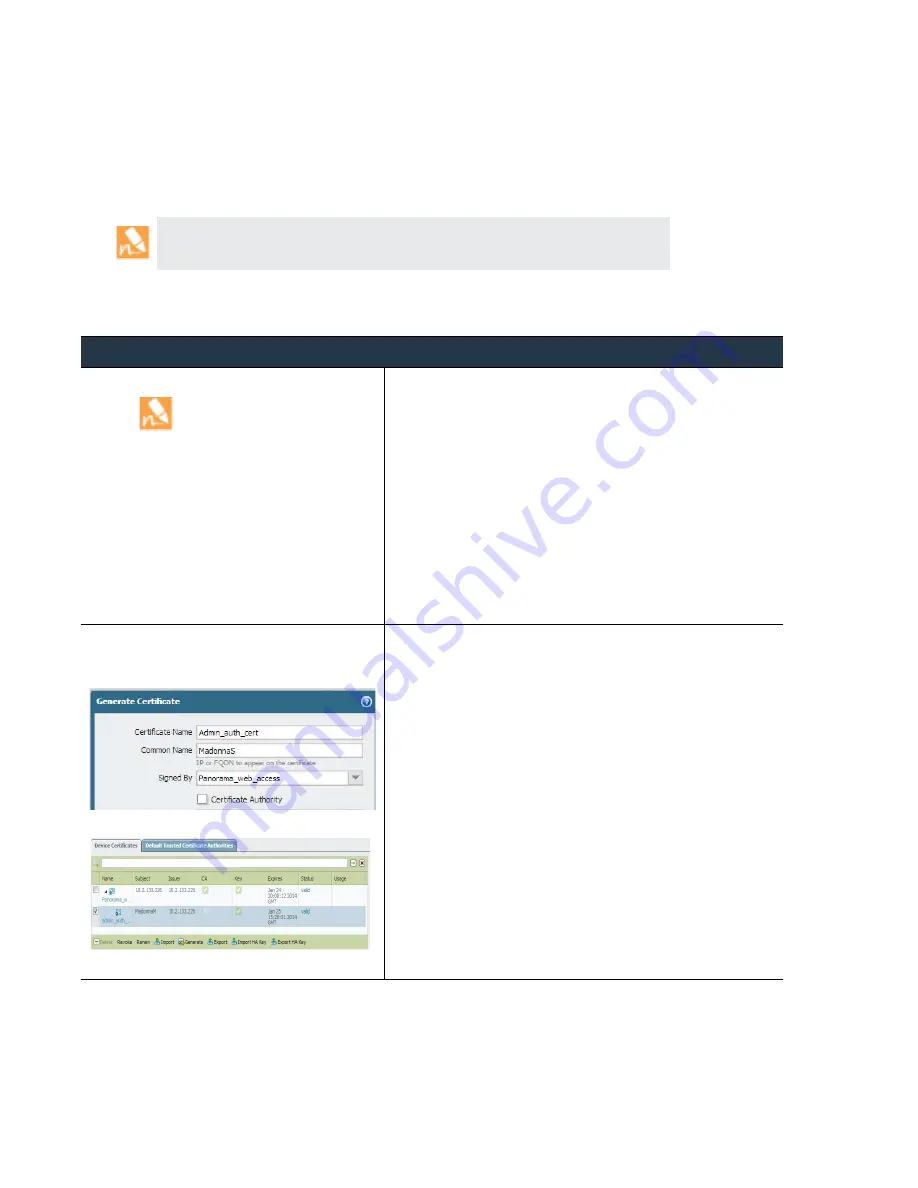
Create
and
export
the
client
certificate
that
will
be
used
to
authenticate
an
administrator.
1.
Use
the
CA
certificate
to
generate
a
client
certificate
for
the
specified
administrative
user.
a.
Select
Panorama > Certificate Management > Certificates
and
click
Generate
.
b.
In
the
Common Name
field,
enter
the
name
of
the
administrator
for
whom
you
are
generating
the
certificate.
The
name
syntax
must
match
the
format
used
by
the
local
or
external
authentication
mechanism.
c.
In
the
Signed by
field,
select
the
same
CA
certificate
that
you
created
in
.
d.
Click
Generate
to
create
the
certificate.
2.
Export
the
client
certificate
you
just
generated.
a.
Select
the
certificate
that
you
just
generated
and
click
Export.
b.
To
encrypt
the
private
key,
select
PKCS12
as
the
File
Format
.
c.
Enter
a
passphrase
to
encrypt
the
private
key
and
confirm
the
entry.
d.
Click
OK
to
export
the
certificate.


