background image

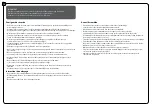
Forberelse af opsætningstedet!

• 

Din base eller grundlag skal være fladt, jævnt og 

forberedt, før produktet installeres. 

• 

Produktet skal opsættes på en solid base for at 

fungere. Vi anbefaler at anvende beton eller et 
trægulv som base.

*

  Vi anbefaler at tjekke regler og lign. omkring 

opsætning af produktet i dit område. Vi anbefaler 
desuden at tjekke, hvorvidt du vil skulle indsende 
formularer, eller om tilladelser kræves, før 
opsætning af produktet.

• 

Rengør overfladen for løse genstande, som 

kunne komme i vejen 

• 

Gør overfladen jævn 

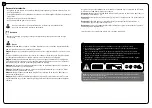
Se to anbefalede muligheder herunder 


solid base (beton / betonvæg / 

trykbehandlet træ / trædæk) 

(tegning)


B

  Jordoverflade (græs / jord)  

(tegning)

• 

For nemt at kunne tilgå området, hvor 

produktet sættes sammen, så sørg for at du 
rydder op omkring samlingsstedet.

• 

Sørg for at du har mindst 5 cm mellem 

produktet base og kanten af dit grundlag.

A


Fastgør produktet til den solide base, du vælger, 
ved hjælp af passende skruer og stik eller 
murværk ankre.  (Medfølger ikke)

B


Fastgør produktet til jordoverfladen ved hjælp af 
passende stifter. (Medfølger ikke)

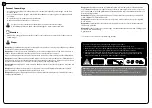
Come preparare il sito: 

• 

 La piattaforma o le fondamenta devono essere 

appiattite, livellate e preparate prima di installare il 
prodotto!

• 

 Il il prodottodeve essere costruito su una 

superficie solida per garantire una resa adeguata. 
Si raccomanda l’uso di piattaforme in cemento o in 
legno.

*

  Si prega di verificare le restrizioni e le 

convenzioni vigenti nella vostra zona, per quanto 
riguarda la costruzione dei questo prodotto. 
Inoltre, si raccomanda di verificare se sia necessario 
inviare dei moduli e/o ottenere dei permessi prima 
di iniziare la costruzione del prodotto.


Rimuovere qualunque ostacolo dalla superficie 

scelta 


Livellare la superficie del terreno 


Si prega di far riferimento alle 2 seguenti opzioni 

consigliate: 

A

 Base solida (calcestruzzo / muro di cemento/

legno trattato a pressione/ piano di legno) 

(disegno)

Superficie del terreno (erba/terreno)

 (vedi 

immagine)


Per consentire un comodo accesso durante 

l’assemblaggio, assicurarsi di ripulire la superficie 
attorno al sito di assemblaggio del prodotto.


Assicurarsi di avere a disposizione almeno 5 cm 

(2 pollici) tra la base del il prodottoe il bordo delle 
fondamenta.

A


Ancorare il prodotto alla solida base di vostra scelta 
utilizzando viti e tasselli adeguati o ancoraggi in 
muratura. (Non forniti)

B


Fissare il prodotto alla superficie del terreno 
usando dei pioli adatti. (Non forniti)

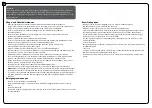
Príprava miesta!                                                                                                                      


Než začnete Produkt stavať je potrebné si pred 

pripraviť, zarovnať a uhladiť podklad alebo základy! 


produkt musí byť postavená na pevnej 

rovnej ploche, aby sa mohla správne používať. 
Odporúčame vám ako podklad použiť betón alebo 
drevo. 

*

  Odporúčame vám skontrolovať obmedzenia 

alebo nariadenia na výstavbu produkt vo vašom 
okolí. Taktiež vám odporúčame, aby ste si zistili, či 
potrebujete vyplniť akékoľvek formuláre, alebo či 
potrebujete povolenie pred výstavbou produkt. 


Vyčistíte  povrch  od  rôznych  prekážok                                                                                      


Zarovnajte plochu    


Pozri  nižšie  na  2  odporúčané  možnosti              


A

 Pevné základy (betón / betónová stena / 

tlakom ošetrené drevo / drevená podlaha) 

(obrázok)

B

 Povrch zeme (tráva / pôda) 

(výkres)

• 

Uistite sa, že ste vyčistili okolie miesta na montáž 

produkt, aby ste k montáži mali ľahký prístup.


Uistite sa, že máte najmenej 5 cm medzi 

podkladom produkt a okrajom základov.

A


Zaistite výrobok pomocou vhodných skrutiek a 
hmoždiniek na pevnom základe podľa vlastného 
výberu. (Nie sú v balení)

B


Výrobok zaistite použitím vhodných kolíkov do 
zeme. (Nie sú v balení)

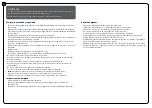
Voorbereiding van de site!

• 

De basis of de fundering moet worden 

afgemalen, geëgaliseerd en geprepareerd 
voorafgaand aan het installeren van de het 
product! 

• 

De het product moet op een solide, vlakke 

ondergrond worden gebouwd om goed te 
kunnen functioneren. We raden aan om beton of 
een houten dek als basis te gebruiken. De loods 

*

  We raden u aan te controleren of er 

beperkingen of convenanten zijn voor het 
bouwen van een het product in uw regio. 
Daarnaast adviseren wij u om te controleren of u 
formulieren moet insturen of dat er vergunningen 
vereist zijn voordat u de het product gaat 
bouwen.

• 

Ontruim het oppervlak van losse voorwerpen

• 

Breng het grondoppervlak waterpas 

Zie hieronder 2 aanbevolen opties 

A

  Een stevige basis (beton / betonnen muur 

/ met druk behandeld hout / houten terras)


(tekening)

B

  Grondoppervlak (gras/grond) 

(tekening)

• 

Om tijdens de montage gemakkelijk toegang 

te krijgen, moet u het oppervlak rondom de 
montageplaats van de het product schoonmaken.

• 

Zorg ervoor dat u ten minste 5 cm (2 in.) tussen 

de basis van de het product en de rand van uw 
fundering zit.

A


Bevestig het product aan de solide basis van uw 
keuze met geschikte schroeven en pluggen of 
bevestigingsklauwen. (Niet meegeleverd)

B


Bevestig het product aan de grond met behulp 
van geschikte pluggen. (Niet meegeleverd)

DA

NL/BE

IT

SK

Summary of Contents for Snap & Grow 8x8

Page 1: ...retourner le produit au magasin Veuillez communiquer avec En caso de que falten piezas o alguna est da ada no devuelva el producto a la tienda Por favor contacte con For All Customer Services Please C...

Page 2: ...83172 _18 06 _MV 9 2 Snap Grow 8 x8 4 Extension EXTENDABLE PRODUCT Wind Resistance 90km hr 55ml hr SnowLoad 15lbs ft2 115kg m2 Light Transmission 90...

Page 3: ...SNG 8 Series Extending the Greenhouse 8 x8 8 x12 8 x16 8 x20 Index 8 x8 8 x8 8 x12 4 Ext 8 x8 8 x16 4 Ext x 2 8 x8 8 x20 4 Ext x 3 8 x 4 Ext 8 x 8 8 x 8 8 x 8 8 x 8 8 x 8 8 x 4 8 x 4 8 x 4...

Page 4: ...SNG 8 Series Extending the Greenhouse 8 x24 8 x28 8 x32 Index 8 x8 8 x28 4 Ext x 5 8 x 4 Ext 8 x 8 8 x8 8 x24 4 Ext x 4 8 x8 8 x32 4 Ext x 6 8 x 8 8 x 8 8 x 8 8 x 4 8 x 4 8 x 4...

Page 5: ...kt mit geeigneten D beln am Boden nicht mitgeliefert Preparaci n del Sitio La base o cimentaci n debe estar aplanada nivelada y lista antes de instalar el producto El producto debe construirse sobre u...

Page 6: ...elle tillatelser f r du oppset produktet Rydd omr det for s ppel og skrot Jevn ut bakken Se under 2 Anbefalte alternativer A Solid fundament betong betongvegg trykkbehandlet tre tredekk tegning B Fund...

Page 7: ...e tasselli adeguati o ancoraggi in muratura Non forniti B Fissare il prodotto alla superficie del terreno usando dei pioli adatti Non forniti Pr prava miesta Ne za nete Produkt stava je potrebn si pre...

Page 8: ...i zidnimi sidri niso prilo eni B Izdelek pritrdite na povr ino tal s pomo jo ustreznih klinov niso prilo eni Przygotowanie miejsca budowy Przed monta em produkt pod o e lub fundamenty nale y wyr wna w...

Page 9: ...A O 5 2 A B Vietnes sagatavo ana Pirms produkts uzst d anas atbalsta punktam vai pamatam ir j b t nol dzin tam izgludin tam un sagatavotam Lai veiktu pareizi produkts ir j b t uzceltai uz cietas virs...

Page 10: ...o etren drevo dreven podlaha SL Trdna osnova Beton Betonska stena Pre an les Lesen podest ET Tahke alus Betoon Betooni sein R huga t deldud puit Puidust tekk HU Szil rd alap beton beton fal nyom skeze...

Page 11: ...panels Make Sure there are no hidden pipes or cables in the ground before inserting the pegs not supplied Do not touch overhead power cables with the aluminum profiles If color was scratched during a...

Page 12: ...tep 22 Slide the panel 566 till the end of the rail and insert it into it s final position as shown in illustartion a and b When encountering the information icon please refer to the relevant assembly...

Page 13: ...urer sa stabilit Assurez vous que les vis et les ancrages sont compatibles avec les fondations Instructions de nettoyage Pour nettoyer le produit utilisez une solution d tergente douce et rincez l eau...

Page 14: ...er glisser les panneaux dans les profils Ne pulv risez pas les panneaux en polycarbonate Utilisez un maillet en caoutchouc si n cessaire FR Etape 19 Fa tes attention bien assembler la fen tre comme in...

Page 15: ...nden bevor Sie die Bolzen einsetzen nicht im Lieferumfang enthalten Ber hren Sie keine freiliegende Leitungen mit den Aluminiumprofilen Wenn die Farbe bei der Montage zerkratzt wurde so kann dies in O...

Page 16: ...mmihammer zur Hilfe Beim Aufbau wird Ihnen das Informationssymbol begegnen Fu r zus tzliche Kommentare und Unterstu tzung beziehen Sie sich bitte auf die entsprechende Aufbaustufe Schritt 19 Achten Si...

Page 17: ...es de la pared Aseg rese de que no haya tuber as o cables ocultos en el suelo antes de insertar las estacas no suministradas No toque cables el ctricos en altura con los perfiles de aluminio Si se ray...

Page 18: ...l lubricante de silicona con el fin de ayudar a deslizar los paneles en los perfiles No pulverice los paneles de policarbonato Utilice un martillo de goma si es necesario Cuando encuentre el cono de i...

Page 19: ...HE...

Page 20: ...HE 849 848 4 848 816 5 4 a b 8 836 835 8 23 95 10 840 841 11 566 12 809 20 19 20 809 809 566 22 b 23 23 815 814 24 43 450 25 466 411 466 411 3 2 2 466...

Page 21: ...cm Inc Qty Item cm Inc Qty 840 199cm 78 x 1 841 199cm 78 x 1 847 151 5cm 593 4 x 4 845 119cm 461 2 x 1 851 116cm 45 1 2 x 1 8 8 842 115cm 45 1 4 x 1 8 8 843 115cm 45 1 4 x 1 850 154cm 60 1 2 x 4 814 9...

Page 22: ...x 6 852 56cm 22 x 2 560 x 2 559 x 2 562 x 2 833 53cm 20 3 4 x 4 856 119cm 4 x 2 858 119cm 4 x 1 854 120cm 4 x 2 47 x 2 48 x 2 49B x 1 49A x 1 34 x 1 46 x 2 363 x 1 spare x 1 spare x 1 450 32mm x 2 44...

Page 23: ...1 465 x 16 99 x 1 x 1 95 56 5cm 221 2 x 1 T100 x 1 2 1 21 x 4 spare x 1 23 x 9 23 spare x 2 x 6 spare x 2 2 2 22 x 14 spare x 1 x 4 spare x 1 466 x 76 spare x 4 x 52 spare x 2 411 x 20 spare x 2 x 12...

Page 24: ...245cm 961 2 365 cm 1433 4...

Page 25: ...b a 847 817 1 824 846 a b b b b b b b 856 856 856 847 847 847 847 817 817 845 846 824 824 817 824 855 855 x 1 846 x 1 824 856 x 2 a a a 847 x 4 824 x 3 817 x 3 845 x 1...

Page 26: ...a 2 a a a a a a a a a a 245cm 961 2 365 cm 1433 4 924 x 10 c c x 1 c c 0 1 2 3 4...

Page 27: ...90 0 90 0 847 847 847 Front Back 847 847 847 847 7020 7021 7023 7022 90 0 90 0 90 0 90 0 3 7020 x 1 7021 x 1 7022 x 1 7023 x 1...

Page 28: ...1 b a 4 X2 848 849 b a a a b 849 849 848 848 849 848 848 x 2 849 x 2 847 U P U P U P UP a...

Page 29: ...1 2 a 5 c d a b c 100 b 816 816 816 816 816 816 821 822 X2 822 821 d 816 x 2 858 858 858 858 858 x 1 x 2 100...

Page 30: ...a 813 847 b 813 6 b a a a 813 813 813 813 b b b 813 x 4 854 854 854 854 x 2...

Page 31: ...1 2 b a a a a a 836 x 4 836 836 836 836 836 836 836 7...

Page 32: ...X2 X2 23 4 17 a 4 b 2 3 2 3 23 23 23 23 23 23 835 x 4 a a b 23 23 23 23 23 23 a a b 23 23 23 23 23 23 835 835 835 836 835 23 23 x 6 835 835 835 836 835 835 835 835 835 8...

Page 33: ...b a 1 2 c c a a a a a b b b c c b b b 9 23 23 836 x 6 835 x 6 23 x 9 835 835 835 836 835 835 836 835 835 836 836 a 836 836 836 23 Carton Spacer...

Page 34: ...b 10 a 95 95 95 95 Carton Spacer...

Page 35: ...a 1 2 838 841 b 840 841 21 21 21 21 c 21 95 21 x 4 b 841 x 1 840 x 1 838 x 1 839 x 1 a a a c c c c 839 838 841 840 11...

Page 36: ...a b 566 x 4 a a b b b a b 1 2 a 566 566 566 566 566 566 566 843 12...

Page 37: ...1 2 837 x 1 566 x 2 a b 1 2 a a b 837 837 566 566 837 a b 817 824 13 14...

Page 38: ...22 b 1 2 22 1 2 b b b a a 22 22 x 5 844 x 2 844 844 837 841 840 a 15 7020 7021 7020 7021 7023 7022...

Page 39: ...a a 562 562 559 559 560 560 b b b 559 x 2 560 x 2 562 x 2 16 b a b c...

Page 40: ...2 2 a a a a b 22 2 1 b 842 x 1 843 x 1 22 x 5 843 842 837 843 1 2 22 a 843 842 17...

Page 41: ...b b b b 850 Click 850 850 850 850 b b 850 x 4 561 x 2 a a 850 561 561 850 561 a 18...

Page 42: ...a 2 2 b 22 809 558 558 809 22 a b b 558 22 22 809 a 22 809 x 1 x 1 22 x 4 558 x 1 x 1 809 809 558 558 19...

Page 43: ...22 b a 1 2 1 2 22 22 809 558 99 99 22 x 4 99 x 1 99 x 1 20 558...

Page 44: ...X2 b a b 809 563 x 1 X1 a b 563 563 563 563 563 21...

Page 45: ...566 566 566 566 566 a b 566 x 15 x 7 566 a a b a a a a a b b b b 22...

Page 46: ...b a 23 23 23 2 3 a a a a a a b b b b b 23...

Page 47: ...b Click a 815 815 814 814 815 x 2 814 x 4 814 814 x 2 830 830 830 24...

Page 48: ...a b c b Click a c Click Click 49 47 447 47 450 447 48 46 49A 49B 49B x 1 48 x 2 49A x 1 447 x 6 34 x 1 450 x 2 47 x 2 46 x 2 363 x 1 34 363 25...

Page 49: ...Click a1 833 833 851 a2 851 x 1 852 x 2 833 x 4 852 833 833 852 a a a a 26...

Page 50: ...a b a b a b 422 x 16 465 x 16 464 x 8 a b x4 465 x4 464 x2 422 x2 464 x2 a b 840 839 27 7mm...

Page 51: ...29B 29A x4 28 x 5 559 x 1 29B x33 29A x 2 560 x 1 28 29B a b Click Click L R a b a a a 29A 29B 29B 29A 29B 28 28 28 28 28 L R 565 564 28...

Page 52: ...462 462 x4 a b 466 x2 411 x2 a b a b x2 466 x 8 411 x 8 462 x 4 9cm 31 2 7 5cm 215 16 29...

Page 53: ...a b 463 x4 463 x 4 a b a b a b a b 30...

Page 54: ...300 300 101 101 101 101 a a 300 x 2 101 x 2 a 300 b 300 31...

Page 55: ...a 466 411 256 a 461 x 4 256 x 4 66 x 8 411 x 4 b b a a a b b 32 b 256 466 461 x4...

Page 56: ...459 461 x 4 466 x 4 459 a b PUSH PUSH PUSH a a a a a b 461 x 4 c 461 x 2 927 b b b b 459 459 x 2 461 x 68 8469 x6 x 4 8469 466 x 68 927 x 4 c 927 c c c 33 8469 8469...

Page 57: ...34 8582 4008 8582 8582 8582 x 4 8583 x 2 8583 8583 4 cm 1 5 3 cm 1 2 4008 4 cm 1 5 3 cm 1 2 8582 a b c d 4008 x 8 x2...

Page 58: ...35 411 411 x 4 x 4 8550 x 4 x 4 466 x2 x2 8550 466 x 4 x 4 x 2 8584 8584 8550 466 411 8550 466 411 8582 8582...

Page 59: ...10mm 36 b 466 x 2 461 x 2 x 2 x 2 a 466 461 466 461...

Page 60: ...466 x 2 461 x 2 x 2 x 2 10mm c b a 466 461 37 466 461 466 461...

Page 61: ...461 x 8 a a a a c b c b 256 x 4 x 4 256 x 2 466 x 20 411 x 12 466 x 2 411 x 2 c c b c 927 927 466 x 2 411 x 2 a 38 461 466 256 256 256...

Page 62: ...850 461 x 8 466 x 8 39 a a 98B x 2 a b x2 466 x4 461 x4 98B 98B...

Page 63: ...Version9 2_6 2018...

Reviews: