background image

OPERATION 

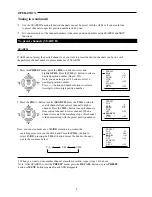
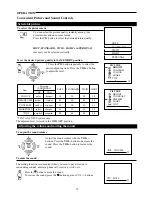
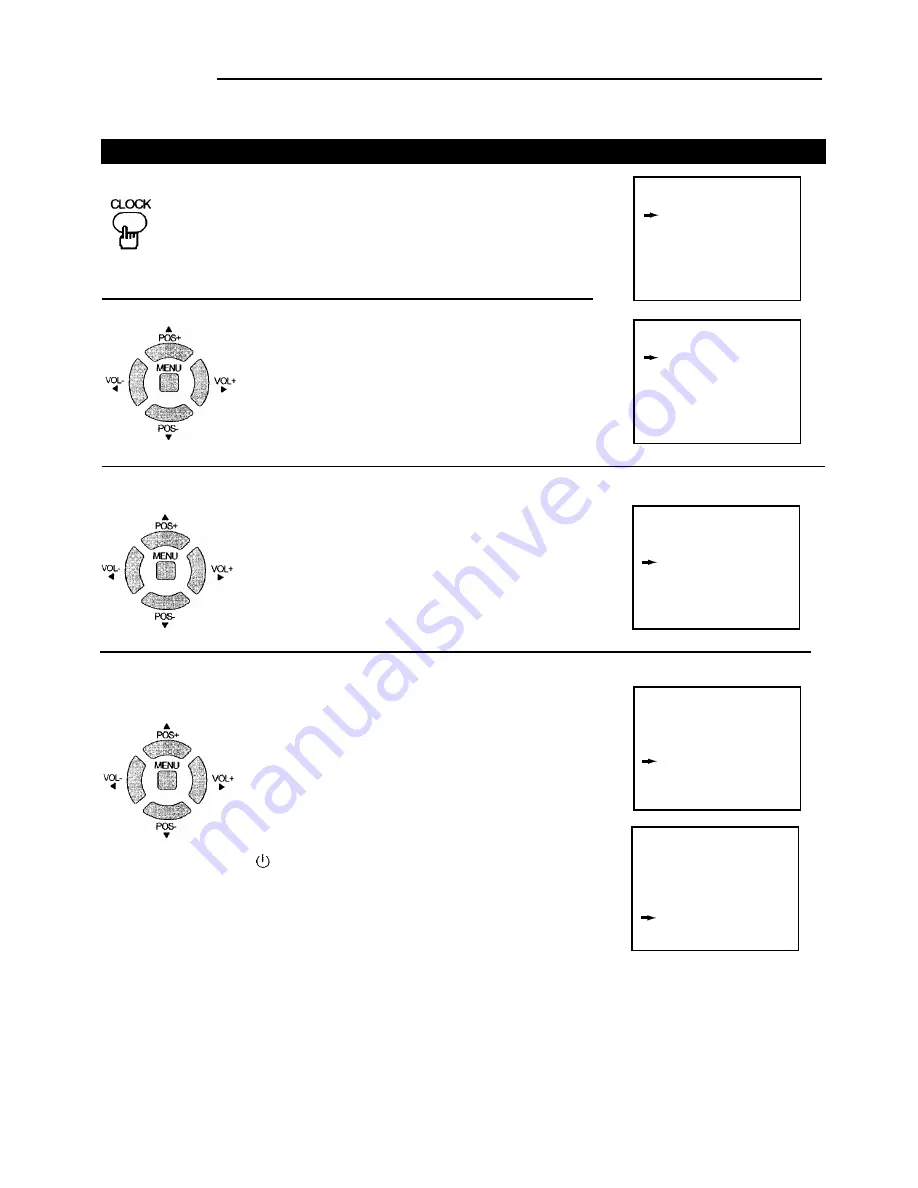
CLOCK SETTING

Press the 

CLOCK

 button to display the 

CLOCK

 menu. (Or press the

MENU

 button repeatedly to select and highlight 

CLOCK 

icon, and press

VOL+/-

 button to enter into the 

CLOCK

 menu.)

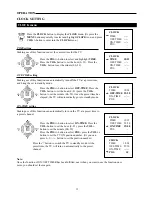
TIME setting

Making use of this function can set the current time for the TV.

Press the 

POS+/-

 button to select and highlight 

TIME

.

Press the 

VOL-

 button to set the hour (0~23). Press the

VOL+

 button to set the minute (00~59).

OFF-TIME setting

Making use of this function can automatically turn off the TV at a preset time,
and bring the set to standby mode.

Press the 

POS+/-

 button to select 

OFF-TIME

. Press the

VOL-

 button to set the hour (0~23) press the 

VOL+

button to set the minute (00~59). Once the preset time has
elapsed, the TV will automatically go into standby mode.

ON-TIME setting

Making use of this function can automatically turn on the TV at a preset time to
a preset channel. 

Press the 

POS+/-

 button to select 

ON-TIME.

 Press the

VOL-

 button to set the hour (0~23), press the 

VOL+

button to set the minute (00~59).
Press the 

POS+/-

 button to select 

POS.

, press the 

VOL+/-

button to set the TV ON position number. (Or you can
press 0~9, --/--- button to set the position number).

Press the     button to switch the TV to standby mode. At the
preset time, the TV will turn on automatically to the preset
channel.

Note: 

Once the function of ON/OFF TIMER has been fulfilled, next when you want to use the function once
more, you should set them again.

CLOCK menu

13

CLOCK 

TIME

18:24

OFF-TIME 22:50

ON-TIME
POS

--:--

-

CLOCK 

TIME

--:--

OFF-TIME

--:--

ON-TIME
POS

--:--

-

CLOCK 

TIME

18:23

OFF-TIME

--:--

ON-TIME
POS

--:--

-

CLOCK 

TIME

18:25

OFF-TIME

22:50

ON-TIME

POS

19:00

-

CLOCK 

TIME

18:24

OFF-TIME

22:50

ON-TIME

POS

--:--

10

Summary of Contents for 5120B

Page 1: ...9313 7111 FAX 02 9313 7555 www palsonic com au PALSONIC CUSTOMER SERVICE TELEPHONE AUSTRALIA 1300 657 888 51CM CORDLESS REMOTE COLOUR TELEVISION MODEL 5120G 5120B 5120S OWNER S MANUAL Type Tested Ele...

Page 2: ...te controller 5 Back view 4 Front view 4 Battery installation 3 Antenna connection 3 Cautions for safety 2 Features 1 INTRODUCTION NOTES FOR OPERATION INSTALLATION APPEARANCE Contents OPERATION To pre...

Page 3: ...remote control Sleep timer ON Timer OFF Timer Non signal blue background display and AUTO POWER OFF function Games built in 500 year calendar function Child Lock function Channel swap 2 1 Program scan...

Page 4: ...excessive moisture to prevent tire disaster or electric shock Avoid using the set in very warm or damp places Never use it in a bathroom There exists High Voltage in this TV set Do not remove the cove...

Page 5: ...t directly Note When you connect the outdoor aerial cable to the aerial terminal on the TV set please turn off the power switch on the TV while connecting the antenna lead In thunder and lightning wea...

Page 6: ...Front view Back View Appearance Note Functions of MENU TV AV VOL CH are also provided to the remote controller 4...

Page 7: ...Remote Controller Appearance 5...

Page 8: ...e last TV mode picture and sound setting mode and preset channels all are memorised Therefore next time you turn on the TV the TV will work in the previous setting mode If you directly pressed the mai...

Page 9: ...MENU button on the interface there are three icons in red background colour PRESET SWAP LOCK which indicates these items can not be used in AV mode ASM Automatic Search Memory PRESET 1 Press the POS...

Page 10: ...the POS button to select SEARCH Press the VOL button to search channels from current channel to higher channel Press the VOL button to search channels from current channel to lower channel When a chan...

Page 11: ...e POS button to select POS then select the unwanted program number with the VOL button you want to fine tune 2 Press the POS button to select FINE then press and hold the Note if some channel s colour...

Page 12: ...elect proper colour system Every time you press the C SYS button the colour system will change in the sequence below AUTO PAL N3 58 N4 43 9 PAL B G 3 If the sound is abnormal press the S SYS button to...

Page 13: ...er To select a three digit position number 100 255 Press button to display on the screen then press the channel number Using the POS buttons Press POS to select lower position numbers POS to select hi...

Page 14: ...Press the PIC button repeatedly to select the desired adjusting item Press the VOL button to adjust the level softer sharper 16 32 34 34 TINT purplish greenish 00 00 00 TINT is for NTSC system only Th...

Page 15: ...ill automatically go into standby mode ON TIME setting Making use of this function can automatically turn on the TV at a preset time to a preset channel Press the POS button to select ON TIME Press th...

Page 16: ...e With the B B blue background function ON the TV will automatically turn blue when no signal is being received In SYSTEM menu press the POS button to select B B Press the VOL button to change the B B...

Page 17: ...ing quickly while pressing MENU button can rotate the cube When at the screen s left playing area one row has been filled with the cubes the row will flash and disappear and your score will gain one p...

Page 18: ...e one person and your score will gain 100 points When stage 1 is finished the screen will show Mission Complete and BOSS STAGE At this time you should pay attention to the quick bullet shot by the fly...

Page 19: ...ock Enter into CHILD LOCK menu move the cursor to ENTER PASSWORD input the password if the password is correct the cursor will move to next row automatically Pressing POS button can change the program...

Page 20: ...n to select POSITION B item press 0 9 or button to input the channel number which you want to swap to Press the POS button to select EXCHANGE item press VOL button to confirm Then channel A and channe...

Page 21: ...ther the front or rear terminals but not both Press the AV TV button on the remote controller to select AV mode AV and corresponding colour system will be displayed on the screen The picture displayed...

Page 22: ...an electronics game machine a broadcast station etc Super receiving is set ON When the signals are stronger turning on the super receiving may cause distorted picture or picture is disturbed or lost...

Page 23: ...pecifications Power supply Power consumption CRT TV system channel range System VHF PAL B G 2 12 Colour system Sound output Accessory AC 240V 50Hz 23 51cm UHF 21 69 PAL BG NTSC AV One remote controlle...

Page 24: ...PALSONIC CORPORATION PTY LTD 1 JOYNTON AVENUE WATERLOO NSW 2017 AUSTRALIA TEL 02 9313 7111 FAX 02 9313 7555 www palsonic com au PALSONIC CUSTOMER SERVICE TELEPHONE AUSTRALIA 1300 657 888 604 A21Y3 01...

Reviews: