background image

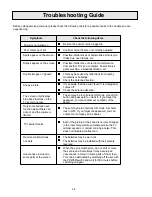
Troubleshooting Guide

29

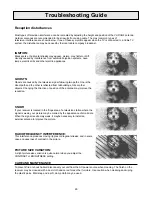
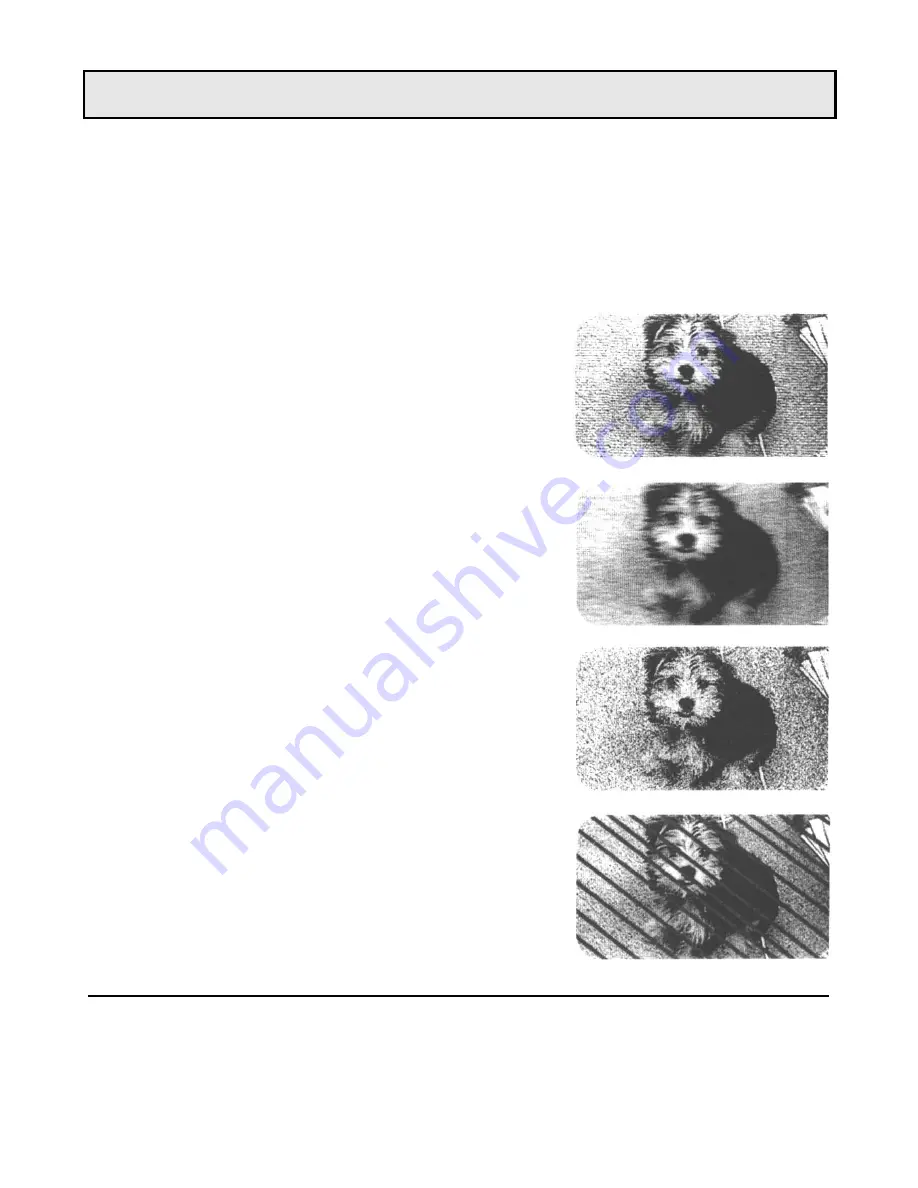
Reception disturbances

Most types of television interference can be remedied by adjusting the height and position of the VHF/UHF antenna.
Outdoor antennas are recommended for best results if not using cable. The most common types of
television interference are shown below. If one of these symptoms appear when the TV is connected to a Cable TV
system, the disturbance may be caused by the local cable company broadcast.

IGNITION:

Black spots or horizontal streaks may appear, picture, may flutter or drift.
Usually caused by interference from automobile ignition systems, neon
lamps, electric drills and other electric appliances. 

GHOSTS:

Ghosts are caused by the television signal following two paths. One is the
direct path and the other is reflected from tall buildings, hills or other
objects. Changing the direction or position of the antenna may improve the
reception.

SNOW:

If your receiver is located in the fringe area of a television station where the
signal is weak, your picture may be marred by the appearance of small dots.
When the signal is extremely weak, it maybe necessary to install an
external antenna to improve the picture.

RADIO FREQUENCY INTERFERENCE:

This interference produces moving ripples or diagonal streaks, and in some
cases, causes loss of contrast in the picture.

PICTURE SIZE VARIATION:

A slight picture size variation is quite normal when you adjust the
CONTRAST or BRIGHTNESS setting.

CARE AND MAINTENANCE

To  prevent fire or shock hazard, disconnect your unit from the AC power source when cleaning. The finish on the
receiver may be cleaned with a dust cloth and cared for as other furniture. Use caution when cleaning and wiping
the plastic parts. Mild soap and a soft, damp cloth may be used.

Summary of Contents for 7610WSPF

Page 1: ...LIA TEL 02 9313 7111 FAX 02 9313 7555 www palsonic com au PALSONIC CUSTOMER SERVICE TELEPHONE AUSTRALIA 1300 657 888 76CM CORDLESS REMOTE COLOUR TELEVISION MODEL 7610WSPF OWNER S MANUAL Type Tested El...

Page 2: ...puts Power on off Turning on Turning off Selecting Input Signal Watching AV program Switching from AV to TV Tuning in Automatic tuning Manual Tuning Fine tuning Setting colour system Setting sound sys...

Page 3: ...al broadcasts option Teletext ON Timer OFF Timer Real Clock with teletext signal Channel swap Child lock option Hotel lock option Digital comb filter SMV scan velocity modulation option Black stretch...

Page 4: ...epartment in your local area When cleaning dust off the picture tube disconnect the power first You can wipe lightly with a piece of dry clean and soft cloth Avoid exposing the set to direct sunlight...

Page 5: ...e than 10cm from the walls to the TV set to ensure adequate ventilation If the power cord or the plug is damaged contact a qualified service department for service When the TV set is to be left unatte...

Page 6: ...ntrols 4 Front Side AV2 scart AV1 scart AV output VIDEO AUDIO L MONO R POWER SWITCH INDICATOR Volume up Volume down Channel up Channel down AV TV Menu Earphone jack AV3 input S VHS input S VIDEO VIDEO...

Page 7: ...rn to TV mode Clear the menu Channel up down Menu item select GREEN teletext Sound mode select Contrast control teletext Picture mode select Brightness control teletext Retain on screen display Mix te...

Page 8: ...s recommended that the 75 ohm coaxial cable be used to eliminate interference and noise which may occur due to radio wave conditions The aerial cable should not be bundled with the power cord and the...

Page 9: ...rn out remove the batteries Do not throw the batteries into a fire Dispose of used batteries in the specified manner Do not drop dampen or disassemble the remote control Effective range of the Remote...

Page 10: ...jacks press 0 AV button until AV3 appears on the screen The figure below shows how to connect the SVHS input to video equipment To access the unit connected to these jacks press 0 AV button until AV3...

Page 11: ...equipped with 21 pin Scart you can connect it by using the 21 pin Scart Convertor supplied as illustrated above The figure below shows how to connect the AV2 SCART to video equipment Note If the equip...

Page 12: ...or 0 9 digit button on the remote controller and the TV set is turned on In STANDBY mode you can also press Channel up down or AV TV button on the set to turn on the set Press the Power Switch on the...

Page 13: ...urce input through AV1 AV2 is RGB signal the OSD is AV1 RGB AV2 RGB When AV3 S VIDEO is used the OSD is AV3 S VHS When the TV set is in AV mode there are three ways for you to switch back to TV mode a...

Page 14: ...l be preset and stored into memory automatically After automatic tuning the set will return to the first channel program During automatic tuning pressing OK button will stop the process Note Before Au...

Page 15: ...wards lower frequency the VOL towards higher frequency When a channel is located the searching stops and the channel is stored in the specified position number Notes In manual tuning you can also use...

Page 16: ...to display Tuning menu 3 Press CH to select Manual tuning press VOL to enter into Manual tuning sub menu Press CH to select Fine tune Press VOL to begin fine tuning until the best possible picture and...

Page 17: ...to select a proper colour system If some channel s sound is abnormal it may be that the setting of the sound system is wrong please do the following steps to set a proper sound system Enter into Speci...

Page 18: ...18 and so on You can edit the channel programs in your favourite order Press MENU repeatedly until Program sort menu appears Press CH to select Swap Prg A use VOL to select a program number or you can...

Page 19: ...CH button the channel number increases Press CH button the channel number decreases Use previous program button Press this button to switch between the current program and the previous one Press this...

Page 20: ...st Notes Tint is only for NTSC system Turning on SVM will greatly improve picture s sharpness SVM is an optional function Picture mode Favourite Picture mode Mild Picture mode Dynamic Picture mode Sta...

Page 21: ...Use MUTE button If you want to mute the sound press button on the remote To resume the sound press this button again Press MENU repeatedly to display Sound menu Press CH or CH to select desired adjus...

Page 22: ...SOUND button the sound mode will switch between Dual I and Dual II Press button to enter into earphone state in this state sound is outputted through earphones and speakers sound is muted Press the b...

Page 23: ...ically switch to standby mode at a preset time In Timer menu press CH to select Timer off Use Digit Buttons to set the OFF time In wrong in inputting press RED button to cancel and input again At the...

Page 24: ...ss CH to select Timer set Use Digit buttons to set the time If wrong in inputting press RED button to cancel and input again Press CH to select Prg no use VOL to set a program number or directly input...

Page 25: ...right This is due to the earth s magnetic field or position of your TV To rectify you can do the following Enter into Special functions menu Press CH to select Rotate Press VOL to rotate the picture u...

Page 26: ...only displays blue back with Lock menu bar To unlock input the correct password to set the Child lock to OFF Note the preset password can be changed the steps are shown below After you set the lock to...

Page 27: ...level is the level you set just before you enter the Hotel ON mode If you want to change the volume limitation set the Hotel to OFF and then adjust the volume then enter into ON mode again To exit th...

Page 28: ...VOL button to select card press OK button the card will be turned over If the second card you turned over is different with the first card it will cover again unless the same two cards are selected On...

Page 29: ...INDEX In teletext mode press the button the index page will appear 4 REVEAL Some pages have sections that are concealed such as the answers to riddles or puzzles To see the concealed part press the bu...

Page 30: ...the antenna direction The screen only displays blue back Buttons on the TV set can not act The set may be in child lock ON mode Use LOCK button and password to unlock it If you forget the password yo...

Page 31: ...d from tall buildings hills or other objects Changing the direction or position of the antenna may improve the reception SNOW If your receiver is located in the fringe area of a television station whe...

Page 32: ...50Hz 200W 968 W x 564 H x 570 D 66 76cm TV system channel range System PAL B G VHF UHF 2 12 21 69 TELETEXT Colour System Stereo bilingual system Sound output WST TELETEXT PAL BG NTSC AV NICAM BG IGR B...

Page 33: ...PALSONIC CORPORATION PTY LTD 1 JOYNTON AVENUE WATERLOO NSW 2017 AUSTRALIA TEL 02 9313 7111 FAX 02 9313 7555 www palsonic com au PALSONIC CUSTOMER SERVICE TELEPHONE AUSTRALIA 1300 657 888 604 TA3263 00...

Reviews: