


13
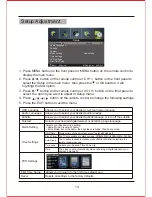
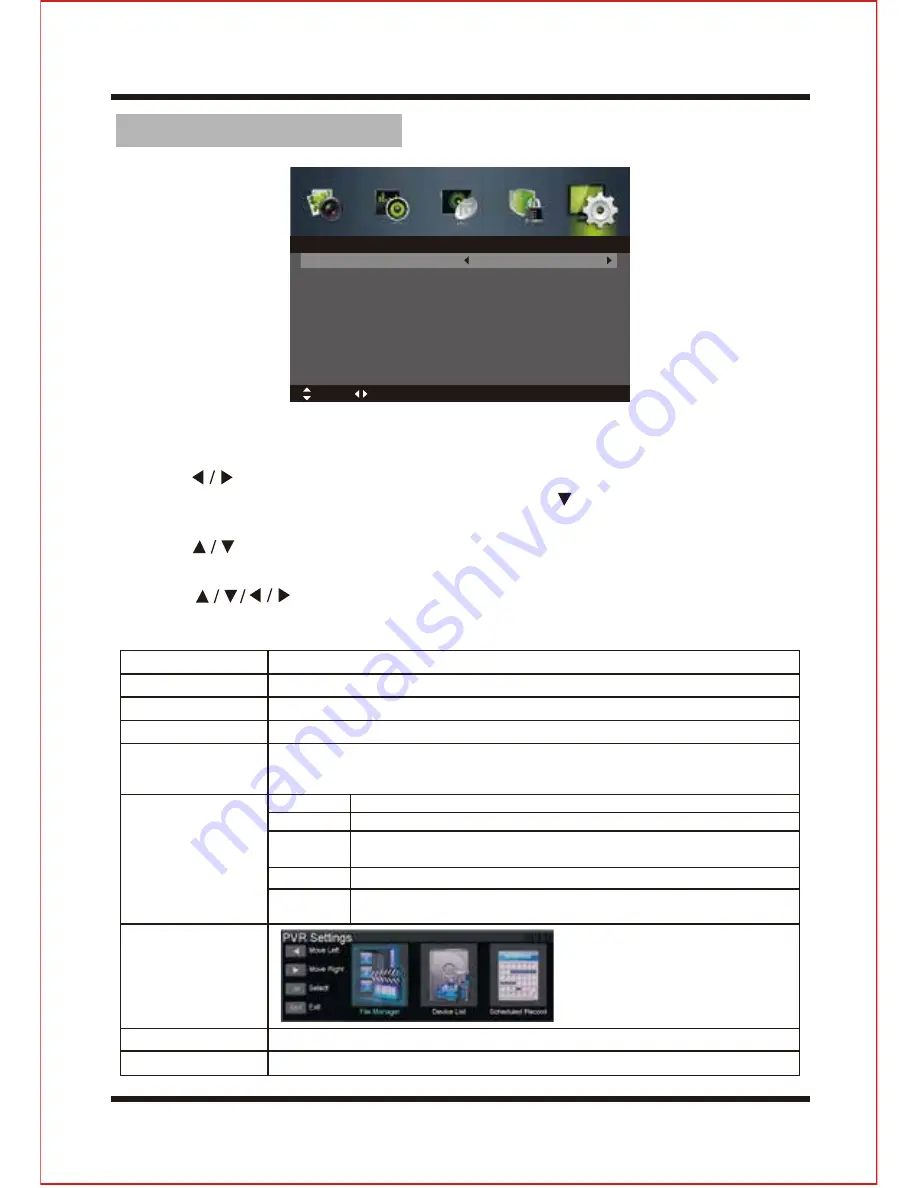
Setup Adjustment
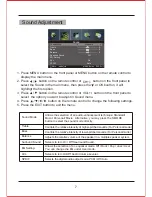
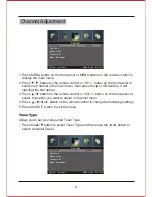
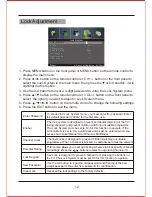
1. Press MENU button on the front panel or MENU button on the remote control to
display the main menu.
2. Press button on the remote control or button on the front panel to
select the Setup in the main menu, then press the or OK boutton, it will
highlihgt the first option.
C
H+/
-
3. Press button on the remote control or button on the front panel to
select the option you want to adjust in Setup menu.
4. Press button on the remote control to change the following settings.
5. Press the EXIT button to exit the menu.
VOL
+/
-
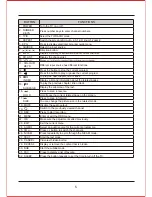
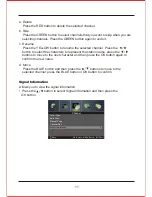
Time Settings
Sleep Timer
Auto Sleep
Time zone
Time
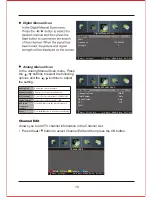
Allows you to select your desired on-screen menu lanuage.
Allows you to select your desired audio lanuage.
Allows you to select your desired subtitle lanuage or turn off the subtitle.
Selects your desired digital teletext or decording page language.
Allows you to return to the first time setup menu.
Resets all settings to the factory defaults.
OSD Lanuage
Audio Lanuages
Subtitle
Teletext
Mode Setting
PVR Settings
Reset
First Time Setup
Selects your desired mode setting.
Selects your desired Time Zone city.
The clock is set automatically when receiving a digital signal or you
can set it manually.
•
Home Mode: Viewing at home.
•
Store Mode: For store demo, the brightness is higher than home mode.
OSD Time
Display
s time of the on-screen menu:10s/20s/30s/60s/off
The TV auto switches to standby mode: Off/5Min/15Min/30Min/60Min...240Min.
The TV will auto switch to standby mode off/3H/4H/5H after the last time the
remote control was used.
OSD Language
Audio Languages
Subtitle
Teletext
Mode Setting
Time Settings
PVR Settings
First Time Setup
English
Home Mode
Move
Adjust
MENU: Return EXIT: Exit
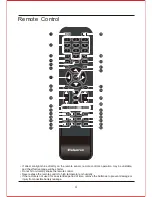
Setup
Summary of Contents for TFTV806LED
Page 1: ...User s Manual TFTV806LED 80cm 31 5 HD LED TV with DVB T...
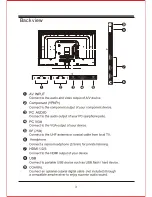
Page 8: ...Back view 3...
Page 22: ......
Page 23: ......
Page 24: ......


