background image

8

CLEANING

•    


WARNING:

 Before cleaning the unit, make sure the mixer has stopped moving . Press the On/Off switch 

to Off and unplug the power cord . 

•  

To clean the body of the mixer, wipe clean with a damp cloth . Do not use household/commercial cleaners . 

Wipe off the mixing shaft frequently, removing any residue that may accumulate . Do not immerse in water .

•  

The bowl, scraping beater, whisk, and dough hook accessories are dishwasher-safe . Place the accessories 

away from heating element .

•    

The bowl will scratch with use . This is considered normal and does not fall under the guarantee . 

•  

Clean before using for the first time and after each use .  

•    

Make sure all parts are clean and dry before storing . Let the mixer stop completely, switch to Off, unplug, 

and remove the attachments and accessories when not in use and before cleaning and storing .  

•    

Do not store accessories on the mixing shaft . 

 IMPORTANT PRECAUTIONS 

Before first use:

• Remove all packaging . 

• Read all instructions in this document .

• Clean all parts . See the “Cleaning” section for instructions .

PREPARING TO USE

• Make sure the unit is unplugged and the On/Off switch is in the Off position .

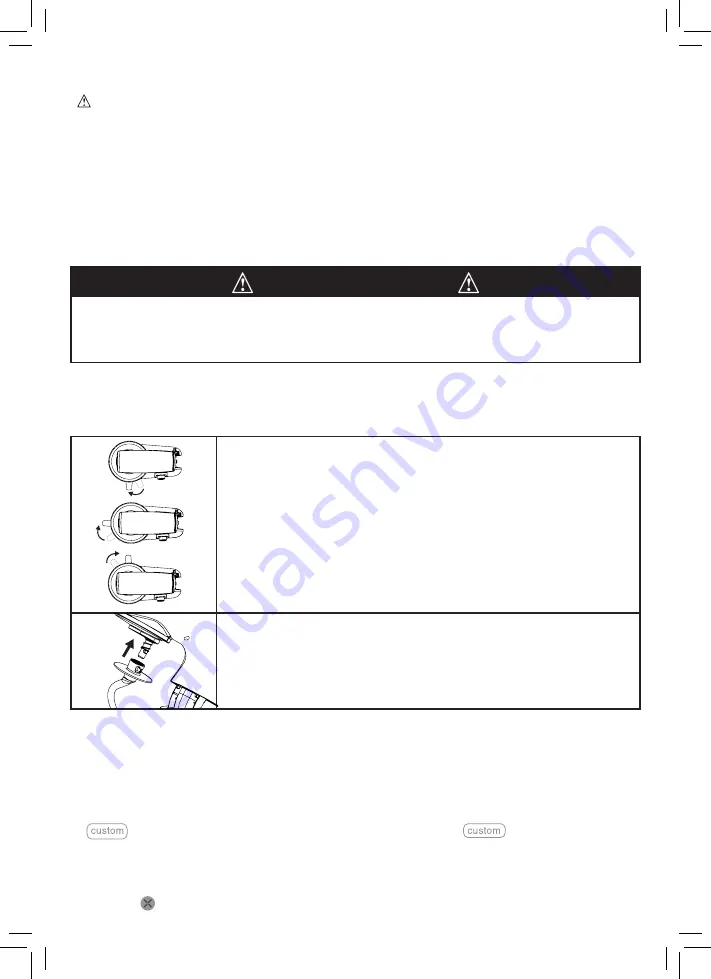
• Gently pull up on the open/close lever to lift the tilting mixer head up . 

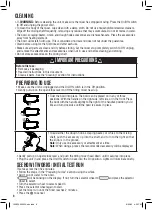
•  Twist the bowl into place . The bowl can be placed on in any of three 

positions: With the handle on the right side, left side, or in the front . Place 

the bowl with the handle slightly to the right of the handle’s position you’d 

like and turn clockwise until the bowl is secure in place . 

•  To add either the dough hook, scraping beater, or whisk to the mixing 

shaft, push the accessory up into the shaft, and turn to the right so that 

the knob is in the groove .  

Note: 

Only use one accessory or attachment at a time .  

Note: 

When using a preset, the recommended accessory will be displayed .

• Gently pull up on open/close lever and push the tilting mixer head down until it secures into place .

• Plug the unit in and press the On/Off switch in back into the On position . Lights will illuminate briefly . 

SEE HOW IT WORKS: INITIAL TEST RUN 

This takes less than five minutes .

• Follow the steps in the “Preparing to Use” section using the whisk .

• Add 1 cup of water to the bowl .

•  

 will be blinking on the display . If not, turn the selector wheel to 

 and press the selector 

wheel to select .

• Turn the selector wheel to select speed 3 .

• Press the selector wheel again to start . 

• Let the mixer run until the timer reaches 2 minutes .

• Press the   to cancel .

100833-032023-u&c.indd   8

100833-032023-u&c.indd   8

9/23/22   4:50 PM

9/23/22   4:50 PM

Summary of Contents for 100833

Page 1: ...r Save these instructions MODE D EMPLOI ET DIRECTIVES RELATIVES L ENTRETIEN ET LA S CURIT POUR Batteur Sur Socle de Luxe Conservez ces instructions Made in China Fabriqu en Chine 100833 032023 u c ind...

Page 2: ...100833 032023 u c indd 2 100833 032023 u c indd 2 9 23 22 4 49 PM 9 23 22 4 49 PM...

Page 3: ...ing 10 Guarantee 10 Table des mati res FRAN AIS Pr cautions importantes 11 12 Danger lectrique 13 Pi ces 14 R glages d affichage et de menu 15 Nettoyage 16 Pr cautions importantes 16 Pr paration l uti...

Page 4: ...ting mixer head are secure and locked in the closed position Always use two hands when moving the unit Do not use the bowl or bowl handle to move the unit Do not use the Deluxe Stand Mixer for anythin...

Page 5: ...is running Do not operate any appliance with a damaged cord or plug or after the appliance malfunctions or is dropped or damaged in any manner Contact the manufacturer at their customer service teleph...

Page 6: ...st be used with a dedicated outlet A three prong grounded socket of more than 10A rated current must be used alone If shared with other appliances the socket may cause electrical shock fire or other d...

Page 7: ...tes 5 Speaker Off Icon To mute the scrolling selecting and starting beeps press and hold the and together for two seconds Repeat to unmute 6 Timer Button Press while in the setting to set time 7 Add 3...

Page 8: ...he open close lever to lift the tilting mixer head up Twist the bowl into place The bowl can be placed on in any of three positions With the handle on the right side left side or in the front Place th...

Page 9: ...close lever is opened or is pressed Note You can press the selector wheel while mixing to pause the function The display will flash Pause Press the wheel again to resume the function If the open clos...

Page 10: ...let If the code persists call the Solution Center at 888 687 2433 United States or 800 342 2433 Canada for assistance Error Code 3 The motor overloaded from mixing a heavy load such as bread dough Tur...

Page 11: ...atteur sur socle de luxe est hors fonction et d branch avant de le d placer Ne soulevez pas ou n abaissez pas la t te inclinable du batteur pendant le fonctionnement de l appareil Faites preuve de pru...

Page 12: ...urveillance troite est n cessaire lorsqu un appareil est utilis par ou proximit d enfants Les enfants doivent tre surveill s pour s assurer qu ils ne jouent pas avec l appareil Ne placez jamais de cor...

Page 13: ...ez pas ni ne retirez la fiche avec les mains mouill es Pour viter les blessures caus es par une d charge lectrique s assurer d avoir les mains s ches avant de brancher et de d brancher l appareil Ne b...

Page 14: ...E Prise d accessoires F Plaque de fixation du bol G cran num rique H Batteur racleur I Fouet J Crochet p trisseur K Poign e de transport L Levier d ouverture de fermeture M Rangement du cordon N Inter...

Page 15: ...lement de s lection et de d marrage appuyez sur et et maintenez les enfonc es pendant deux secondes R p tez pour r activer le son 6 Bouton de minuterie Appuyez sur ce bouton lorsque vous tes dans le r...

Page 16: ...uctions de ce document Nettoyez toutes les pi ces Veuillez consulter la section Nettoyage pour les instructions PR PARATION L UTILISATION Assurez vous que l appareil est d branch et que l interrupteur...

Page 17: ...la vitesse pendant le m lange en tournant la roue de s lection une vitesse inf rieure ou sup rieure Remarque Vous pouvez appuyer sur la roue de s lection pendant le m lange pour mettre la fonction en...

Page 18: ...racleur Utiliser pour incorporer d licatement les ingr dients secs et humides sans trop les m langer Aide garder les brownies les muffins et les pains clairs moelleux Battre 2 min 30 s 10 min Batteur...

Page 19: ...d autre n est branch dans cette prise Si le code d erreur s affiche toujours appelez le Centre de solutions au 888 687 2433 tats Unis ou au 800 342 2433 Canada pour obtenir de l aide Code d erreur 3 L...

Page 20: ...dchef ca Phone 800 342 CHEF 2433 Website pamperedchef ca SERVICE ET SOUTIEN Nous savons que vous allez adorer ce Batteur Sur Socle de Luxe Ce produit est couvert par une garantie de deux ans ainsi s i...

Reviews: