10
11
Quick Start Guide
First
T
ime
Setup
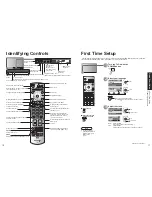
Identifying
Controls
First time setup
Language
Clock
Auto program
Language
Language
English
First time setup
Language
Clock
Auto program
Clock
Date
Time
4 / 1 / 2006
9 : 43 AM
-
-
S VIDEO VIDEO
INPUT3
L-AUDIO-R HDMI3 AUDIO IN
AV IN
3
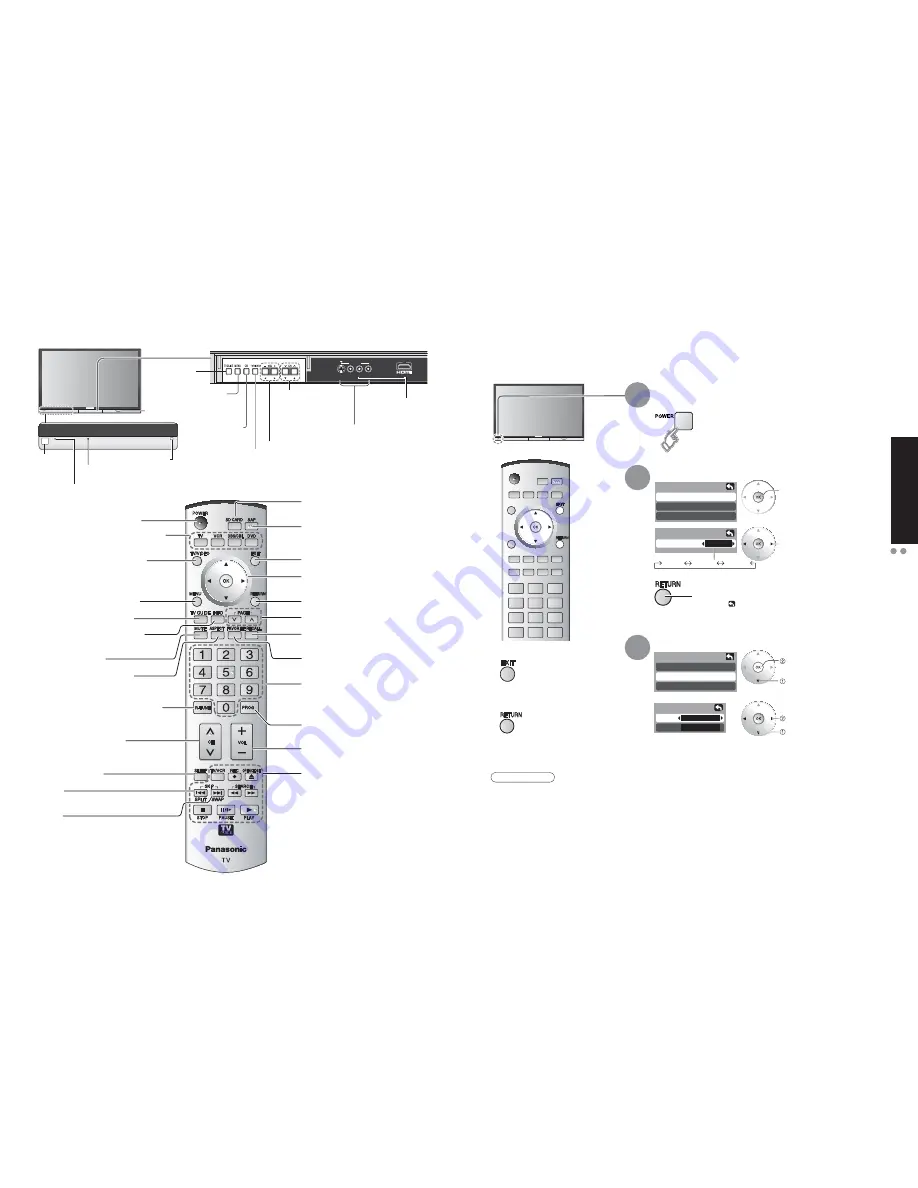
First Time Setup
“First time setup” is displayed only when the TV is turned on for the first time after the AC cord is inserted
into a wall outlet. Available only when “Auto power on” (p. 30) is set to “Off”.
Turn the TV On with the
POWER button
1
Select your language
2
Adjust the clock
3
Date:
Adjust the date
(Press and hold to change the month.)
Time: Adjust the time
(If the button is held, the speed of change increases.)
Press to go to previous screen.
Or, select icon, then press OK for same results.
Ŷ
Press to exit
Note
•
To change setting
(Language/Clock/Auto
program) later, go to
Menu screen
(p. 30)
Ŷ
Press to return to
previous screen
(Continue to next page.)
English
Español
Français
next
select
next
select “Clock”
set
select item
Identifying Controls
Switches TV to On or Standby
Sets the remote to communicate with
other equipment (p. 43)
Changes the input mode (p. 26)
Display Main Menu (p. 28, 30)
Press to enter the TV Guide
Press to display an information
screen on TV Guide
Sound mute On/Off
Changes aspect ratio (p. 16)
Switch to previously viewed channel
and input modes.
Channel up/down buttons
Sleep Timer (p. 16)
SPLIT
Split Screen (p. 16)
SWAP
Swap pictures in SPLIT operation (p. 16)
Viewing from SD Card (p. 24)
SAP (p. 17)
Exit menus
Select/OK/Change
RETURN (to previous menu)
Page scroll on TV Guide
Display or remove the channel
banner (p. 16)
Operate the Favorite channel list
function. (p. 17)
Numeric keypad to select any
channel (p. 15) or press to enter
alphanumeric input in menus.
(p. 26, 27, 36, 38, 43)
Direct channel access for DTV and
DBS (p. 15)
Volume
External equipment operations
(p. 26, 46) (VCRs, DVDs, etc.)
Changes the input mode.
POWER
button
Remote control sensor
Video Input 3
connector
Power indicator
(on: red, off: no light)
C.A.T.S. sensor
Plasma C.A.T.S. (Contrast Automatic Tracking System).
(p. 28)
Display the Main menu.
Choose menu and
submenu entry.
Display the TV
Guide.
SD CARD slot
HDMI input 3
connector
Adjust the volume level.
(Move cursor to right or left during menu mode.)
Change the TV
Channel.
(Move cursor to
up or down during
menu mode.)
Summary of Contents for 65PX600U - 65" Plasma TV
Page 33: ...64 65 Note Note ...


