Verify Panasonic Mechanical Pulse Tools On Applications
1.
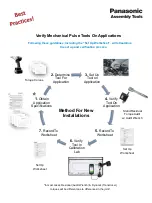
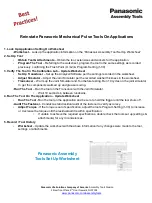
Application Specifications
–
Record to Worksheet
•
Specs
–
Obtain the target torque, tolerance, extensions and sockets for the application.
•
Joint Type
–
Determine the joint type (Hard 30
°
, Medium-Hard 60
°
, Medium-Soft 180
°
, Soft 360
°
(degrees are
calculated by rotating the fastener from the flush point (snug torque) to final torque))
•
Dry Loctite, Lock Nuts, etc. will possibly cause a medium-soft or soft joint.
2. Determine The Tool
–
Record to Worksheet
•
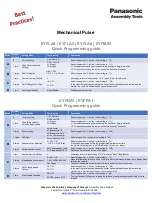
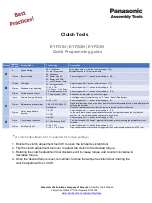
Look Up The Tool
–
Use the torque curve graphs to select the tool and be sure to use the joint type
determined above.
•
Select Tool
–
Locate the target torque on the left column; follow the line to the right to select the tool.
Follow the chart directly down to obtain an estimated starting point to program the tool.
•
Suggestion
–
If more than one tool can be used in the torque range then consider using a
larger tool on Medium-Soft/Soft joints and a smaller tool on Hard/Medium Hard joints.
3. Program The Tool Settings
–
Record to Worksheet
•
Flush Point Mode
–
If the tool pulses before achieving the flush point, set the tool to
“
L2 Flush Point
”
otherwise leave the tool in the default “
L1 Flush Point
”
mode.
•
Setting Torque
–
Adjust the tools shut-
off setting “
Program Setting
” (1~30) to the desired torque from the
set
up torque curves.
4. Run The Tool On The Application
–
Record to Worksheet
•
Run The Tool
- Run the tool on the application and be sure to hold the trigger until the tool shuts off.
•
Audit The Fastener
- Conduct a static/residual audit of the fastener to verify accuracy.
•
Adjust Torque
- If the torque is out of
specification, adjust the tool’s Program Setting
(1-30) to increase or
decrease the torque until the residual audit is within specification.
•
If unable to achieve the required specifications, consider using a larger tool on Medium-
Soft/Soft joints and a smaller tool on Hard/Medium Hard joints.
5. Record / Tool History
•
Worksheet
–
Document the above information on
the “Panasonic Assembly Tool Set
Up
Worksheet”.
•
Save Data
–
Record the Tools Model, Program Setting, Flush Point (L1/L2), Joint Type, Analyzer Settings,
Sockets and Extensions.
6. Verify The Tool In The Calibration Lab
–
Record to Worksheet
•
Set Up Transducer
–
Set up the Analyzer/Software per manufacturers suggested settings.
•
Adjust Simulator
–
Adjust the Joint Simulator per the transducer quick start guide.
•
Transducer
–
Warm up the Joint Simulator and Tool before testing. Run 10 cycles on the joint simulator to get
the components warmed up and grease moving.
•
Run The Tool
–
Run the tool on the Transducer with the Joint Simulator.
•
Wait 5 seconds in between rundowns.
7. Record / Tool History
•
Worksheet
–
Document the above information on
the “Panasonic Assembly Tool Set
Up
Worksheet”.
•
Save Data
–
Record the Tools Model, Program Setting, Flush Point (L1/L2), Joint Type, Analyzer Settings,
Sockets and Extensions.
Panasonic Assembly
Tools Set Up Worksheet
Panasonic Life Solutions Company of America
Assembly Tools Division
2 Riverfront Plaza 5
th
Floor Newark, NJ 07102
Summary of Contents for AccuPulse EYFLA7
Page 1: ......
Page 9: ...EYFLA4 EYFLA5 EYFLA6 EYFMA1 EYFNA1 EYFPA1 Mechanical Pulse Tools ...
Page 14: ... Tool set to L1 ...
Page 15: ... Tool set to L1 ...
Page 16: ...EYFLA7 EYFLA8 EYFLA9 EYFMA2 AccuPulse ...
Page 24: ...EYFGA1 EYFGA2 EYFGA3 EYFGB1 EYFGB2 EYFGB3 Clutch Tools ...


