background image

Safety Precautions

7

(ENG) DVQX2103

Cautions for use

Keep this unit as far away as possible from electromagnetic equipment (such as microwave 
ovens, TVs, video games etc.).

If you use this unit on top of or near a TV, the pictures and/or sound on this unit may be disrupted by 
electromagnetic wave radiation.

Do not use this unit near cell phones because doing so may result in noise adversely affecting the 
pictures and/or sound.

Recorded data may be damaged, or pictures may be distorted, by strong magnetic fields created by 
speakers or large motors.

Electromagnetic wave radiation generated by microprocessors may adversely affect this unit, 
disturbing the pictures and/or sound.

If this unit is adversely affected by electromagnetic equipment and stops functioning properly, turn 
this unit off and remove the battery or disconnect AC adaptor. Then reinsert the battery or 
reconnect AC adaptor and turn this unit on.

Do not use this unit near radio transmitters or high-voltage lines.

If you record near radio transmitters or high-voltage lines, the recorded pictures and/or sound may be 
adversely affected.

Do not lift up this unit by the handle with the tripod still attached

When the tripod is attached, its weight will also affect the unit’s handle, possibly causing the handle 
to break and hurting the user.

To carry the unit while the tripod is attached, take hold of the tripod.

Do not swing the unit around, shake it by, or allow it hang from the handle

Do not jar, swing, or shake the unit by its handle. Any strong jolt to the handle may damage the unit 
or result in personal injury.

Do not allow the cord to drag on the ground or pull a connected cord along the passage

The cord will be damaged, causing fire or electrical shock, when the cord gets caught by the feet, 
excite will also cause personal injury.

When this unit is turned on, do not use it in direct contact with the skin for a long period of 
time.

When using this unit for a long period of time, use a support such as a tripod. Low temperature 
burns may result if any high temperature part of this unit or hot air from the ventilation openings on 
the front side of the hand strap of this unit is in direct contact with the skin for a long period of time.

About connecting to a PC

A USB2.0 cable is not supplied with this unit. Use a commercially-available generic USB cable 
conforming to USB2.0.
If possible, we recommend using a cable with a length of 1.5 m (approx. 4.9 feet) or less.

About connecting to a TV

Use a commercially-available High Speed HDMI cable. If possible, we recommend using a cable 
with a length of 3 m (approx. 9.8 feet) or less.

About using a headphone

Excessive sound pressure from earphones and headphones can cause hearing loss.

Listening at full volume for long periods may damage the user’s ears.

AG-CX7_CX8_CX10-DVQX2103_eng.book  7 ページ  2020年1月6日 月曜日 午後2時48分

Summary of Contents for AG-CX8

Page 1: ...arefully before using this product and save this manual for future use More detailed operating instructions are available in Operating Instructions PDF format To read it download it from the website https pro av panasonic net en products ag cx10 index html P DVQX2103ZA ENGLISH until 2020 2 21 AG CX7_CX8_CX10 DVQX2103_eng book 1 ページ 2020年1月6日 月曜日 午後2時48分 ...

Page 2: ...this unit Use the recommended accessories Do not remove covers Do not repair this unit by yourself Refer servicing to qualified service personnel CAUTION To reduce the risk of fire electric shock or product damage Do not install or place this unit in a bookcase built in cabinet or in another confined space Ensure this unit is well ventilated Do not obstruct this unit s ventilation openings with ne...

Page 3: ...couraged to try to correct the interference by one or more of the following measures Reorient or relocate the receiving antenna Increase the separation between the equipment and receiver Connect the equipment into an outlet on a circuit different from that to which the receiver is connected Consult the dealer or an experienced radio TV technician for help FCC Caution Any unauthorized changes or mo...

Page 4: ...5 This device contains licence exempt transmitter s receiver s that comply with Innovation Science and Economic Development Canada s licence exempt RSS s Operation is subject to the following two conditions 1 This device may not cause interference 2 This device must accept any interference including interference that may cause undesired operation of the device The available scientific evidence doe...

Page 5: ...e wide blade or the third prong are provided for your safety If the provided plug does not fit into your outlet consult an electrician for replacement of the obsolete outlet 10 Protect the power cord from being walked on or pinched particularly at plugs convenience receptacles and the point where they exit from the apparatus 11 Only use attachments accessories specified by the manufacturer 12 Use ...

Page 6: ...y pack Lithium ion battery pack Use the specified unit to recharge the battery pack Do not use the battery pack with equipment other than the specified unit Do not get dirt sand liquids or other foreign matter on the terminals Do not touch the plug terminals i and j with metal objects Do not disassemble remodel heat or throw into fire If any electrolyte should come into contact with your hands or ...

Page 7: ...e unit while the tripod is attached take hold of the tripod Do not swing the unit around shake it by or allow it hang from the handle Do not jar swing or shake the unit by its handle Any strong jolt to the handle may damage the unit or result in personal injury Do not allow the cord to drag on the ground or pull a connected cord along the passage The cord will be damaged causing fire or electrical...

Page 8: ...r to the genuine product are made available to purchase in some markets Some of these battery packs are not adequately protected with internal protection to meet the requirements of appropriate safety standards There is a possibility that these battery packs may lead to fire or explosion Please be advised that we are not liable for any accident or failure occurring as a result of use of a counterf...

Page 9: ...i Alliance Wi Fi is a registered trademark of Wi Fi Alliance Wi Fi Protected Setup WPA and WPA2 are trademarks of Wi Fi Alliance NDI is a registered trademark of NewTek Inc All other names company names product names etc contained in this instruction manual are trademarks or registered trademarks of their respective owners License This product is licensed under the AVC Patent Portfolio License for...

Page 10: ...CULAR PURPOSE For details refer to the terms of license that are displayed using the following method 1 Select the NETWORK menu DEVICE SEL WLAN or OFF 2 Select the OTHERS menu USB DEVICE SERVICE MODE YES Select LICENSE TXT in the external drive recognized by the computer At least three 3 years from delivery of this product Panasonic will give to any third party who contacts us at the contact infor...

Page 11: ...nventions used in this manual Words and phrases in brackets indicate content displayed in the LCD monitor Words and phrases in brackets indicate design text used on this unit such as button names Reference pages Reference pages in this document are indicated by l 00 Terminology The battery pack is described as battery SDHC memory card and SDXC memory card are referred to as SD card unless distingu...

Page 12: ...rted by the unit 39 Inserting removing the memory card 40 Turning on off the power 42 Turning the unit on and off with the power button 42 Turning the unit on and off with the LCD monitor viewfinder 42 Basic operation of the menu 43 Configuration of the menu 43 Formatting the memory card 44 Menu list 44 Manual recording 48 Rear ring function settings 49 Focusing manual focus 50 White balance adjus...

Page 13: ...dust may damage the camera and memory card Be careful when inserting or removing the memory card AC adaptor and battery It may take more time to charge or may not be able to charge when the temperature of the battery is extremely high or extremely low Noise may be generated in radio when the unit is used close to a radio especially when receiving AM Keep a distance of 1 m approx 3 3 feet or more w...

Page 14: ...ry has worn out Please purchase a new battery Memory cards The surface of this unit or the memory card may get slightly hot when used for a long period of time but this is not a malfunction The amount of memory included on the label of the memory card is the total amount of memory below jCapacity to protect and manage copyright jCapacity usable as the normal memory on the unit or a PC Do not give ...

Page 15: ...er discharge and may become unusable even if it is recharged when the battery is left attached for long period of time Do not remove the battery when the power is turned on Turn off the power and remove the battery after the operation lamp goes completely out Take proper care of the battery terminal Do not allow dust or foreign objects on the battery terminal Confirm that the battery and its termi...

Page 16: ... or a cold room to a warm room Please be careful as it may cause the lens the viewfinder or LCD monitor to become soiled moldy or damaged When taking the unit to a place which has a different temperature if the unit is accustomed to the room temperature of the destination for about 1 hour condensation can be prevented When the difference in temperature is severe place the unit in a plastic bag or ...

Page 17: ... video that the customer has shot including recording that became public by any reason including using with the network user authentication turned OFF 7 The registered information is lost due to any reason including initializing this unit because the authentication information such as user name or password is forgotten Cautions regarding network Since this unit is used connected to a network follo...

Page 18: ...sed by them When requesting repairs or when transferring ownership disposing of the product After first taking note of personal information make sure you delete information in this unit that includes personal information including the wireless LAN connection settings etc that you have registered or set in this unit using the following menu settings j NETWORK menu UTILITY NETWORK INITIALIZE j OTHER...

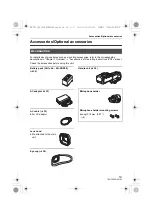
Page 19: ...apter 1 Overview Accessories of Operating Instructions PDF version Check the accessories before using this unit Battery pack Parts No AG VBR59 l 32 AC adaptor l 33 AC cable l 33 For AC adaptor Lens hood Pre attached to the main unit Eye cup l 36 Handle unit l 30 Microphone holder Microphone holder mounting screws Length 12 mm 0 47 q 2 AG CX7_CX8_CX10 DVQX2103_eng book 19 ページ 2020年1月6日 月曜日 午後2時48分 ...

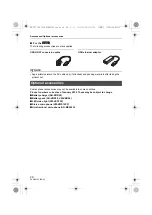
Page 20: ...ng materials after taking the product out Optional accessories Some optional accessories may not be available in some countries Product numbers correct as of January 2020 These may be subject to change Battery charger AG BRD50 Battery pack AG VBR59 VW VBD58 LED video light VW LED1PP Stereo microphone VW VMS10PP Unidirectional microphone AG MC200G CX10 AG CX7_CX8_CX10 DVQX2103_eng book 20 ページ 2020年...

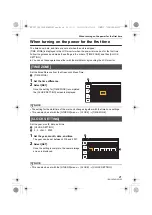
Page 21: ...wich Mean Time A TIME ZONE 1 Set the time difference 2 Select SET Once the setting for TIME ZONE is completed the CLOCK SETTING screen is displayed NOTE 0 The setting for the date time of the main unit changes together with the time zone settings 0 This can also be set with the OTHERS menu CLOCK TIME ZONE CLOCK SETTING Set the year month date and time A CLOCK SETTING B 0 0 JAN 1 2020 1 Set the yea...

Page 22: ...hen using use a BNC cable SDI OUT terminal to connect a TV monitor A HDMI cable B For the BNC cable SDI OUT terminal C TV Monitor Use a commercially available High Speed HDMI cable If possible we recommend using a cable with a length of 3 m approx 9 8 feet or less For the Use a commercially available 5C FB or equivalent double shielded cable for the BNC cable When using a DVI converter etc to conn...

Page 23: ...k For the This unit is equipped with wireless LAN It can connect to wireless LAN devices via a network For the This unit is equipped with wireless LAN It can connect to networks via wireless LAN or wired LAN To use a wired LAN use the supplied USB HOST conversion cable and USB ethernet adaptor to connect a LAN cable Use the following cable for connections jLAN cable STP category 5 or better maximu...

Page 24: ...connecting this unit with an iPhone iPad or Android terminal via wireless LAN Streaming function You can perform streaming of audio and video currently shot with the unit over a network wired LAN wireless LAN Available for use when using For the NDI HX function This unit can be connected to a network via a NewTek NDI HX compatible switcher and a wired LAN CX10 CX10 AG CX7_CX8_CX10 DVQX2103_eng boo...

Page 25: ...ion You can switch the function to be adjusted by setting with the menu pressing the USER button assigned to REAR RING or touching the USER button icon 5 ND FILTER switch Selects the ND filter to suit the illumination of the subject 1 64 Reduces the amount of light entering the MOS sensor to 1 64 1 16 Reduces the amount of light entering the MOS sensor to 1 16 1 4 Reduces the amount of light enter...

Page 26: ...een the camera image screen and the thumbnail screen 17 DISP MODE CHK button Switches display hide of information other than the time counter time stamp zebra pattern and marker Press and hold the button to display information about the settings of the various shooting functions and information such as a list of the functions assigned to the USER button Each press of the button switches the inform...

Page 27: ...one level higher when the menu is displayed Pressing the EXIT button without confirming the setting value will not reflect the change in the setting 30 Multidial l 48 Moves selects and sets the menu while the menu is displayed Use the multidial to also operate thumbnails select the multi manual function and select set the various operation icons 31 Fan inlet Fan inlet for cooling fan Do not block ...

Page 28: ... Do not block this while the unit is being used 42 Status indicator l 42 Illuminates when power is on 43 Battery release lever l 32 Used when removing the battery from the main unit 44 Battery mounting section l 32 Attaches a battery 45 Viewfinder 46 REC button on the grip Starts or stops the recording It is possible to directly record from the thumbnail mode 47 HDMI terminal A terminal to output ...

Page 29: ...justs the zoom of an image T Zooms in the image W Zooms out the image Adjust the volume when playing back clips 56 Handle unit mounting section l 36 57 USER5 button Used as a USER button USER5 REC CHECK is set at the time of purchase Automatically plays back the last approximately 3 seconds of the previously shot clip 90 180 90 53 54 56 55 57 AG CX7_CX8_CX10 DVQX2103_eng book 29 ページ 2020年1月6日 月曜日 ...

Page 30: ...nal microphone 7 Microphone cable clamp Fixes the external microphone cable 8 INPUT1 switch Switches audio input signals connected to the INPUT 1 terminal 9 CH1 SELECT switch Selects the audio to be recorded on audio channel 1 10 CH2 SELECT switch Selects the audio to be recorded on audio channel 2 11 INPUT2 switch Switches audio input signals connected to the INPUT 2 terminal 12 AUDIO LEVEL CH2 d...

Page 31: ... lamp can be set in the menu 20 Accessory shoe on the handle Attach a video light etc 21 LIGHT switch Switches the built in LED light on off 22 Hold lever Disables the REC button on the handle when switched to HOLD 23 REC button on the handle Starts or stops the recording 24 Accessory mounting hole Accessories can be attached Mounting hole size j 1 4 20 UNC screw length 5 5 mm 0 22 q or shorter 25...

Page 32: ... power button to turn off the unit l 42 Attaching the battery 1 Push the battery against the battery mounting section on the main unit and slide forward to attach Press in the battery until it clicks and gets locked A Battery mounting section Removing the battery Be sure to hold down the power button until the status indicator goes off Then remove the battery while supporting the unit to prevent i...

Page 33: ...e DC IN 12V terminal As the charging lamp lights up green charging starts It will turn off when the charging is completed If the charging lamp flashes refer to page 13 The DC plug of the AC adaptor depending on its angle may block your view of the charging lamp To check the charging lamp status adjust the angle of the DC plug Connecting to the AC outlet It is possible to use this unit with power s...

Page 34: ...his product 0 Do not heat or expose to flame 0 Do not leave the battery ies in a car exposed to direct sunlight for a long period of time with doors and windows closed 0 Do not expose to low air pressure at high altitudes 0 Do not expose to extremely low air pressure as this may result in explosions or leakage of flammable liquids and gases AG CX7_CX8_CX10 DVQX2103_eng book 34 ページ 2020年1月6日 月曜日 午後...

Page 35: ...e of your hand If the buckle is difficult to tighten move the pad forward and tighten the buckle again 1 Undo the button of the grip belt 2 Open the buckle section 3 Pull the end of the belt 4 Do up the button of the grip belt A Button B Buckle C Pad 2 2 4 4 1 1 3 3 AG CX7_CX8_CX10 DVQX2103_eng book 35 ページ 2020年1月6日 月曜日 午後2時48分 ...

Page 36: ... is an example of attaching the eye cup to use it with your right eye If you rotate the eye cup to the left by 180 before attaching it you can use it with your left eye Attaching the handle unit Press the power button to turn off the unit l 42 1 Open the microphone holder Open buckle 1 and detach fitting 2 from hook 3 A Groove B Ridge AG CX7_CX8_CX10 DVQX2103_eng book 36 ページ 2020年1月6日 月曜日 午後2時48分 ...

Page 37: ...with the rubber when screwing in the microphone holder mounting screws but please ensure they are done up tightly 1 Microphone holder 2 Microphone holder mounting screws 3 Push the handle unit into the handle unit mounting section on the camera Match the positions of mounting mark A on the handle unit and mounting mark B on the camera when pushing in AG CX7_CX8_CX10 DVQX2103_eng book 37 ページ 2020年1...

Page 38: ...While pressing the handle unit mounting screw down turn it in the direction indicated by arrow 2 until it stops How to remove Remove by doing the steps for attaching in reverse NOTE Keep the microphone holder mounting screws out of reach of children to prevent swallowing AG CX7_CX8_CX10 DVQX2103_eng book 38 ページ 2020年1月6日 月曜日 午後2時48分 ...

Page 39: ... stop suddenly when a memory card not compatible with the required Speed Class is used Speed Class and UHS Speed Class are the speed specification regarding continuous writing Check the display on the label and other information on the memory card Available for setting when using File format Recording bit rate or recording function Supported memory cards and Speed Classes Example of card display P...

Page 40: ... 2 Insert the memory card into the card slot Card slot 1 and card slot 2 can each insert one memory card With the label facing in the direction indicated in the diagram push in until there is a click Do not force or apply excess force when inserting the memory card 3 Close the card slot cover When the file format is MOV or MP4 For the SDXC memory cards can be used SDHC memory cards cannot be used ...

Page 41: ...n orange Data is being written loaded when the card access lamp is flashing in orange so do not remove the memory card 2 Press in the memory card further into the main unit and let go Pull the memory card straight out when it is released from the card slot 3 Close the card slot cover AG CX7_CX8_CX10 DVQX2103_eng book 41 ページ 2020年1月6日 月曜日 午後2時48分 ...

Page 42: ...t in battery Turning the unit on and off with the LCD monitor viewfinder Opening the LCD monitor or extending the viewfinder turns on the unit Closing the LCD monitor viewfinder turns off the unit During normal use you may find it convenient to turn the unit on off using the LCD monitor or viewfinder The unit will not turn off unless the LCD monitor is closed and the viewfinder is retracted The un...

Page 43: ...regarding scene file This menu sets the detailed image quality adjustment of the camera video Also selection of the scene file writing the scene file data to the main unit memory and loading from the main unit memory can be performed This menu cannot be set when the thumbnail screen is displayed AUDIO menu Sets the input output function of audio VIDEO OUT LCD VF menu Configures the settings for th...

Page 44: ...essage until it can record Menu list For details on specifications visit the Operating Instructions PDF version 1 Available for setting when using 2 This can be set when the handle unit supplied is attached to the unit 3 This can be set when the handle unit has not been attached to the unit 4 Available for setting when using Format the cards using this unit Do not format using other devices such a...

Page 45: ...OUT FORMAT SDI AUDIO GAIN CHG SDI REC REMOTE SDI OUT CHAR SDI OUT ZEBRA HDMI OUT OUT FORMAT HDMI TC OUT HDMI REC REMOTE HDMI OUT CHAR HDMI OUT ZEBRA LCD BRIGHTNESS COLOR LEVEL CONTRAST BACK LIGHT RED TINT BLUE TINT SELF SHOOT VF BRIGHTNESS COLOR LEVEL CONTRAST RED TINT BLUE TINT VF COLOR INDICATOR FULL AUTO SLOT1 2 STATUS 2 SLOTS FUNC STREAMING NETWORK BATTERY REMAIN REC FORMAT FRAME RATE CLIP NAM...

Page 46: ...DRESS MULTICAST PORT LOAD SD CARD SAVE SD CARD START NDI HX 1 ACTIVATION STREAMING FORMAT MULTICAST MULTICAST ADDRESS MULTICAST PORT CLEAR ACTIVATION WLAN PROPERTY TYPE SSID CHANNEL ENCRYPTION ENCRYPT KEY WLAN IPv4 SETTING DHCP IP ADDRESS SUBNET MASK DEFAULT GATEWAY PRIMARY DNS SECONDARY DNS USB LAN IPv4 SETTING 1 DHCP IP ADDRESS SUBNET MASK DEFAULT GATEWAY PRIMARY DNS SECONDARY DNS USB LAN IPv6 S...

Page 47: ...ILE MEMORY SLOT FOR LOAD SAVE HANDLE TALLY LED CLOCK CLOCK SETTING TIME ZONE DATE FORMAT USB DEVICE CARD READER MODE SERVICE MODE INFORMATION VERSION OPERATION TIME UPDATE ECO MODE BATTERY AC NETWORK APPROVED REGULATION LANGUAGE MENU INITIALIZE AG CX7_CX8_CX10 DVQX2103_eng book 47 ページ 2020年1月6日 月曜日 午後2時48分 ...
Page 48: ...de jFocus lens stop gain shutter speed white balance Camera operations that are disabled in auto mode The following camera operations are disabled in auto mode j IRIS button GAIN button SHUTTER button WHITE BAL button FOCUS A M button focus ring rear ring When set with the CAMERA menu SW MODE REAR RING IRIS The following USER button functions are disabled in auto mode j AWB FBC ONE PUSH AF ATW FOC...

Page 49: ...l exposure compensation adjustment Zoom 1 Select the CAMERA menu SW MODE REAR RING ZOOM 2 Rotate the rear ring Iris 1 Select the CAMERA menu SW MODE REAR RING IRIS or IRIS AE LEVEL 2 Switch to MANU with the AUTO MANU switch to enter manual mode 3 Press the IRIS button to switch to manual iris mode STD disappears 4 Rotate the rear ring AG CX7_CX8_CX10 DVQX2103_eng book 49 ページ 2020年1月6日 月曜日 午後2時48分 ...
Page 50: ...th the AUTO MANU switch to enter manual mode 2 Press the FOCUS A M button to switch to manual focus mode AF and MF switch each time you press the button The focal point goes to infinity after you press and hold the button and then the manual focus mode is engaged 3 Rotate the focus ring White balance adjustment Follow the steps below to adjust the white balance automatically White balance black ba...

Page 51: ...ET is approx 70 7 Either press the USER button assigned to AWB or touch the USER button icon Automatic adjustment of the white balance starts and the white balance adjustment value is memorized NOTE 0 The content previously set is maintained in Ach or Bch Make the settings again if the lighting conditions have changed When having no time to adjust the white balance 1 Press the WHITE BAL button to ...

Page 52: ...ges to the value displayed and exits Press the EXIT button to exit without changing the setting Setting the shutter speed 1 Switch to MANU with the AUTO MANU switch to enter manual mode 2 Press the SHUTTER button to switch to manual shutter mode The shutter speed display is highlighted in orange 3 Turn the multidial to select the shutter speed 4 Press the multidial The setting changes to the value...

Page 53: ...ハペフ ヶラュ ブペハペフ フビパ ヒパパ フビパ ヒパパ ヶラュ ビペハペヘ ヶラュ ビペハペヘ ラユヷヤ ヒブパ ラユヷヤ ヒブパ ヶラュ ビペハペヘ ヶラュ ビペハペヘ フビビ ヒブパ フビビ ヒブパ ヶラュ ビペハペヘ ヶラュ ビペハペヘ フビパ ヒパパ フビパ ヒパパ ヶラュ ビピハペベ ヶラュ ビピハペベ ラユヷヤ ヒブパ ラユヷヤ ヒブパ ヶラュ ビピハペベ ヶラュ ビピハペベ フビビ ヒブパ フビビ ヒブパ ヶラュ ビピハペベ ヶラュ ビピハペベ フビビ ヒパパ フビビ ヒパパ ョラュ ブペハペフ ョラュ ブペハペフ 0001 0001 00 00 00 00 00 00 00 00 0002 0002 00 00 16 00 00 00 16 00 0003 0003 00 00 32 15 00 00 32 15 0004 0004 00 01 00 17 00 01 ...

Page 54: ...ia the memory card Insert the memory card that stores the update file into card slot 1 and select the OTHERS menu INFORMATION UPDATE For update method refer to the support desk at the following website https pro av panasonic net en products ag cx10 index html This Site is English only 0 When updating the firmware use the AC adaptor or sufficiently charged battery 0 Do not turn off the power while ...

Page 55: ...sions W H D 129 mm 159 mm 257 mm 5 08 q 6 26 q 10 1 q including handle unit lens hood and eye cup excluding protrusions Pickup device 1 2 5 q MOS solid state image sensing device for colors Total pixels approx 8 570 000 pixels Number of pixels Number of effective pixels approx 8 290 000 pixels Lens Optical image stabilizer lens motorized 24 zoom F1 8 to F4 0 f 4 12 mm to 98 9 mm 35 mm conversion f...

Page 56: ... 100 sec 1 120 sec 1 180 sec 1 250 sec 1 350 sec 1 500 sec 1 750 sec 1 1000 sec 1 1500 sec 1 2000 sec 1 3000 sec 1 4000 sec 1 8000 sec When the SYSTEM menu FREQUENCY 50 00Hz is set 50 00i 50 00p mode 1 50 sec 1 60 sec 1 100 sec 1 125 sec 1 180 sec 1 250 sec 1 350 sec 1 500 sec 1 750 sec 1 1000 sec 1 1500 sec 1 2000 sec 1 3000 sec 1 4000 sec 1 8000 sec 25 00p mode 1 25 sec 1 50 sec 1 60 sec 1 100 s...

Page 57: ...angle approx 30 Color temperature approx 4600 K Lens hood Hood with lens cover Item Recording media SDHC memory card 4 GB to 32 GB SDXC memory card exceeding 32 GB to 128 GB UHS I UHS Speed Class 3 compatible microP2 card A series B series Refer to Speed Class during shooting l 39 Recording slot 2 slots System frequency 59 94 Hz 50 00 Hz File format MOV HEVC MOV MP4 HEVC MP4 AVCHD P2 Recording for...

Page 58: ...s j1080 59 94i 50 00i Average approx 25 Mbps HD 1280 720 AVC G50 Average approx 50 Mbps AVC G25 Average approx 25 Mbps Number of recording pixels Recording video signal 3840 2160 59 94p 50 00p 29 97p 25 00p 23 98p 1920 1080 59 94p 50 00p 29 97p 25 00p 23 98p 59 94i 50 00i 1280 720 59 94p 50 00p Recording and playback time Refer to the operating instructions PDF for information about the recording ...

Page 59: ...rofile Item Recording audio signal MOV 48 kHz 24bit 2ch MP4 AVCHD 48 kHz 16bit 2ch P2 48 kHz 24bit 2ch Audio compression format MOV LPCM MP4 AAC AVCHD Dolby Audio P2 LPCM Headroom 12 dB Video compression format H 264 MPEG 4 AVC Main Profile H 264 MPEG 4 AVC High Profile Video resolution 1920 1080 FHD 1280 720 HD 640 360 320 180 Streaming method Unicast Multicast Frame rate When set to the SYSTEM m...

Page 60: ... method Wi Fi compliant WPA WPA2 Access method Infrastructure mode Item SDI OUT terminal BNC terminal 1 0 8 V p p 75 Ω 3G 1 5G HD SDI compatible Output format 1920 1080 59 94p LEVEL A 50 00p LEVEL A 59 94i 50 00i 29 97PsF 25 00PsF 23 98PsF 1280 720 59 94p 50 00p HDMI terminal HDMI type A terminal 1 not compatible with VIERA Link Output format 3840 2160 59 94p 50 00p 29 97p 25 00p 23 98p 1920 1080 ...

Page 61: ... switched with menu HDMI terminal LPCM 2ch Headphone terminal 3 5 mm 0 14 q diameter stereo mini jack 1 Speaker 15 mm approx 0 59 q diameter round 1 Item REMOTE terminal 2 5 mm approx 0 10 q diameter super mini jack 1 USB terminal USB2 0 Micro AB terminal 5pin with USB mass storage functionality read only Micro AB terminal 5pin with USB mass storage functionality read only USB host function Suppor...

Page 62: ...camera at the maximum bit rate USB interface Standards followed Conforms to USB3 0 2 0 1 1 Terminal USB3 0 Type A LAN interface Standards followed Conforms to IEEE802 3ab 1000BASE T conforms to IEEE802 3u 100BASE TX conforms to IEEE802 3 10BASE T Transfer speeds 1000 Mbps 100 Mbps 10 Mbps Connector shape RJ 45 8 plug connector Mass Weight Approx 30 Approx 0 066 lbs External dimensions W H D Approx...

Page 63: ... condensation Mass Weight Approx 225 Approx 0 496 lbs External dimensions W H D 115 mm 37 mm 57 mm 4 1 2 q 1 7 16 q 2 1 4 q excluding the DC cable section Voltage capacity 7 28 V 5900 mAh 43 Wh Charging current Maximum 4000 mA Ambient operating humidity 0 to 80 relative humidity no condensation Mass Weight Approx 230 Approx 0 507 lbs External dimensions W H D 41 3 mm 51 3 mm 69 6 mm 1 5 8 q 2 q 2 ...

Page 64: ... Panasonic Corporation 2020 Panasonic Corporation Web site http www panasonic com AG CX7_CX8_CX10 DVQX2103_eng book 64 ページ 2020年1月6日 月曜日 午後2時48分 ...
Reviews: