18
A p p e n d i x
Demonstrating the AG-DVC30
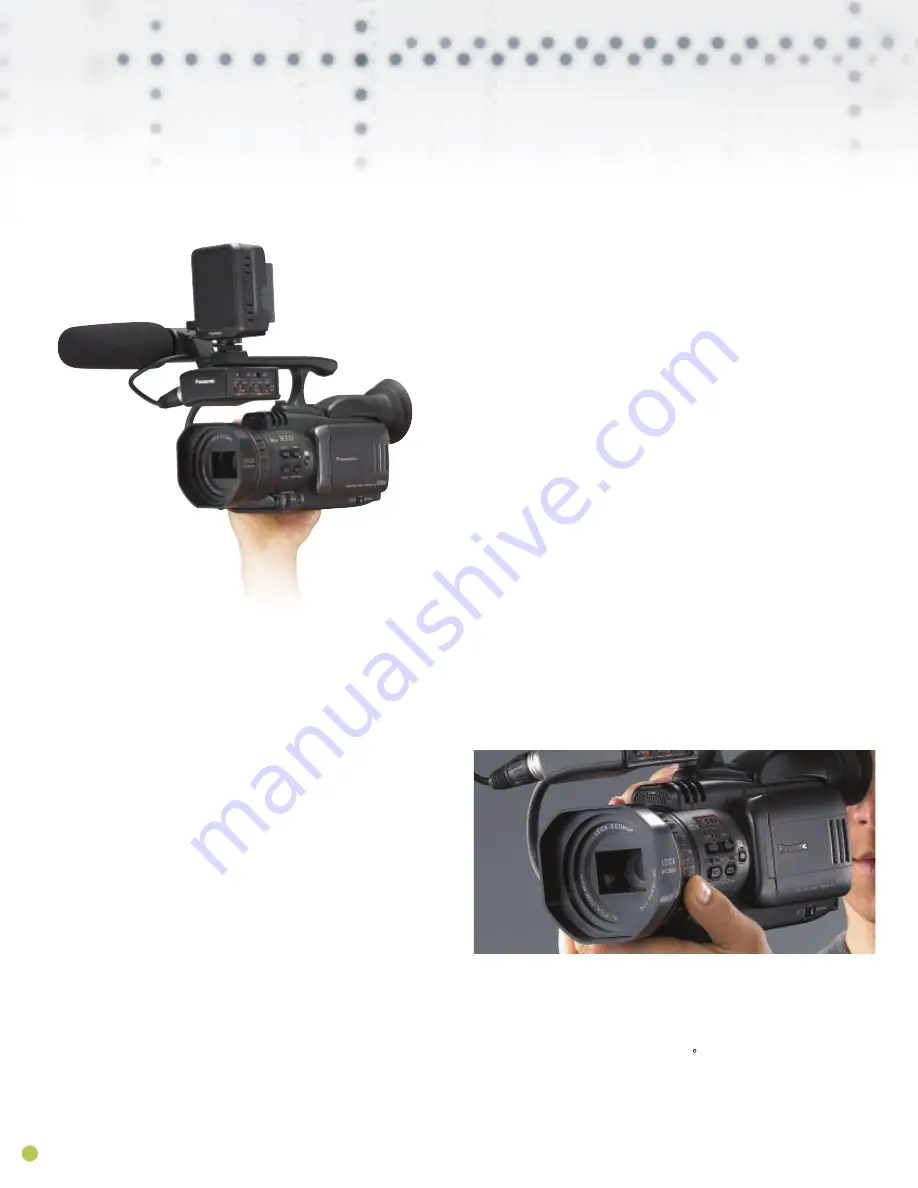
The new Panasonic AG-DVC30 is loaded with professional features in a small,
lightweight mobile package. Built tough, with a die cast Magnesium Alloy chassis &
handle. It sports a Leica Dicomar 16x Zoom Lens that will surprise you. Clearly, the
DVC30 is the "pro-fordable" choice in the 1/4" three-CCD palm-sized camcorder
category.
Preparation
On Switch Mode Menu
1. Set USER1 to Push AF + ZOOM
2. Set USER2 to Lumi-Flik
3. Set USER3 to White Fade
On the Other Functions Menu, Set Tape Protect to STBY (Standby).
With the DVC30 on the tripod, connect a VariZoom VZDVR130 or VZDVX100 control
at the rear and mount on the tripod handle. No DV tape is required, open the side
screen and put a charged battery or AC adapter DC power plug on the back.
Start:
The AG-DVC30’s 16 times Leica lens is a major competitive advantage. Feel the
Zoom Rocker control or VariZoom yourself. It’s fast when you need it to be fast! For
sports you can go right in on the ball in one second. But even more impressive, is how
slowly it zooms! For shooting dramatic work it can take you from wide to telephoto in
as slow as 100 seconds. Surprisingly, it has the feel of an expensive professional lens
costing as much as the entire AG-DVC30 which already has a price that is
incomparably affordable.
Note the smooth start/stops this precision zoom gives you...very professional. The
end user who views the images made with the DVC30 will think the video was made
with a large shoulder mounted camcorder with an expensive lens. The AG-DVC30’s
quiet lens motor won’t affect the soundtrack as much as other camcorders in its class.
And as an added feature, the Switch Mode menu allows a choice for Zoom speed
curve favoring Fast, Slow or Normal. What’s more, the fastest and slowest speeds are
still available whichever choice you make, so it’s the taper of the control or the zoom
curve that’s being selected, again a trait of a very expensive lens.
Digital Auto Focus
Pull back to Wide Angle and put your watch and sleeve in front of the lens (allowing a
little light to get in there). Watch the lens sharpen all the way in to the Macro focus
mode. Drop your hand down, the lens will quickly and accurately focus on the subject
in the distance. Raise your hand in front of the camera again. Watch the auto focus
return to Macro. Fast & accurate Auto Focus with no hunting! Notice the DVC30 is
focusing better and faster than many end users could and to prove it, zoom in all the
way to telephoto (most critical) and scan the across different subjects at different
distances and see how accurate the auto focusing is.
Since the Auto Focus function is so accurate, we will be using it more often than not,
and typically that would mean our Focus Ring is wasted. Well the AG-DVC30 is not a
typical camcorder! With the DVC30 we can go to the Switch Mode Menu and choose
Focus Ring - Zoom. Now try the Focus ring. The zoom now has a touch and feel
that’s a delight to the senses. So smooth!
Our factory engineers were able to add a servo momentum feel to its movement. It’s a
dampened response that allows you to do those quick reverse moves so popular
today. It’s especially useful when standing on the left side of the camera with the 3.5"
side screen folded back. Your video footage will never look jumpy, like an amateur
made it, because the DVC30 yields results that are smooth and professional.
Manual Focus
Slide the Auto / Manual slide switch over to Manual. Press the Focus button and
MF (Manual Focus) will appear in the upper right hand side of the LCD screen.
Now let’s turn the focus ring which feels very smooth. Let’s say you’re shooting in full
Manual Mode. Watch how smoothly and quickly one can focus with this Focus Ring.
While we’re in Manual Focus I’d like to show you a quick way of touching up focus on
a subject automatically. Press in and hold the USER 1 button on the top of the
camera. The lens will Zoom in all the way, Focus Automatically (even though you’re
still in Manual Focus mode), and then return to the exact framing you had before you
pressed the User 1 button. In the upper right hand corner of the LCD Screen (or EVF),
note the Zoom #. This represents the relative Zoom position.
Move from 44 to 99 and back to 44, 12 to 99 and back to 12. There is a similar feature
found in expensive lenses. However, the DVC30 returns to your original framing and
does the focus for you as well!
(Reminder: the User1 button can be set to 16 different functions by pushing Menu,
Switch Mode and User 1.) Customizing the DVC30 to your needs is easy. Most times,
you will be shooting in Auto mode so slide the switch over to Auto. Now Focus, Shutter
Speed, Iris, Gain, & White Balance will all be handled automatically.
What if you’re going to use Auto Focus and be hand held using the Rocker lever for
Zoom? The Focus/Zoom Ring will be again wasted? Go to the Switch Mode Menu
and choose Focus Ring - Iris. For this to work you must slide the Auto/Manual switch
over to Manual, press the menu roller dial in two times (one for Shutter and a second
time for Iris) until you see the F stop on the right side of the LCD Screen. Now roll that
small jog wheel down and show how smoothly the fade in/out gradations are.
Admittedly, using this little wheel found on the smaller camcorders is a little
inconvenient because my finger isn’t 12" long (then it would be a foot). Wouldn’t it be
great if I could use the larger Focus Ring to do this? Now roll the Focus Ring Down
and the Iris will close and then up to open and notice after it hits Open the gains
automatically activate and will add +3, +6, +9, +12, +15 all the way to +18 dB. Shoot a
darker area with the Iris on Open and no Gain.
Then roll the Focus Ring (Iris) up to +3, +6, +9, +12, +15 and all the way to +18 dB as
needed. Very little noise very impressive! Then ask doesn’t this look better than what
we saw at Open?
Suppose the customer is accustomed to a broadcast lens that goes up to close and
down to open? Go to the Switch Mode Menu and change Up Open to Down Open
and that will allow the customer to go up to close or down to close. This is truly an
amazing camera considering its size and price.
Infra Red (SNS Super Night Shooting)
Now for seeing in total darkness! Make sure to go to the Switch Mode Menu and
choose SNS - IR.
Shut the lights off and looking at the black LCD monitor say: Here’s what you would get
with any other camcorder. Now press the SNS button on the LCD side of the camera.
Remove the lens hood by twisting off about 10 degrees or else the hood will block a
portion of the internal IR LED’s located under the lens. Then Zoom in slightly because the
IR LED’s are targeted for a smaller area. Shoot something about 10’ away with good
contrast (Black on white print etc.). The Auto/Manual slide switch should be in Auto. When
you press the SNS button you’ll hear the IR filter being removed from the light path. The
picture will turn B&W with high detail, not green and noisy as in some camcorders with IR
capability. The Auto focus will be active, even in total darkness.


