– 38 –
Chapter 3 Preparation — microP2 memory card
microP2 memory card
Inserting a microP2 memory card
When using the camera for the first time, be sure to set the time data beforehand. (page 36)
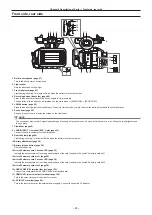
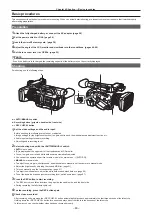
microP2 memory card slot 1
microP2 memory card slot 2
microP2 memory card access LED
Card slot cover
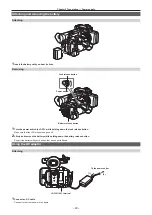
Fig. 1
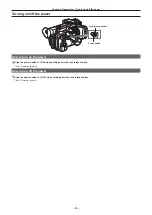
Fig. 2
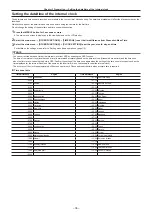
Fig. 3
1
Open the card slot cover. (Fig. 1)
2
Insert a card into the card slot. (Fig. 2)
f
Insert with the label side facing left.
f
There are two microP2 memory card slots.
3
Confirm that the microP2 memory card access LED is lit in orange or green. (Fig. 3) (page 39)
When two microP2 memory cards are inserted in the card slots, recording will be performed in order from the microP2 memory card with the smaller
slot number. However, regardless of the slot number, if a microP2 memory card is inserted later, that microP2 memory card will be accessed later
than the previously inserted microP2 memory cards.
f
Example: When microP2 memory cards are inserted in two slots
When microP2 memory cards are inserted into two slots, the cards are used as the microP2 memory cards in the order of slot numbers 1
→
2.
However, if the microP2 memory card in the slot number 1 is removed and then inserted again, recording of the microP2 memory cards will take
place in the order of slot numbers 2
→
1.
The microP2 memory card number to be recorded to is maintained even if the camera is turned off. When the camera is next turned on, recording
can be continued to the same microP2 memory card as before the camera was turned off.
4
Close the card slot cover.
@
@
NOTE
t
Be sure to close the card slot cover in order to prevent dropping, dust, and static electricity.
t
Maker sure to format the microP2 memory card in the P2 device.
t
If SDHC/SDXC memory cards other than microP2 memory cards are used on the microP2 memory card slot, operation is not guaranteed.
t
If a microP2 memory card is inserted slowly, [FORMAT ERROR!] or [NOT SUPPORTED!] may be displayed. In such a case, insert the card again.
Ejecting the microP2 memory card
1
Open the card slot cover.
2
Remove the card.
f
Press in the microP2 memory card further into the camera and let go.
f
The microP2 memory card is released from the card slot, and the microP2 memory card can be removed.
@
@
NOTE
t
Do not eject the microP2 memory card while accessing or performing recognition after insertion (microP2 memory card access LED is flashing in
orange). Doing so will cause a malfunction.
t
If the microP2 memory card is ejected while being accessed, [TURN POWER OFF] is displayed in the LCD monitor screen or the viewfinder
screen, and warning is displayed in the tally lamp, etc. Also, all microP2 memory card access LEDs flash rapidly in orange. Turn off the power once.
(page 156)
t
The clip may become irregular in the microP2 memory card that was removed while being accessed. Check the clips and restore them, if required.
(page 108)
t
The format of the removed microP2 memory card is not guaranteed when the microP2 memory card is removed during the formatting. In this case,
[TURN POWER OFF] is displayed on the LCD monitor screen or the viewfinder screen. Turn off the power once and then back on again, and reformat
the microP2 memory card.
t
The microP2 memory card is not recognized and the microP2 memory card access LED will not illuminate if it is inserted in other slot during playback.
Recognition of the microP2 memory card is started after the playback is completed.
t
Even if a microP2 memory card is inserted in a vacant slot during recording, the microP2 memory card may not be recognized immediately in the
following conditions:
Summary of Contents for AJ-PX230 Series
Page 12: ...Before using the camera read this chapter Chapter 1 Overview ...
Page 153: ...Maintenance of the camera or frequently asked questions are described Chapter 9 Maintenance ...
Page 161: ...This chapter describes the specifications of this product Chapter 10 Specification ...
Page 169: ...Web Site http www panasonic com Panasonic Corporation 2016 ...

