– 154 –
Chapter 8 Connecting to External Devices — Connection function via <USB2.0 DEVICE> or <USB3.0 HOST> terminal
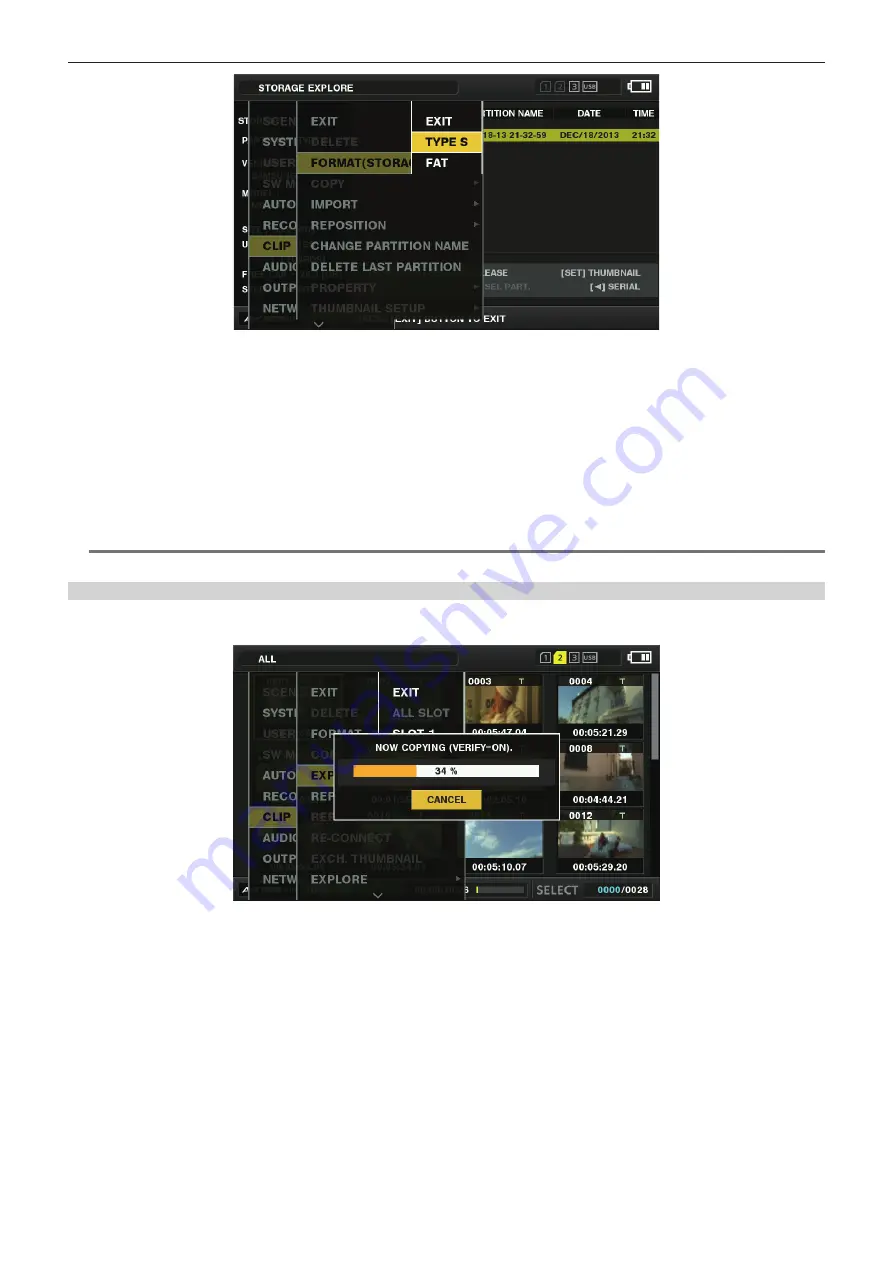
Fig. 1
1
Select [STORAGE] in the main menu
→
[CLIP]
→
[EXPLORE] and press the control stick.
This opens the explorer screen.
2
Select the desired format ([TYPE S], [FAT]) in the main menu
→
[CLIP]
→
[FORMAT(STORAGE)] and press the control stick. (Fig.
1)
3
Select [YES] in the confirmation message and press the control stick.
4
Select [YES] again when the confirmation message appears, and press the control stick.
This formats the storage device.
@
@
NOTE
t
Formatting the storage devices erases all of its contents. Data cannot be recovered once it is formatted. Always check the data before formatting.
Exporting to a storage device by card
You can export to a storage device (write to a storage device from a P2 card) by P2 card. The copy results and the maximum number of items that can
be copied vary depending on format type of the storage device. You cannot perform copying once the capacity of the storage device is exceeded.
Fig. 1
r
[TYPE S]
A partition is created for each card, and all data included in the card are copied there. You can check the part numbers and serial numbers of the P2
cards that have been copied on the explorer screen of the camera.
The maximum number of items that can be copied is 23.
r
[FAT]
A folder is created for each card. All data included in the card are copied there. You can check the folder names in the explorer screen of the camera.
Folders are created in two levels; the date folders on the first level and the time folders on the second.
Example) August 30, 2013, 12:34:56: /13-08-30/12-34-56
The maximum number of items that can be copied is 100.
1
Select [EXPORT] in the main menu
→
[CLIP] and press the control stick.
2
Move the cursor to the card slot number of the copy source and press the control stick.
For [TYPE S], selecting [ALL SLOT] exports all cards currently inserted.


