Using Play List: Creating Play Lists
75
Us
ing P
la
y
Li
st
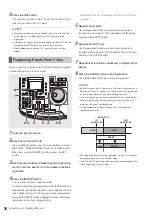
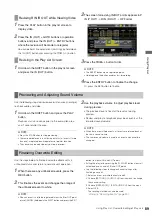
Follow the steps below to replace audio channels after event
registration.
1
Select one or multiple events whose channels you
want to replace in the play list screen.
2
Press the MENU button, use the cursor buttons to
choose [SETTING] – [AUDIO CH] and press the SET
button.
3
Select the channels that will be replaced.
Example: Make the following registration to switch CH1
and CH2 locations.
[AUDIO CH]- [CH1]=CH2
[CH2]=CH1
[CH3]=CH3
[CH4]=CH4
◆
NOTE:
• Select [SETTING] – [AUDIO CH] – [RESET] to return channel
settings to their factory defaults.
4
Press the MENU button, use the cursor buttons to
choose [OPERATION] – [EDIT AUDIO CH] and
press the SET button.
Then select [YES] to switch channel locations.
◆
NOTE:
• A channel switch is indicated by “EDITED” in the A CH field. The
status after the switch also shows up in the event property.
➝
For details, refer to “Viewing Event Information” (page 98).
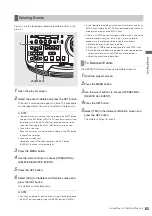
Use the following procedure to add selected clips to the play
list. This operation registers the start of a clip as the IN point
and its end as the OUT point.
1
Select the clip you want to register in the play list from
the thumbnail screen.
2
Open the play list screen.
3
Use the cursor buttons to select the location where
you want to add the clip.
4
Press the MENU button.
5
Use the cursor buttons to choose [OPERATION] –
[APPEND SELECTED CLIP].
Audio Channel Replacement During
Editing
Registering Events for Selected
Clips


