19
Mounting the camera on a tripod
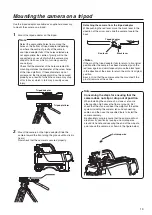
Use the tripod adaptor, available as an optional accessory,
to mount the camera on a tripod.
1
Mount the tripod adaptor on the tripod.
Select the appropriate holes from among the
holes on the bottom of tripod adaptor depending
on where the centre of gravity of the camera
and tripod adaptor falls. If the holes selected are
not appropriate, the centre of gravity will not be
supported, as a result of which the camera may
drop off or fall over, which in turn may possibly
cause injury.
Check that the diameter of the holes selected for
mounting matches the diameter of the screw holes
of the tripod platform. If these diameters do not
correspond, the tripod adaptor will not be secured
properly, as a result of which the camera may drop
off or fall over, which in turn may possibly cause
injury.
Note
Tripod platform
Tripod adaptor
2
Mount the camera on the tripod adaptor. Slide the
camera toward the front along the groove until a click is
heard.
Now check that the camera is secured properly.
Detaching the camera from the tripod adaptor
While pushing the red lever, move the black lever in the
direction of the arrow, and slide the camera toward the
back.
Red lever
Tripod adaptor
Black lever
<Note>
If the pin of the tripod adaptor fails to return to its original
position after the camera has been detached, push the
red lever again and simultaneously move the black lever
in the direction of the arrow to return the pin to its original
position.
Bear in mind that the camera cannot be mounted if the
pin still remains at the centre.
Concerning the steps for ensuring that the
camera does not slip or drop out of position
When installing the camera on a crane or at some
other position high above the floor or ground, first
check that the crane can bear the weight of the entire
system including the camera, lens and connecting
cables, and then use the specified tools to install the
camera securely.
Be absolutely sure to ensure that the camera will not
drop from its position by looping an anti-drop wire
around its handle and securing the end of the wire at a
point above the camera, as shown in the figure below.
Note
Anti-drop wire
Summary of Contents for AK-HC3500AES
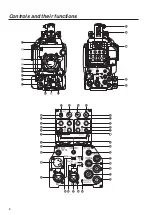
Page 8: ...8 Controls and their functions...
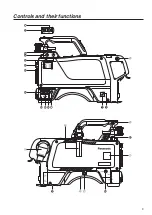
Page 9: ...9 Controls and their functions...
Page 44: ...44 External dimension drawings Unit mm 360 260 105 135...
Page 47: ...47 Memo...


